為你的 iOS (Swift) 應用程式新增驗證 (Authentication)
本指南假設你已在管理控制台中創建了一個類型為 "Native app" 的應用程式。
安裝
Logto Swift SDK 最低支援的 iOS 版本為 iOS 13。
Logto Swift SDK 主要有兩個版本:
- v2:在
ASWebAuthenticationSession(系統瀏覽器)中開啟登入體驗,支援通行密鑰登入(passkey sign-in)並共用瀏覽器會話。注意 v2 移除了原生社交插件目標;社交連接器仍透過瀏覽器運作。如果你依賴原生 WeChat 或 Alipay SDK 的跳轉,請繼續使用 v1。 - v1:在嵌入式 WebView 中開啟登入體驗,這是原生社交插件目標所需,但不支援 通行密鑰登入(passkey sign-in)(WebView 不支援 WebAuthn,即通行密鑰的底層標準)。
本指南涵蓋兩個版本。請在下方分頁選擇你的版本,選擇將在本指南中同步。
使用以下 URL 於 Swift Package Manager 新增 Logto SDK 依賴。
https://github.com/logto-io/swift.git
自 Xcode 11 起,你可以直接匯入 Swift 套件,無需額外工具。
當 Xcode 詢問套件版本時,請選擇你要整合的版本:
- v2
- v1
請使用最新的 v2 版本。最新 v2 版本為 2.0.0。
如果你直接使用 Package.swift:
.package(url: "https://github.com/logto-io/swift.git", from: "2.0.0")
若你需要原生社交插件目標,請使用最新的 v1 版本。最新 v1 版本為 1.2.0。
如果你直接使用 Package.swift:
.package(url: "https://github.com/logto-io/swift.git", from: "1.2.0")
目前因技術限制,Carthage 與 CocoaPods 尚未支援。
Carthage
Carthage 需要 xcodeproj 檔案才能建置。我們將來會嘗試尋找替代方案。
整合
初始化 LogtoClient
初始化客戶端時,透過 LogtoConfig 物件建立一個 LogtoClient 實例。
import Logto
import LogtoClient

let config = try? LogtoConfig(
  endpoint: "<your-logto-endpoint>", // 例如:http://localhost:3001
  appId: "<your-app-id>"
)
let client = LogtoClient(useConfig: config)
預設情況下,我們將 ID 權杖 (ID Token) 和重新整理權杖 (Refresh Token) 等憑證儲存在 Keychain 中。因此,使用者返回時無需再次登入。
若要關閉此行為,將 usingPersistStorage 設為 false:
let config = try? LogtoConfig(
  // ...
  usingPersistStorage: false
)
實作登入與登出
在進入細節之前,這裡先快速說明一下終端使用者的體驗。登入流程可簡化如下:
- 你的應用程式呼叫登入方法。
- 使用者被重新導向至 Logto 登入頁面。對於原生應用程式,會開啟系統瀏覽器。
- 使用者登入後,會被重新導向回你的應用程式(設定為 redirect URI)。
關於基於重導的登入
- 此驗證流程遵循 OpenID Connect (OIDC) 協議,Logto 強制執行嚴格的安全措施以保護使用者登入。
- 如果你有多個應用程式,可以使用相同的身分提供者 (IdP, Identity provider)(Logto)。一旦使用者登入其中一個應用程式,Logto 將在使用者訪問另一個應用程式時自動完成登入流程。
欲了解更多關於基於重導登入的原理和優勢,請參閱 Logto 登入體驗解析。
設定重新導向 URI(Redirect URI)
- v2
- v1
讓我們切換到 Logto Console 的應用程式詳細資訊頁面。新增一個重定向 URI io.logto.app://callback,然後點擊「儲存變更」。
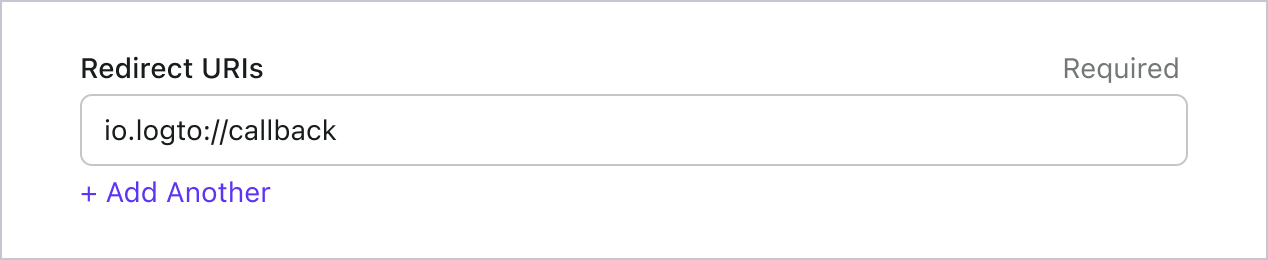
在 v2 中,登入體驗會在 ASWebAuthenticationSession(系統瀏覽器)中開啟,並透過作業系統層級的 callback 匹配將重新導向帶回你的應用程式。對於像 io.logto.app://callback 這樣的自訂 scheme 重新導向 URI,只需在你的 app 的 Info.plist 中註冊 scheme 部分(io.logto.app),然後將完整的重新導向 URI 加入 Logto 應用程式的 Redirect URIs。
在 Xcode 中,打開你的 app target,選擇 Info,展開 URL Types,並在 URL Schemes 中新增一筆 io.logto.app。如果你直接編輯 Info.plist,請加入:
<key>CFBundleURLTypes</key>
<array>
  <dict>
    <key>CFBundleTypeRole</key>
    <string>Editor</string>
    <key>CFBundleURLName</key>
    <string>io.logto.app</string>
    <key>CFBundleURLSchemes</key>
    <array>
      <string>io.logto.app</string>
    </array>
  </dict>
</array>
在 v2 的瀏覽器流程中,你不需要呼叫 LogtoClient.handle(url:);該 plugin handoff API 已隨內嵌 WebView 流程移除。
要用 Universal Links 取代自訂 scheme 嗎?
你也可以使用像 https://example.com/callback 這樣的 HTTPS 重新導向 URI:
- 為你的 app 加入 Associated Domains 能力。
- 設定
webcredentials:example.com,讓ASWebAuthenticationSession能在 iOS 17.4 及更新版本上匹配 HTTPS callback。 - 如果同一個 URL 也要在驗證會話外以 Universal Link 開啟 app,請設定
applinks:example.com,並為該網域與路徑主機一份有效的apple-app-site-association檔案。 - 將 HTTPS URI 加入 Logto 應用程式的 Redirect URIs。
- 傳遞相同的 URI 給
signInWithBrowser。
在 iOS 17.4 及更新版本,SDK 會使用 ASWebAuthenticationSession 的 HTTPS callback 匹配 API,因此 HTTPS 重新導向可自動完成並關閉會話。在較舊的 iOS 版本,授權請求仍可使用 HTTPS 重新導向 URI,但會話可能不會自動關閉,除非你的 app 自行處理 Universal Link callback。如果你需要在舊版 iOS 上自動完成,請保留自訂 scheme 重新導向作為相容選項。
讓我們切換到 Logto Console 的應用程式詳細資訊頁面。新增一個重定向 URI io.logto://callback,然後點擊「儲存變更」。
iOS SDK 中的 Redirect URI 僅供內部使用。不需要新增 Custom URL Scheme,除非有連接器要求。
登入與登出
在呼叫 .signInWithBrowser(redirectUri:) 之前,請確保已在管理控制台中正確配置了 Redirect URI。
- v2
- v1
在 v2 中,client.signOut(postLogoutRedirectUri:) 會執行完整登出:清除本地憑證、撤銷重新整理權杖 (refresh token)、並透過系統瀏覽器開啟 end session endpoint 結束 Logto session。瀏覽器會再透過登出後重新導向 URI 導回你的 app。使用前,請先到 Logto Console 的應用程式詳細頁,新增登出後重新導向 URI io.logto.app://signed-out 並點擊「儲存變更」。登出後重新導向 URI 可使用你登入時註冊的相同自訂 scheme。
例如,在 SwiftUI 應用程式中:
// 這裡僅註解與訊息可翻譯,其餘程式碼請保持原樣
struct ContentView: View {
  @State var isAuthenticated: Bool

  private let redirectUri = "io.logto.app://callback"
  private let postLogoutRedirectUri = "io.logto.app://signed-out"

  init() {
    isAuthenticated = client.isAuthenticated
  }

  var body: some View {
    VStack {
      if isAuthenticated {
        Button("Sign Out") {
          Task { [self] in
            let error = await client.signOut(postLogoutRedirectUri: postLogoutRedirectUri)
            if let error = error {
              print(error)
              return
            }
            isAuthenticated = false
          }
        }
      } else {
        Button("Sign In") {
          Task { [self] in
            do {
              try await client.signInWithBrowser(redirectUri: redirectUri)
              isAuthenticated = true
            } catch let error as LogtoClientErrors.SignIn {
              // 登入過程發生錯誤
            } catch {
              // 其他錯誤
            }
          }
        }
      }
    }
  }
}
- 你也可以呼叫
client.signOut()而不帶登出後重新導向 URI。這種情況下不需在 Console 設定:瀏覽器會顯示 Logto 登出頁面,使用者可手動關閉返回 app。 - 若沒有 UI context,可呼叫
client.clearCredentials()來清除本地憑證並撤銷重新整理權杖 (refresh token)。注意這會保留瀏覽器中的 Logto session,因此下次signInWithBrowser可能會自動透過該 session 靜默登入使用者。
你可以使用 client.signInWithBrowser(redirectUri:) 讓使用者登入,並用 client.signOut() 讓使用者登出。
例如,在 SwiftUI 應用程式中:
// 這裡僅註解與訊息可翻譯,其餘程式碼請保持原樣
struct ContentView: View {
  @State var isAuthenticated: Bool

  init() {
    isAuthenticated = client.isAuthenticated
  }

  var body: some View {
    VStack {
      if isAuthenticated {
        Button("Sign Out") {
          Task { [self] in
            await client.signOut()
            isAuthenticated = false
          }
        }
      } else {
        Button("Sign In") {
          Task { [self] in
            do {
              try await client.signInWithBrowser(redirectUri: "io.logto://callback")
              isAuthenticated = true
            } catch let error as LogtoClientErrors.SignIn {
              // 登入過程發生錯誤
            } catch {
              // 其他錯誤
            }
          }
        }
      }
    }
  }
}
檢查點:測試你的應用程式
現在,你可以測試你的應用程式:
- 執行你的應用程式,你會看到登入按鈕。
- 點擊登入按鈕,SDK 會初始化登入流程並將你重定向到 Logto 登入頁面。
- 登入後,你將被重定向回應用程式並看到登出按鈕。
- 點擊登出按鈕以清除權杖存儲並登出。
獲取使用者資訊
顯示使用者資訊
要顯示使用者資訊,你可以使用 client.getIdTokenClaims() 方法。例如,在 SwiftUI 應用程式中:
struct ContentView: View {
  @State var isAuthenticated: Bool
  @State var name: String?

  init() {
    isAuthenticated = client.isAuthenticated
    name = try? client.getIdTokenClaims().name
  }

  var body: some View {
    VStack {
      if isAuthenticated {
        Text("Welcome, \(name)")
      } else {
        Text("Please sign in")
      }
    }
  }
}
請求額外的宣告 (Claims)
你可能會發現從 client.getIdTokenClaims() 返回的物件中缺少一些使用者資訊。這是因為 OAuth 2.0 和 OpenID Connect (OIDC) 的設計遵循最小權限原則 (PoLP, Principle of Least Privilege),而 Logto 是基於這些標準構建的。
預設情況下,僅返回有限的宣告 (Claims)。如果你需要更多資訊,可以請求額外的權限範圍 (Scopes) 以存取更多宣告。
「宣告 (Claim)」是對主體所做的斷言;「權限範圍 (Scope)」是一組宣告。在目前的情況下,宣告是關於使用者的一部分資訊。
以下是權限範圍與宣告關係的非規範性範例:
「sub」宣告表示「主體 (Subject)」,即使用者的唯一識別符(例如使用者 ID)。
Logto SDK 將始終請求三個權限範圍:openid、profile 和 offline_access。
要請求額外的權限範圍 (Scopes),你可以將權限範圍傳遞給 LogtoConfig 物件。例如:
let config = try? LogtoConfig(
  endpoint: "<your-logto-endpoint>", // 例如 http://localhost:3001
  appId: "<your-app-id>",
  scopes: [
    UserScope.Email.rawValue,
    UserScope.Phone.rawValue,
  ]
)
然後你可以在 client.getIdTokenClaims() 的返回值中訪問額外的宣告:
let claims = try? client.getIdTokenClaims()
// 現在你可以訪問額外的宣告 `claims.email`、`claims.phone` 等。
需要網路請求的宣告 (Claims)
為了防止 ID 權杖 (ID token) 膨脹,某些宣告 (Claims) 需要透過網路請求來獲取。例如,即使在權限範圍 (Scopes) 中請求了 custom_data 宣告,它也不會包含在使用者物件中。要存取這些宣告,你可以使用 client.fetchUserInfo() 方法:
let userInfo = try? client.fetchUserInfo()
// 現在你可以訪問宣告 `userInfo.custom_data`
權限範圍 (Scopes) 與宣告 (Claims)
Logto 採用 OIDC 權限範圍 (Scopes) 與宣告 (Claims) 慣例 來定義從 ID 權杖 (ID token) 及 OIDC userinfo 端點 取得使用者資訊時的權限範圍與宣告。無論「權限範圍 (Scope)」還是「宣告 (Claim)」,皆為 OAuth 2.0 與 OpenID Connect (OIDC) 規範中的術語。
對於標準 OIDC 宣告 (Claims),其是否包含於 ID 權杖 (ID token) 內,完全取決於所請求的權限範圍 (Scopes)。擴充宣告(如 custom_data 與 organizations)則可透過 自訂 ID 權杖 (Custom ID token) 設定,額外配置於 ID 權杖中。
以下是支援的權限範圍 (Scopes) 及對應的宣告 (Claims) 清單:
標準 OIDC 權限範圍 (Scopes)
openid(預設)
| Claim name | Type | Description |
|---|---|---|
| sub | string | 使用者的唯一識別符 (The unique identifier of the user) |
profile(預設)
| Claim name | Type | Description |
|---|---|---|
| name | string | 使用者全名 (The full name of the user) |
| username | string | 使用者名稱 (The username of the user) |
| picture | string | 終端使用者大頭貼的 URL。此 URL 必須指向圖片檔案(如 PNG、JPEG 或 GIF),而非包含圖片的網頁。請注意,此 URL 應明確指向適合描述終端使用者的個人照片,而非任意由終端使用者拍攝的照片。(URL of the End-User's profile picture. This URL MUST refer to an image file (for example, a PNG, JPEG, or GIF image file), rather than to a Web page containing an image. Note that this URL SHOULD specifically reference a profile photo of the End-User suitable for displaying when describing the End-User, rather than an arbitrary photo taken by the End-User.) |
| created_at | number | 終端使用者建立時間。以自 Unix epoch(1970-01-01T00:00:00Z)以來的毫秒數表示。(Time the End-User was created. The time is represented as the number of milliseconds since the Unix epoch (1970-01-01T00:00:00Z).) |
| updated_at | number | 終端使用者資訊最後更新時間。以自 Unix epoch(1970-01-01T00:00:00Z)以來的毫秒數表示。(Time the End-User's information was last updated. The time is represented as the number of milliseconds since the Unix epoch (1970-01-01T00:00:00Z).) |
其他 標準宣告 (Standard claims) 包含 family_name、given_name、middle_name、nickname、preferred_username、profile、website、gender、birthdate、zoneinfo 及 locale 也會包含在 profile 權限範圍內,無需額外請求 userinfo endpoint。與上表宣告不同的是,這些宣告僅在其值不為空時才會回傳,而上表宣告若值為空則會回傳 null。
與標準宣告不同,created_at 與 updated_at 宣告使用毫秒而非秒為單位。
email
| Claim name | Type | Description |
|---|---|---|
string | 使用者的電子郵件地址 (The email address of the user) | |
| email_verified | boolean | 電子郵件地址是否已驗證 (Whether the email address has been verified) |
phone
| Claim name | Type | Description |
|---|---|---|
| phone_number | string | 使用者的電話號碼 (The phone number of the user) |
| phone_number_verified | boolean | 電話號碼是否已驗證 (Whether the phone number has been verified) |
address
請參閱 OpenID Connect Core 1.0 以瞭解 address 宣告的詳細資訊。
標註為 (預設) 的權限範圍 (Scopes) 會由 Logto SDK 自動請求。當請求對應權限範圍時,標準 OIDC 權限範圍下的宣告 (Claims) 會始終包含於 ID 權杖 (ID token) 中,且無法關閉。
擴充權限範圍 (Extended scopes)
以下權限範圍由 Logto 擴充,會透過 userinfo endpoint 回傳宣告 (Claims)。這些宣告也可透過 Console > Custom JWT 設定直接包含於 ID 權杖 (ID token) 中。詳情請參閱 自訂 ID 權杖 (Custom ID token)。
custom_data
| Claim name | Type | Description | Included in ID token by default |
|---|---|---|---|
| custom_data | object | 使用者的自訂資料 (The custom data of the user) |
identities
| Claim name | Type | Description | Included in ID token by default |
|---|---|---|---|
| identities | object | 使用者的連結身分 (The linked identities of the user) | |
| sso_identities | array | 使用者的連結 SSO 身分 (The linked SSO identities of the user) |
roles
| Claim name | Type | Description | Included in ID token by default |
|---|---|---|---|
| roles | string[] | 使用者的角色 (The roles of the user) | ✅ |
urn:logto:scope:organizations
| Claim name | Type | Description | Included in ID token by default |
|---|---|---|---|
| organizations | string[] | 使用者所屬的組織 ID (The organization IDs the user belongs to) | ✅ |
| organization_data | object[] | 使用者所屬的組織資料 (The organization data the user belongs to) |
這些組織宣告 (Organization claims) 也可在使用 不透明權杖 (Opaque token) 時,透過 userinfo endpoint 取得。然而,不透明權杖無法作為組織權杖 (Organization tokens) 來存取組織專屬資源。詳見 不透明權杖與組織 (Opaque token and organizations)。
urn:logto:scope:organization_roles
| Claim name | Type | Description | Included in ID token by default |
|---|---|---|---|
| organization_roles | string[] | 使用者所屬組織角色,格式為 <organization_id>:<role_name> (The organization roles the user belongs to with the format of <organization_id>:<role_name>) | ✅ |
API 資源
我們建議先閱讀 🔐 角色型存取控制 (RBAC, Role-Based Access Control),以瞭解 Logto RBAC 的基本概念以及如何正確設定 API 資源。
配置 Logto 用戶端
一旦你設定了 API 資源,就可以在應用程式中配置 Logto 時新增它們:
let config = try? LogtoConfig(
  endpoint: "<your-logto-endpoint>", // 例如:http://localhost:3001
  appId: "<your-app-id>",
  resources: ["https://shopping.your-app.com/api", "https://store.your-app.com/api"], // 新增 API 資源 (API resources)
)
let client = LogtoClient(useConfig: config)
每個 API 資源都有其自身的權限(權限範圍)。
例如,https://shopping.your-app.com/api 資源具有 shopping:read 和 shopping:write 權限,而 https://store.your-app.com/api 資源具有 store:read 和 store:write 權限。
要請求這些權限,你可以在應用程式中配置 Logto 時新增它們:
let config = try? LogtoConfig(
  endpoint: "<your-logto-endpoint>",
  appId: "<your-app-id>",
  scopes: ["shopping:read", "shopping:write", "store:read", "store:write"],
  resources: ["https://shopping.your-app.com/api", "https://store.your-app.com/api"],
)
let client = LogtoClient(useConfig: config)
你可能會注意到權限範圍是獨立於 API 資源定義的。這是因為 OAuth 2.0 的資源標示符 (Resource Indicators) 指定請求的最終權限範圍將是所有目標服務中所有權限範圍的笛卡兒積。
因此,在上述情況中,權限範圍可以從 Logto 的定義中簡化,兩個 API 資源都可以擁有 read 和 write 權限範圍而不需要前綴。然後,在 Logto 配置中:
let config = try? LogtoConfig(
  endpoint: "<your-logto-endpoint>",
  appId: "<your-app-id>",
  scopes: ["read", "write"],
  resources: ["https://shopping.your-app.com/api", "https://store.your-app.com/api"],
)
let client = LogtoClient(useConfig: config)
對於每個 API 資源,它將請求 read 和 write 權限範圍。
請求未在 API 資源中定義的權限範圍是可以的。例如,即使 API 資源中沒有可用的 email 權限範圍,你也可以請求 email 權限範圍。不可用的權限範圍將被安全地忽略。
成功登入後,Logto 將根據使用者的角色向 API 資源發出適當的權限範圍。
為 API 資源取得存取權杖 (Access token)
要獲取特定 API 資源的存取權杖 (Access token),你可以使用 getAccessToken 方法:
let accessToken = try await client.getAccessToken(for: "https://shopping.your-app.com/api")
此方法將返回一個 JWT 存取權杖 (Access token),當使用者擁有相關權限時,可以用來存取 API 資源。如果當前快取的存取權杖 (Access token) 已過期,此方法將自動嘗試使用重新整理權杖 (Refresh token) 獲取新的存取權杖 (Access token)。
將存取權杖附加到請求標頭
將權杖放在 HTTP 標頭的 Authorization 欄位中,使用 Bearer 格式(Bearer YOUR_TOKEN),即可完成。
Bearer 權杖的整合流程可能會根據你使用的框架或請求者而有所不同。選擇適合你的方式來應用請求的 Authorization 標頭。
await LogtoRequest.get(
  useSession: session,
  endpoint: userInfoEndpoint,
  headers: ["Authorization": "Bearer \(accessToken)"]
)