为你的 iOS (Swift) 应用添加认证 (Authentication)
本指南假设你已经在管理控制台中创建了一个类型为“Native app”的应用程序。
安装
The minimum supported iOS version of Logto Swift SDK is iOS 13.
Logto Swift SDK comes in two major versions:
- v1: Opens the sign-in experience in an embedded WebView, which is required by the native social plugin targets, but does not support passkey sign-in (WebView does not support WebAuthn, the underlying standard of passkeys).
- v2 (beta): Opens the sign-in experience in
ASWebAuthenticationSession(the system browser), which unlocks passkey sign-in and shares the browser session. Note that v2 removes the native social plugin targets; social connectors still work through the browser. If you depend on the native WeChat or Alipay SDK handoff, stay on v1.
This guide covers both versions. Choose your version in the tabs below, and the choice will be kept in sync throughout this guide.
Use the following URL to add Logto SDK as a dependency in Swift Package Manager.
https://github.com/logto-io/swift.git
Since Xcode 11, you can directly import a Swift package w/o any additional tool.
When Xcode asks for the package version, choose the version you want to integrate:
- v2 (beta)
- v1
v2 is released as 2.0.0-beta.x prereleases until GA. Use 2.0.0-beta.1 or the latest 2.0.0-beta.x prerelease as the version. During beta, we recommend selecting the prerelease explicitly instead of relying on a normal version range to pick it automatically.
If you use Package.swift directly:
.package(url: "https://github.com/logto-io/swift.git", exact: "2.0.0-beta.1")
Use the latest v1 release as the stable line. The latest v1 version is 1.2.0.
If you use Package.swift directly:
.package(url: "https://github.com/logto-io/swift.git", from: "1.2.0")
We do not support Carthage and CocoaPods at the time due to some technical issues.
Carthage
Carthage needs a xcodeproj file to build. We will try to find a workaround later.
CocoaPods
CocoaPods does not support local dependency and monorepo, thus it's hard to create a .podspec for this repo.
集成
初始化 LogtoClient
通过使用 LogtoConfig 对象创建一个 LogtoClient 实例来初始化客户端。
import Logto
import LogtoClient

let config = try? LogtoConfig(
  endpoint: "<your-logto-endpoint>", // 例如 http://localhost:3001
  appId: "<your-app-id>"
)
let client = LogtoClient(useConfig: config)
默认情况下,我们将 ID 令牌 (ID Token) 和刷新令牌 (Refresh Token) 等凭据存储在 Keychain 中。因此,当用户返回时,不需要再次登录。
要关闭此行为,请将 usingPersistStorage 设置为 false:
let config = try? LogtoConfig(
  // ...
  usingPersistStorage: false
)
实现登录和登出
在我们深入细节之前,下面是终端用户体验的快速概览。登录流程可以简化为如下:
- 你的应用调用登录方法。
- 用户被重定向到 Logto 登录页面。对于原生应用,会打开系统浏览器。
- 用户完成登录后被重定向回你的应用(配置为重定向 URI)。
关于基于重定向的登录
- 此认证 (Authentication) 过程遵循 OpenID Connect (OIDC) 协议,Logto 强制执行严格的安全措施以保护用户登录。
- 如果你有多个应用程序,可以使用相同的身份提供商 (IdP)(日志 (Logto))。一旦用户登录到一个应用程序,当用户访问另一个应用程序时,Logto 将自动完成登录过程。
要了解有关基于重定向的登录的原理和好处的更多信息,请参阅 Logto 登录体验解释。
Configure redirect URI
- v2 (beta)
- v1
让我们切换到 Logto Console 的应用详情页面。添加一个重定向 URI io.logto.app://callback 并点击“保存更改”。
In v2, the sign-in experience opens in ASWebAuthenticationSession (the system browser), and the redirect is routed back to your app through OS-level callback matching. For a custom scheme redirect URI such as io.logto.app://callback, register only the scheme part (io.logto.app) in your app's Info.plist, then add the full redirect URI to your Logto application's Redirect URIs.
In Xcode, open your app target, select Info, expand URL Types, and add one entry with io.logto.app in URL Schemes. If you edit Info.plist directly, add:
<key>CFBundleURLTypes</key>
<array>
  <dict>
    <key>CFBundleTypeRole</key>
    <string>Editor</string>
    <key>CFBundleURLName</key>
    <string>io.logto.app</string>
    <key>CFBundleURLSchemes</key>
    <array>
      <string>io.logto.app</string>
    </array>
  </dict>
</array>
For the browser flow in v2, you do not need to call LogtoClient.handle(url:); that plugin handoff API was removed with the embedded WebView flow.
Use Universal Links instead of a custom scheme?
You can also use an HTTPS redirect URI such as https://example.com/callback:
- Add the Associated Domains capability to your app.
- Configure
webcredentials:example.comsoASWebAuthenticationSessioncan match HTTPS callbacks on iOS 17.4 and newer. - If the same URL should also open your app as a Universal Link outside the authentication session, configure
applinks:example.comand host a validapple-app-site-associationfile for the domain and path. - Add the HTTPS URI to your Logto application's Redirect URIs.
- Pass the same URI to
signInWithBrowser.
On iOS 17.4 and newer, the SDK uses ASWebAuthenticationSession's HTTPS callback matching API so HTTPS redirects can automatically complete and dismiss the session. On older iOS versions, the authorization request can still use the HTTPS redirect URI, but the session may not close automatically unless your app handles the Universal Link callback itself. Keep a custom scheme redirect as a compatibility option if you need automatic completion on older iOS versions.
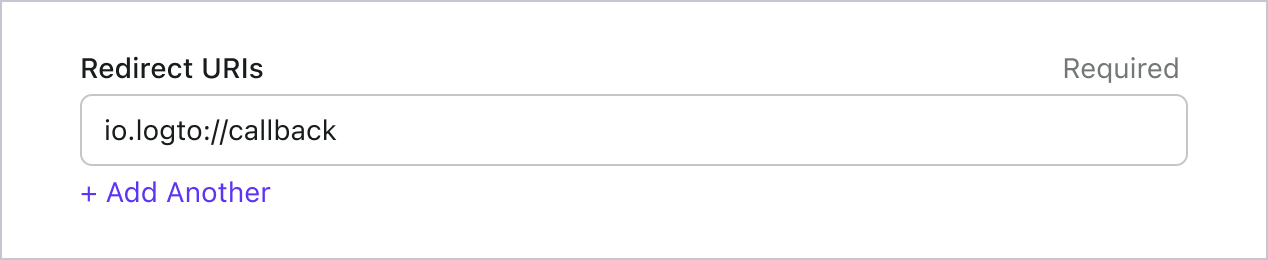
让我们切换到 Logto Console 的应用详情页面。添加一个重定向 URI io.logto://callback 并点击“保存更改”。
The Redirect URI in iOS SDK is only for internal use. There's NO NEED to add a Custom URL Scheme until a connector asks.
Sign-in and sign-out
在调用 .signInWithBrowser(redirectUri:) 之前,请确保你已在管理控制台中正确配置了重定向 URI。
- v2 (beta)
- v1
In v2, client.signOut(postLogoutRedirectUri:) performs a complete sign-out: it clears the local credentials, revokes the refresh token, and ends the Logto session by opening the end session endpoint in the system browser. The browser then navigates back to your app through the post sign-out redirect URI. Before using it, switch to the application details page of Logto Console, add the post sign-out redirect URI io.logto.app://signed-out and click "Save changes". The post sign-out redirect URI can use the same custom scheme you registered for sign-in.
For example, in a SwiftUI app:
struct ContentView: View {
  @State var isAuthenticated: Bool

  private let redirectUri = "io.logto.app://callback"
  private let postLogoutRedirectUri = "io.logto.app://signed-out"

  init() {
    isAuthenticated = client.isAuthenticated
  }

  var body: some View {
    VStack {
      if isAuthenticated {
        Button("Sign Out") {
          Task { [self] in
            let error = await client.signOut(postLogoutRedirectUri: postLogoutRedirectUri)
            if let error = error {
              print(error)
              return
            }
            isAuthenticated = false
          }
        }
      } else {
        Button("Sign In") {
          Task { [self] in
            do {
              try await client.signInWithBrowser(redirectUri: redirectUri)
              isAuthenticated = true
            } catch let error as LogtoClientErrors.SignIn {
              // error occurred during sign in
            } catch {
              // other errors
            }
          }
        }
      }
    }
  }
}
- You can also call
client.signOut()without a post sign-out redirect URI. No Console configuration is needed in this case: the browser shows the Logto sign-out page, and the user returns to the app by dismissing it manually. - If no UI context is available, you can call
client.clearCredentials()to clear the local credentials and revoke the refresh token. Note that this keeps the Logto session in the browser, so the nextsignInWithBrowsermay silently sign the user back in through that session.
You can use client.signInWithBrowser(redirectUri:) to sign in the user and client.signOut() to sign out the user.
For example, in a SwiftUI app:
struct ContentView: View {
  @State var isAuthenticated: Bool

  init() {
    isAuthenticated = client.isAuthenticated
  }

  var body: some View {
    VStack {
      if isAuthenticated {
        Button("Sign Out") {
          Task { [self] in
            await client.signOut()
            isAuthenticated = false
          }
        }
      } else {
        Button("Sign In") {
          Task { [self] in
            do {
              try await client.signInWithBrowser(redirectUri: "io.logto://callback")
              isAuthenticated = true
            } catch let error as LogtoClientErrors.SignIn {
              // error occurred during sign in
            } catch {
              // other errors
            }
          }
        }
      }
    }
  }
}
检查点:测试你的应用程序
现在,你可以测试你的应用程序:
- 运行你的应用程序,你将看到登录按钮。
- 点击登录按钮,SDK 将初始化登录过程并将你重定向到 Logto 登录页面。
- 登录后,你将被重定向回你的应用程序,并看到登出按钮。
- 点击登出按钮以清除令牌存储并登出。
获取用户信息
显示用户信息
要显示用户的信息,你可以使用 client.getIdTokenClaims() 方法。例如,在一个 SwiftUI 应用中:
struct ContentView: View {
  @State var isAuthenticated: Bool
  @State var name: String?

  init() {
    isAuthenticated = client.isAuthenticated
    name = try? client.getIdTokenClaims().name
  }

  var body: some View {
    VStack {
      if isAuthenticated {
        Text("Welcome, \(name)")
      } else {
        Text("Please sign in")
      }
    }
  }
}
请求额外的声明 (Claims)
你可能会发现从 client.getIdTokenClaims() 返回的对象中缺少一些用户信息。这是因为 OAuth 2.0 和 OpenID Connect (OIDC) 的设计遵循最小权限原则 (PoLP),而 Logto 是基于这些标准构建的。
默认情况下,返回的声明(Claim)是有限的。如果你需要更多信息,可以请求额外的权限(Scope)以访问更多的声明(Claim)。
“声明(Claim)”是关于主体的断言;“权限(Scope)”是一组声明。在当前情况下,声明是关于用户的一条信息。
以下是权限(Scope)与声明(Claim)关系的非规范性示例:
“sub” 声明(Claim)表示“主体(Subject)”,即用户的唯一标识符(例如用户 ID)。
Logto SDK 将始终请求三个权限(Scope):openid、profile 和 offline_access。
要请求额外的权限 (Scopes),你可以将权限传递给 LogtoConfig 对象。例如:
let config = try? LogtoConfig(
  endpoint: "<your-logto-endpoint>", // 例如 http://localhost:3001
  appId: "<your-app-id>",
  scopes: [
    UserScope.Email.rawValue,
    UserScope.Phone.rawValue,
  ]
)
然后你可以在 client.getIdTokenClaims() 的返回值中访问额外的声明 (Claims):
let claims = try? client.getIdTokenClaims()
// 现在你可以访问额外的声明 `claims.email`,`claims.phone`,等。
需要网络请求的声明
为了防止 ID 令牌 (ID token) 过大,一些声明需要通过网络请求来获取。例如,即使在权限中请求了 custom_data 声明,它也不会包含在用户对象中。要访问这些声明,你可以使用 client.fetchUserInfo() 方法:
let userInfo = try? client.fetchUserInfo()
// 现在你可以访问声明 `userInfo.custom_data`
权限 (Scopes) 和声明 (Claims)
Logto 使用 OIDC 权限 (Scopes) 和声明 (Claims) 约定 来定义用于从 ID 令牌 (ID token) 和 OIDC userinfo 端点 获取用户信息的权限 (Scopes) 和声明 (Claims)。"scope" 和 "claim" 都是 OAuth 2.0 和 OpenID Connect (OIDC) 规范中的术语。
对于标准 OIDC 声明 (Claims),其在 ID 令牌 (ID token) 中的包含严格由所请求的权限 (Scopes) 决定。扩展声明 (Claims)(如 custom_data 和 organizations)可以通过 自定义 ID 令牌 (Custom ID token) 设置额外配置到 ID 令牌 (ID token) 中。
以下是支持的权限 (Scopes) 及其对应的声明 (Claims) 列表:
标准 OIDC 权限 (Scopes)
openid(默认)
| Claim name | Type | Description |
|---|---|---|
| sub | string | 用户的唯一标识符 |
profile(默认)
| Claim name | Type | Description |
|---|---|---|
| name | string | 用户的全名 |
| username | string | 用户名 |
| picture | string | 终端用户头像的 URL。该 URL 必须指向一个图片文件(例如 PNG、JPEG 或 GIF 图片文件),而不是包含图片的网页。请注意,该 URL 应专门指向适合在描述终端用户时显示的头像,而不是终端用户拍摄的任意照片。 |
| created_at | number | 终端用户创建的时间。该时间以自 Unix 纪元(1970-01-01T00:00:00Z)以来的毫秒数表示。 |
| updated_at | number | 终端用户信息最后更新时间。该时间以自 Unix 纪元(1970-01-01T00:00:00Z)以来的毫秒数表示。 |
其他 标准声明 (Claims) 包括 family_name、given_name、middle_name、nickname、preferred_username、profile、website、gender、birthdate、zoneinfo 和 locale 也会包含在 profile 权限 (Scope) 中,无需请求 userinfo 端点。与上表声明 (Claims) 不同的是,这些声明 (Claims) 仅在其值不为空时返回,而上表声明 (Claims) 的值为空时会返回 null。
与标准声明 (Claims) 不同,created_at 和 updated_at 声明 (Claims) 使用的是毫秒而不是秒。
email
| Claim name | Type | Description |
|---|---|---|
string | 用户的电子邮件地址 | |
| email_verified | boolean | 电子邮件地址是否已被验证 |
phone
| Claim name | Type | Description |
|---|---|---|
| phone_number | string | 用户的电话号码 |
| phone_number_verified | boolean | 电话号码是否已被验证 |
address
关于 address 声明 (Claim) 的详细信息,请参阅 OpenID Connect Core 1.0。
带有 (默认) 标记的权限 (Scopes) 总是由 Logto SDK 请求。当请求相应权限 (Scope) 时,标准 OIDC 权限 (Scopes) 下的声明 (Claims) 总是包含在 ID 令牌 (ID token) 中——无法关闭。
扩展权限 (Scopes)
以下权限 (Scopes) 由 Logto 扩展,并将通过 userinfo 端点 返回声明 (Claims)。这些声明 (Claims) 也可以通过 控制台 > 自定义 JWT 配置为直接包含在 ID 令牌 (ID token) 中。详见 自定义 ID 令牌 (ID token)。
custom_data
| Claim name | Type | Description | Included in ID token by default |
|---|---|---|---|
| custom_data | object | 用户的自定义数据 |
identities
| Claim name | Type | Description | Included in ID token by default |
|---|---|---|---|
| identities | object | 用户关联的身份 | |
| sso_identities | array | 用户关联的 SSO 身份 |
roles
| Claim name | Type | Description | Included in ID token by default |
|---|---|---|---|
| roles | string[] | 用户的角色 (Roles) | ✅ |
urn:logto:scope:organizations
| Claim name | Type | Description | Included in ID token by default |
|---|---|---|---|
| organizations | string[] | 用户所属的组织 (Organizations) ID | ✅ |
| organization_data | object[] | 用户所属的组织 (Organizations) 数据 |
这些组织 (Organizations) 声明 (Claims) 也可以在使用 不透明令牌 (Opaque token) 时通过 userinfo 端点获取。但不透明令牌 (Opaque tokens) 不能作为组织令牌 (Organization tokens) 用于访问组织专属资源。详见 不透明令牌 (Opaque token) 与组织 (Organizations)。
urn:logto:scope:organization_roles
| Claim name | Type | Description | Included in ID token by default |
|---|---|---|---|
| organization_roles | string[] | 用户所属组织 (Organizations) 的角色 (Roles),格式为 <organization_id>:<role_name> | ✅ |
API 资源
我们建议首先阅读 🔐 基于角色的访问控制 (RBAC),以了解 Logto RBAC 的基本概念以及如何正确设置 API 资源。
配置 Logto 客户端
一旦你设置了 API 资源,就可以在应用中配置 Logto 时添加它们:
let config = try? LogtoConfig(
  endpoint: "<your-logto-endpoint>", // 例如 http://localhost:3001
  appId: "<your-app-id>",
  resources: ["https://shopping.your-app.com/api", "https://store.your-app.com/api"], // 添加 API 资源 (API resources)
)
let client = LogtoClient(useConfig: config)
每个 API 资源都有其自己的权限(权限)。
例如,https://shopping.your-app.com/api 资源具有 shopping:read 和 shopping:write 权限,而 https://store.your-app.com/api 资源具有 store:read 和 store:write 权限。
要请求这些权限,你可以在应用中配置 Logto 时添加它们:
let config = try? LogtoConfig(
  endpoint: "<your-logto-endpoint>",
  appId: "<your-app-id>",
  scopes: ["shopping:read", "shopping:write", "store:read", "store:write"],
  resources: ["https://shopping.your-app.com/api", "https://store.your-app.com/api"],
)
let client = LogtoClient(useConfig: config)
你可能会注意到权限是与 API 资源分开定义的。这是因为 OAuth 2.0 的资源指示器 指定请求的最终权限将是所有目标服务中所有权限的笛卡尔积。
因此,在上述情况下,权限可以从 Logto 中的定义简化,两个 API 资源都可以拥有 read 和 write 权限,而无需前缀。然后,在 Logto 配置中:
let config = try? LogtoConfig(
  endpoint: "<your-logto-endpoint>",
  appId: "<your-app-id>",
  scopes: ["read", "write"],
  resources: ["https://shopping.your-app.com/api", "https://store.your-app.com/api"],
)
let client = LogtoClient(useConfig: config)
对于每个 API 资源,它将请求 read 和 write 权限。
请求 API 资源中未定义的权限是可以的。例如,即使 API 资源没有可用的 email 权限,你也可以请求 email 权限。不可用的权限将被安全地忽略。
成功登录后,Logto 将根据用户的角色向 API 资源发布适当的权限。
获取 API 资源的访问令牌 (Access token)
要获取特定 API 资源的访问令牌 (access token),你可以使用 getAccessToken 方法:
let accessToken = try await client.getAccessToken(for: "https://shopping.your-app.com/api")
此方法将返回一个 JWT 访问令牌 (access token),当用户具有相关权限时,可以用来访问 API 资源。如果当前缓存的访问令牌 (access token) 已过期,此方法将自动尝试使用刷新令牌 (refresh token) 获取新的访问令牌 (access token)。
将访问令牌附加到请求头
将令牌放在 HTTP 头的 Authorization 字段中,使用 Bearer 格式(Bearer YOUR_TOKEN),然后你就可以继续了。
Bearer 令牌的集成流程可能会根据你使用的框架或请求者而有所不同。选择你自己的方式来应用请求的 Authorization 头。
await LogtoRequest.get(
  useSession: session,
  endpoint: userInfoEndpoint,
  headers: ["Authorization": "Bearer \(accessToken)"]
)