Add authentication to your iOS (Swift) application
This guide assumes you have created an Application of type "Native app" in Admin Console.
Installation
The minimum supported iOS version of Logto Swift SDK is iOS 13.
Logto Swift SDK comes in two major versions:
- v2: Opens the sign-in experience in
ASWebAuthenticationSession(the system browser), which unlocks passkey sign-in and shares the browser session. Note that v2 removes the native social plugin targets; social connectors still work through the browser. If you depend on the native WeChat or Alipay SDK handoff, stay on v1. - v1: Opens the sign-in experience in an embedded WebView, which is required by the native social plugin targets, but does not support passkey sign-in (WebView does not support WebAuthn, the underlying standard of passkeys).
This guide covers both versions. Choose your version in the tabs below, and the choice will be kept in sync throughout this guide.
Use the following URL to add Logto SDK as a dependency in Swift Package Manager.
https://github.com/logto-io/swift.git
Since Xcode 11, you can directly import a Swift package w/o any additional tool.
When Xcode asks for the package version, choose the version you want to integrate:
- v2
- v1
Use the latest v2 release as the version. The latest v2 version is 2.0.0.
If you use Package.swift directly:
.package(url: "https://github.com/logto-io/swift.git", from: "2.0.0")
Use the latest v1 release if you need the native social plugin targets. The latest v1 version is 1.2.0.
If you use Package.swift directly:
.package(url: "https://github.com/logto-io/swift.git", from: "1.2.0")
We do not support Carthage and CocoaPods at the time due to some technical issues.
Carthage
Carthage needs a xcodeproj file to build. We will try to find a workaround later.
CocoaPods
CocoaPods does not support local dependency and monorepo, thus it's hard to create a .podspec for this repo.
Integration
Init LogtoClient
Initialize the client by creating a LogtoClient instance with a LogtoConfig object.
import Logto
import LogtoClient

let config = try? LogtoConfig(
  endpoint: "<your-logto-endpoint>", // E.g. http://localhost:3001
  appId: "<your-app-id>"
)
let client = LogtoClient(useConfig: config)
By default, we store credentials like ID Token and Refresh Token in the Keychain. Thus the user doesn't need to sign in again when he returns.
To turn off this behavior, set usingPersistStorage to false:
let config = try? LogtoConfig(
  // ...
  usingPersistStorage: false
)
Implement sign-in and sign-out
Before we dive into the details, here's a quick overview of the end-user experience. The sign-in process can be simplified as follows:
- Your app invokes the sign-in method.
- The user is redirected to the Logto sign-in page. For native apps, the system browser is opened.
- The user signs in and is redirected back to your app (configured as the redirect URI).
Regarding redirect-based sign-in
- This authentication process follows the OpenID Connect (OIDC) protocol, and Logto enforces strict security measures to protect user sign-in.
- If you have multiple apps, you can use the same identity provider (Logto). Once the user signs in to one app, Logto will automatically complete the sign-in process when the user accesses another app.
To learn more about the rationale and benefits of redirect-based sign-in, see Logto sign-in experience explained.
Configure redirect URI
- v2
- v1
Let's switch to the Application details page of Logto Console. Add a Redirect URI io.logto.app://callback and click "Save changes".
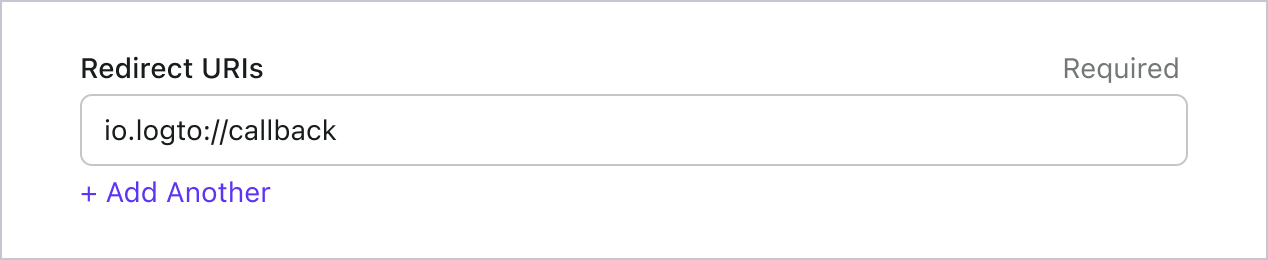
In v2, the sign-in experience opens in ASWebAuthenticationSession (the system browser), and the redirect is routed back to your app through OS-level callback matching. For a custom scheme redirect URI such as io.logto.app://callback, register only the scheme part (io.logto.app) in your app's Info.plist, then add the full redirect URI to your Logto application's Redirect URIs.
In Xcode, open your app target, select Info, expand URL Types, and add one entry with io.logto.app in URL Schemes. If you edit Info.plist directly, add:
<key>CFBundleURLTypes</key>
<array>
  <dict>
    <key>CFBundleTypeRole</key>
    <string>Editor</string>
    <key>CFBundleURLName</key>
    <string>io.logto.app</string>
    <key>CFBundleURLSchemes</key>
    <array>
      <string>io.logto.app</string>
    </array>
  </dict>
</array>
For the browser flow in v2, you do not need to call LogtoClient.handle(url:); that plugin handoff API was removed with the embedded WebView flow.
Use Universal Links instead of a custom scheme?
You can also use an HTTPS redirect URI such as https://example.com/callback:
- Add the Associated Domains capability to your app.
- Configure
webcredentials:example.comsoASWebAuthenticationSessioncan match HTTPS callbacks on iOS 17.4 and newer. - If the same URL should also open your app as a Universal Link outside the authentication session, configure
applinks:example.comand host a validapple-app-site-associationfile for the domain and path. - Add the HTTPS URI to your Logto application's Redirect URIs.
- Pass the same URI to
signInWithBrowser.
On iOS 17.4 and newer, the SDK uses ASWebAuthenticationSession's HTTPS callback matching API so HTTPS redirects can automatically complete and dismiss the session. On older iOS versions, the authorization request can still use the HTTPS redirect URI, but the session may not close automatically unless your app handles the Universal Link callback itself. Keep a custom scheme redirect as a compatibility option if you need automatic completion on older iOS versions.
Let's switch to the Application details page of Logto Console. Add a Redirect URI io.logto://callback and click "Save changes".
The Redirect URI in iOS SDK is only for internal use. There's NO NEED to add a Custom URL Scheme until a connector asks.
Sign-in and sign-out
Before calling .signInWithBrowser(redirectUri:), make sure you have correctly configured Redirect URI
in Admin Console.
- v2
- v1
In v2, client.signOut(postLogoutRedirectUri:) performs a complete sign-out: it clears the local credentials, revokes the refresh token, and ends the Logto session by opening the end session endpoint in the system browser. The browser then navigates back to your app through the post sign-out redirect URI. Before using it, switch to the application details page of Logto Console, add the post sign-out redirect URI io.logto.app://signed-out and click "Save changes". The post sign-out redirect URI can use the same custom scheme you registered for sign-in.
For example, in a SwiftUI app:
struct ContentView: View {
  @State var isAuthenticated: Bool

  private let redirectUri = "io.logto.app://callback"
  private let postLogoutRedirectUri = "io.logto.app://signed-out"

  init() {
    isAuthenticated = client.isAuthenticated
  }

  var body: some View {
    VStack {
      if isAuthenticated {
        Button("Sign Out") {
          Task { [self] in
            let error = await client.signOut(postLogoutRedirectUri: postLogoutRedirectUri)
            if let error = error {
              print(error)
              return
            }
            isAuthenticated = false
          }
        }
      } else {
        Button("Sign In") {
          Task { [self] in
            do {
              try await client.signInWithBrowser(redirectUri: redirectUri)
              isAuthenticated = true
            } catch let error as LogtoClientErrors.SignIn {
              // error occurred during sign in
            } catch {
              // other errors
            }
          }
        }
      }
    }
  }
}
- You can also call
client.signOut()without a post sign-out redirect URI. No Console configuration is needed in this case: the browser shows the Logto sign-out page, and the user returns to the app by dismissing it manually. - If no UI context is available, you can call
client.clearCredentials()to clear the local credentials and revoke the refresh token. Note that this keeps the Logto session in the browser, so the nextsignInWithBrowsermay silently sign the user back in through that session.
You can use client.signInWithBrowser(redirectUri:) to sign in the user and client.signOut() to sign out the user.
For example, in a SwiftUI app:
struct ContentView: View {
  @State var isAuthenticated: Bool

  init() {
    isAuthenticated = client.isAuthenticated
  }

  var body: some View {
    VStack {
      if isAuthenticated {
        Button("Sign Out") {
          Task { [self] in
            await client.signOut()
            isAuthenticated = false
          }
        }
      } else {
        Button("Sign In") {
          Task { [self] in
            do {
              try await client.signInWithBrowser(redirectUri: "io.logto://callback")
              isAuthenticated = true
            } catch let error as LogtoClientErrors.SignIn {
              // error occurred during sign in
            } catch {
              // other errors
            }
          }
        }
      }
    }
  }
}
Checkpoint: Test your application
Now, you can test your application:
- Run your application, you will see the sign-in button.
- Click the sign-in button, the SDK will init the sign-in process and redirect you to the Logto sign-in page.
- After you signed in, you will be redirected back to your application and see the sign-out button.
- Click the sign-out button to clear token storage and sign out.
Get user information
Display user information
To display the user's information, you can use the client.getIdTokenClaims() method. For example, in a SwiftUI app:
struct ContentView: View {
  @State var isAuthenticated: Bool
  @State var name: String?

  init() {
    isAuthenticated = client.isAuthenticated
    name = try? client.getIdTokenClaims().name
  }

  var body: some View {
    VStack {
      if isAuthenticated {
        Text("Welcome, \(name)")
      } else {
        Text("Please sign in")
      }
    }
  }
}
Request additional claims
You may find some user information are missing in the returned object from client.getIdTokenClaims(). This is because OAuth 2.0 and OpenID Connect (OIDC) are designed to follow the principle of least privilege (PoLP), and Logto is built on top of these standards.
By default, limited claims are returned. If you need more information, you can request additional scopes to access more claims.
A "claim" is an assertion made about a subject; a "scope" is a group of claims. In the current case, a claim is a piece of information about the user.
Here's a non-normative example the scope - claim relationship:
The "sub" claim means "subject", which is the unique identifier of the user (i.e. user ID).
Logto SDK will always request three scopes: openid, profile, and offline_access.
To request additional scopes, you can pass the scopes to the LogtoConfig object. For example:
let config = try? LogtoConfig(
  endpoint: "<your-logto-endpoint>", // E.g. http://localhost:3001
  appId: "<your-app-id>",
  scopes: [
    UserScope.Email.rawValue,
    UserScope.Phone.rawValue,
  ]
)
Then you can access the additional claims in the return value of client.getIdTokenClaims():
let claims = try? client.getIdTokenClaims()
// Now you can access additional claims `claims.email`, `claims.phone`, etc.
Claims that need network requests
To prevent bloating the ID token, some claims require network requests to fetch. For example, the custom_data claim is not included in the user object even if it's requested in the scopes. To access these claims, you can use the client.fetchUserInfo() method:
let userInfo = try? client.fetchUserInfo()
// Now you can access the claim `userInfo.custom_data`
Scopes and claims
Logto uses OIDC scopes and claims conventions to define the scopes and claims for retrieving user information from the ID token and OIDC userinfo endpoint. Both of the "scope" and the "claim" are terms from the OAuth 2.0 and OpenID Connect (OIDC) specifications.
For standard OIDC claims, the inclusion in the ID token is strictly determined by the requested scopes. Extended claims (such as custom_data and organizations) can be additionally configured to appear in the ID token through the Custom ID token settings.
Here's the list of supported scopes and the corresponding claims:
Standard OIDC scopes
openid (default)
| Claim name | Type | Description |
|---|---|---|
| sub | string | The unique identifier of the user |
profile (default)
| Claim name | Type | Description |
|---|---|---|
| name | string | The full name of the user |
| username | string | The username of the user |
| picture | string | URL of the End-User's profile picture. This URL MUST refer to an image file (for example, a PNG, JPEG, or GIF image file), rather than to a Web page containing an image. Note that this URL SHOULD specifically reference a profile photo of the End-User suitable for displaying when describing the End-User, rather than an arbitrary photo taken by the End-User. |
| created_at | number | Time the End-User was created. The time is represented as the number of milliseconds since the Unix epoch (1970-01-01T00:00:00Z). |
| updated_at | number | Time the End-User's information was last updated. The time is represented as the number of milliseconds since the Unix epoch (1970-01-01T00:00:00Z). |
Other standard claims include family_name, given_name, middle_name, nickname, preferred_username, profile, website, gender, birthdate, zoneinfo, and locale will be also included in the profile scope without the need for requesting the userinfo endpoint. A difference compared to the claims above is that these claims will only be returned when their values are not empty, while the claims above will return null if the values are empty.
Unlike the standard claims, the created_at and updated_at claims are using milliseconds instead of seconds.
email
| Claim name | Type | Description |
|---|---|---|
string | The email address of the user | |
| email_verified | boolean | Whether the email address has been verified |
phone
| Claim name | Type | Description |
|---|---|---|
| phone_number | string | The phone number of the user |
| phone_number_verified | boolean | Whether the phone number has been verified |
address
Please refer to the OpenID Connect Core 1.0 for the details of the address claim.
Scopes marked with (default) are always requested by the Logto SDK. Claims under standard OIDC scopes are always included in the ID token when the corresponding scope is requested — they cannot be turned off.
Extended scopes
The following scopes are extended by Logto and will return claims through the userinfo endpoint. These claims can also be configured to be included directly in the ID token through Console > Custom JWT. See Custom ID token for more details.
custom_data
| Claim name | Type | Description | Included in ID token by default |
|---|---|---|---|
| custom_data | object | The custom data of the user |
identities
| Claim name | Type | Description | Included in ID token by default |
|---|---|---|---|
| identities | object | The linked identities of the user | |
| sso_identities | array | The linked SSO identities of the user |
roles
| Claim name | Type | Description | Included in ID token by default |
|---|---|---|---|
| roles | string[] | The roles of the user | ✅ |
urn:logto:scope:organizations
| Claim name | Type | Description | Included in ID token by default |
|---|---|---|---|
| organizations | string[] | The organization IDs the user belongs to | ✅ |
| organization_data | object[] | The organization data the user belongs to |
These organization claims can also be retrieved via the userinfo endpoint when using an opaque token. However, opaque tokens cannot be used as organization tokens for accessing organization-specific resources. See Opaque token and organizations for more details.
urn:logto:scope:organization_roles
| Claim name | Type | Description | Included in ID token by default |
|---|---|---|---|
| organization_roles | string[] | The organization roles the user belongs to with the format of <organization_id>:<role_name> | ✅ |
API resources
We recommend to read 🔐 Role-Based Access Control (RBAC) first to understand the basic concepts of Logto RBAC and how to set up API resources properly.
Configure Logto client
Once you have set up the API resources, you can add them when configuring Logto in your app:
let config = try? LogtoConfig(
  endpoint: "<your-logto-endpoint>", // E.g. http://localhost:3001
  appId: "<your-app-id>",
  resources: ["https://shopping.your-app.com/api", "https://store.your-app.com/api"], // Add API resources
)
let client = LogtoClient(useConfig: config)
Each API resource has its own permissions (scopes).
For example, the https://shopping.your-app.com/api resource has the shopping:read and shopping:write permissions, and the https://store.your-app.com/api resource has the store:read and store:write permissions.
To request these permissions, you can add them when configuring Logto in your app:
let config = try? LogtoConfig(
  endpoint: "<your-logto-endpoint>",
  appId: "<your-app-id>",
  scopes: ["shopping:read", "shopping:write", "store:read", "store:write"],
  resources: ["https://shopping.your-app.com/api", "https://store.your-app.com/api"],
)
let client = LogtoClient(useConfig: config)
You may notice that scopes are defined separately from API resources. This is because Resource Indicators for OAuth 2.0 specifies the final scopes for the request will be the cartesian product of all the scopes at all the target services.
Thus, in the above case, scopes can be simplified from the definition in Logto, both of the API resources can have read and write scopes without the prefix. Then, in the Logto config:
let config = try? LogtoConfig(
  endpoint: "<your-logto-endpoint>",
  appId: "<your-app-id>",
  scopes: ["read", "write"],
  resources: ["https://shopping.your-app.com/api", "https://store.your-app.com/api"],
)
let client = LogtoClient(useConfig: config)
For every API resource, it will request for both read and write scopes.
It is fine to request scopes that are not defined in the API resources. For example, you can request the email scope even if the API resources don't have the email scope available. Unavailable scopes will be safely ignored.
After the successful sign-in, Logto will issue proper scopes to API resources according to the user's roles.
Fetch access token for the API resource
To fetch the access token for a specific API resource, you can use the getAccessToken method:
let accessToken = try await client.getAccessToken(for: "https://shopping.your-app.com/api")
This method will return a JWT access token that can be used to access the API resource when the user has related permissions. If the current cached access token has expired, this method will automatically try to use a refresh token to get a new access token.
Attach access token to request headers
Put the token in the Authorization field of HTTP headers with the Bearer format (Bearer YOUR_TOKEN), and you are good to go.
The Bearer Token's integration flow may vary based on the framework or requester you are using. Choose your own way to apply the request Authorization header.
await LogtoRequest.get(
  useSession: session,
  endpoint: userInfoEndpoint,
  headers: ["Authorization": "Bearer \(accessToken)"]
)