あなたの iOS (Swift) アプリケーションに認証 (Authentication) を追加する
このガイドは、Admin Console で「Native app」タイプのアプリケーションを作成したことを前提としています。
インストール
The minimum supported iOS version of Logto Swift SDK is iOS 13.
Logto Swift SDK comes in two major versions:
- v1: Opens the sign-in experience in an embedded WebView, which is required by the native social plugin targets, but does not support passkey sign-in (WebView does not support WebAuthn, the underlying standard of passkeys).
- v2 (beta): Opens the sign-in experience in
ASWebAuthenticationSession(the system browser), which unlocks passkey sign-in and shares the browser session. Note that v2 removes the native social plugin targets; social connectors still work through the browser. If you depend on the native WeChat or Alipay SDK handoff, stay on v1.
This guide covers both versions. Choose your version in the tabs below, and the choice will be kept in sync throughout this guide.
Use the following URL to add Logto SDK as a dependency in Swift Package Manager.
https://github.com/logto-io/swift.git
Since Xcode 11, you can directly import a Swift package w/o any additional tool.
When Xcode asks for the package version, choose the version you want to integrate:
- v2 (beta)
- v1
v2 is released as 2.0.0-beta.x prereleases until GA. Use 2.0.0-beta.1 or the latest 2.0.0-beta.x prerelease as the version. During beta, we recommend selecting the prerelease explicitly instead of relying on a normal version range to pick it automatically.
If you use Package.swift directly:
.package(url: "https://github.com/logto-io/swift.git", exact: "2.0.0-beta.1")
Use the latest v1 release as the stable line. The latest v1 version is 1.2.0.
If you use Package.swift directly:
.package(url: "https://github.com/logto-io/swift.git", from: "1.2.0")
We do not support Carthage and CocoaPods at the time due to some technical issues.
Carthage
Carthage needs a xcodeproj file to build. We will try to find a workaround later.
CocoaPods
CocoaPods does not support local dependency and monorepo, thus it's hard to create a .podspec for this repo.
統合
LogtoClient を初期化する
LogtoConfig オブジェクトを使用して LogtoClient インスタンスを作成することで、クライアントを初期化します。
import Logto
import LogtoClient

let config = try? LogtoConfig(
  endpoint: "<your-logto-endpoint>", // 例: http://localhost:3001
  appId: "<your-app-id>"
)
let client = LogtoClient(useConfig: config)
デフォルトでは、ID トークンやリフレッシュ トークンのような資格情報を Keychain に保存します。したがって、ユーザーは戻ってきたときに再度サインインする必要はありません。
この動作をオフにするには、usingPersistStorage を false に設定します:
let config = try? LogtoConfig(
  // ...
  usingPersistStorage: false
)
サインインとサインアウトを実装する
詳細に入る前に、エンドユーザー体験の概要を簡単にご紹介します。サインインプロセスは次のようにシンプルにまとめられます:
- アプリがサインインメソッドを呼び出します。
- ユーザーは Logto のサインインページにリダイレクトされます。ネイティブアプリの場合は、システムブラウザが開かれます。
- ユーザーがサインインし、アプリ(リダイレクト URI として設定)に戻されます。
リダイレクトベースのサインインについて
- この認証 (Authentication) プロセスは OpenID Connect (OIDC) プロトコルに従い、Logto はユーザーのサインインを保護するために厳格なセキュリティ対策を講じています。
- 複数のアプリがある場合、同じアイデンティティプロバイダー (Logto) を使用できます。ユーザーがあるアプリにサインインすると、Logto は別のアプリにアクセスした際に自動的にサインインプロセスを完了します。
リダイレクトベースのサインインの理論と利点について詳しく知るには、Logto サインイン体験の説明を参照してください。
Configure redirect URI
- v2 (beta)
- v1
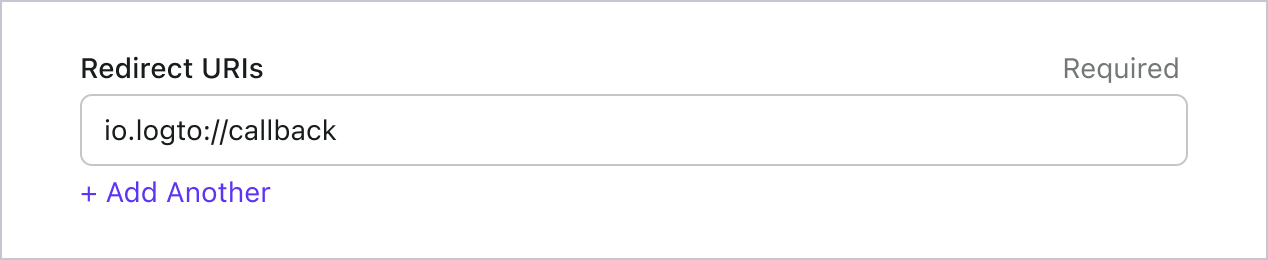
Logto コンソールのアプリケーション詳細ページに切り替えましょう。リダイレクト URI io.logto.app://callback を追加し、「変更を保存」をクリックします。
In v2, the sign-in experience opens in ASWebAuthenticationSession (the system browser), and the redirect is routed back to your app through OS-level callback matching. For a custom scheme redirect URI such as io.logto.app://callback, register only the scheme part (io.logto.app) in your app's Info.plist, then add the full redirect URI to your Logto application's Redirect URIs.
In Xcode, open your app target, select Info, expand URL Types, and add one entry with io.logto.app in URL Schemes. If you edit Info.plist directly, add:
<key>CFBundleURLTypes</key>
<array>
  <dict>
    <key>CFBundleTypeRole</key>
    <string>Editor</string>
    <key>CFBundleURLName</key>
    <string>io.logto.app</string>
    <key>CFBundleURLSchemes</key>
    <array>
      <string>io.logto.app</string>
    </array>
  </dict>
</array>
For the browser flow in v2, you do not need to call LogtoClient.handle(url:); that plugin handoff API was removed with the embedded WebView flow.
Use Universal Links instead of a custom scheme?
You can also use an HTTPS redirect URI such as https://example.com/callback:
- Add the Associated Domains capability to your app.
- Configure
webcredentials:example.comsoASWebAuthenticationSessioncan match HTTPS callbacks on iOS 17.4 and newer. - If the same URL should also open your app as a Universal Link outside the authentication session, configure
applinks:example.comand host a validapple-app-site-associationfile for the domain and path. - Add the HTTPS URI to your Logto application's Redirect URIs.
- Pass the same URI to
signInWithBrowser.
On iOS 17.4 and newer, the SDK uses ASWebAuthenticationSession's HTTPS callback matching API so HTTPS redirects can automatically complete and dismiss the session. On older iOS versions, the authorization request can still use the HTTPS redirect URI, but the session may not close automatically unless your app handles the Universal Link callback itself. Keep a custom scheme redirect as a compatibility option if you need automatic completion on older iOS versions.
Logto コンソールのアプリケーション詳細ページに切り替えましょう。リダイレクト URI io.logto://callback を追加し、「変更を保存」をクリックします。
The Redirect URI in iOS SDK is only for internal use. There's NO NEED to add a Custom URL Scheme until a connector asks.
Sign-in and sign-out
.signInWithBrowser(redirectUri:) を呼び出す前に、Admin Console でリダイレクト URI
が正しく設定されていることを確認してください。 :::
- v2 (beta)
- v1
In v2, client.signOut(postLogoutRedirectUri:) performs a complete sign-out: it clears the local credentials, revokes the refresh token, and ends the Logto session by opening the end session endpoint in the system browser. The browser then navigates back to your app through the post sign-out redirect URI. Before using it, switch to the application details page of Logto Console, add the post sign-out redirect URI io.logto.app://signed-out and click "Save changes". The post sign-out redirect URI can use the same custom scheme you registered for sign-in.
For example, in a SwiftUI app:
struct ContentView: View {
  @State var isAuthenticated: Bool

  private let redirectUri = "io.logto.app://callback"
  private let postLogoutRedirectUri = "io.logto.app://signed-out"

  init() {
    isAuthenticated = client.isAuthenticated
  }

  var body: some View {
    VStack {
      if isAuthenticated {
        Button("Sign Out") {
          Task { [self] in
            let error = await client.signOut(postLogoutRedirectUri: postLogoutRedirectUri)
            if let error = error {
              print(error)
              return
            }
            isAuthenticated = false
          }
        }
      } else {
        Button("Sign In") {
          Task { [self] in
            do {
              try await client.signInWithBrowser(redirectUri: redirectUri)
              isAuthenticated = true
            } catch let error as LogtoClientErrors.SignIn {
              // error occurred during sign in
            } catch {
              // other errors
            }
          }
        }
      }
    }
  }
}
- You can also call
client.signOut()without a post sign-out redirect URI. No Console configuration is needed in this case: the browser shows the Logto sign-out page, and the user returns to the app by dismissing it manually. - If no UI context is available, you can call
client.clearCredentials()to clear the local credentials and revoke the refresh token. Note that this keeps the Logto session in the browser, so the nextsignInWithBrowsermay silently sign the user back in through that session.
You can use client.signInWithBrowser(redirectUri:) to sign in the user and client.signOut() to sign out the user.
For example, in a SwiftUI app:
struct ContentView: View {
  @State var isAuthenticated: Bool

  init() {
    isAuthenticated = client.isAuthenticated
  }

  var body: some View {
    VStack {
      if isAuthenticated {
        Button("Sign Out") {
          Task { [self] in
            await client.signOut()
            isAuthenticated = false
          }
        }
      } else {
        Button("Sign In") {
          Task { [self] in
            do {
              try await client.signInWithBrowser(redirectUri: "io.logto://callback")
              isAuthenticated = true
            } catch let error as LogtoClientErrors.SignIn {
              // error occurred during sign in
            } catch {
              // other errors
            }
          }
        }
      }
    }
  }
}
チェックポイント: アプリケーションをテストする
これで、アプリケーションをテストできます:
- アプリケーションを実行すると、サインインボタンが表示されます。
- サインインボタンをクリックすると、SDK がサインインプロセスを初期化し、Logto のサインインページにリダイレクトされます。
- サインインすると、アプリケーションに戻り、サインアウトボタンが表示されます。
- サインアウトボタンをクリックして、トークンストレージをクリアし、サインアウトします。
ユーザー情報を取得する
ユーザー情報を表示する
ユーザーの情報を表示するには、client.getIdTokenClaims() メソッドを使用できます。例えば、SwiftUI アプリでは:
struct ContentView: View {
  @State var isAuthenticated: Bool
  @State var name: String?

  init() {
    isAuthenticated = client.isAuthenticated
    name = try? client.getIdTokenClaims().name
  }

  var body: some View {
    VStack {
      if isAuthenticated {
        Text("Welcome, \(name)")
      } else {
        Text("Please sign in")
      }
    }
  }
}
追加のクレームをリクエストする
client.getIdTokenClaims() から返されるオブジェクトに一部のユーザー情報が欠けていることがあります。これは、OAuth
2.0 と OpenID Connect (OIDC) が最小特権の原則 (PoLP) に従うように設計されており、Logto
はこれらの標準に基づいて構築されているためです。
デフォルトでは、限られたクレーム (Claims) が返されます。より多くの情報が必要な場合は、追加のスコープ (Scopes) をリクエストして、より多くのクレーム (Claims) にアクセスできます。
「クレーム (Claim)」はサブジェクトについての主張であり、「スコープ (Scope)」はクレーム (Claims) のグループです。現在のケースでは、クレーム (Claim) はユーザーに関する情報の一部です。
スコープ (Scope) とクレーム (Claim) の関係の非規範的な例を示します:
「sub」クレーム (Claim) は「サブジェクト (Subject)」を意味し、ユーザーの一意の識別子(つまり、ユーザー ID)です。
Logto SDK は常に 3 つのスコープ (Scopes) をリクエストします:openid、profile、および offline_access。
追加のスコープをリクエストするには、スコープを LogtoConfig オブジェクトに渡すことができます。例えば:
let config = try? LogtoConfig(
  endpoint: "<your-logto-endpoint>", // 例: http://localhost:3001
  appId: "<your-app-id>",
  scopes: [
    UserScope.Email.rawValue,
    UserScope.Phone.rawValue,
  ]
)
その後、client.getIdTokenClaims() の戻り値で追加のクレームにアクセスできます:
let claims = try? client.getIdTokenClaims()
// これで追加のクレーム `claims.email`、`claims.phone` などにアクセスできます。
ネットワークリクエストが必要なクレーム (Claims)
ID トークンの肥大化を防ぐために、一部のクレーム (Claims) は取得するためにネットワークリクエストが必要です。例えば、custom_data クレームはスコープで要求されてもユーザーオブジェクトに含まれません。これらのクレームにアクセスするには、 client.fetchUserInfo() メソッドを使用できます:
let userInfo = try? client.fetchUserInfo()
// これでクレーム `userInfo.custom_data` にアクセスできます。
スコープとクレーム
Logto は OIDC の スコープ (Scope) とクレーム (Claim) の規約 を使用して、ID トークンおよび OIDC userinfo エンドポイント からユーザー情報を取得するためのスコープ (Scope) とクレーム (Claim) を定義しています。「スコープ (Scope)」と「クレーム (Claim)」は、OAuth 2.0 および OpenID Connect (OIDC) 仕様の用語です。
標準の OIDC クレーム (Claim) については、ID トークンへの含有はリクエストされたスコープ (Scope) によって厳密に決定されます。拡張クレーム (Claim)(例:custom_data や organizations)は、カスタム ID トークン 設定を通じて ID トークンに追加で表示するように構成できます。
こちらはサポートされているスコープと対応するクレーム (Claims) の一覧です:
標準 OIDC スコープ
openid(デフォルト)
| Claim name | Type | 説明 |
|---|---|---|
| sub | string | ユーザーの一意の識別子 |
profile(デフォルト)
| Claim name | Type | 説明 |
|---|---|---|
| name | string | ユーザーのフルネーム |
| username | string | ユーザー名 |
| picture | string | エンドユーザーのプロフィール画像の URL。この URL は画像ファイル(例:PNG、JPEG、GIF 画像ファイル)を指す必要があり、画像を含む Web ページではありません。この URL は、エンドユーザーを説明する際に表示するのに適したプロフィール写真を特に参照するべきであり、エンドユーザーが撮影した任意の写真ではありません。 |
| created_at | number | エンドユーザーが作成された時刻。Unix エポック(1970-01-01T00:00:00Z)からのミリ秒数で表されます。 |
| updated_at | number | エンドユーザー情報が最後に更新された時刻。Unix エポック(1970-01-01T00:00:00Z)からのミリ秒数で表されます。 |
その他の 標準クレーム (Standard Claims) には、family_name、given_name、middle_name、nickname、preferred_username、profile、website、gender、birthdate、zoneinfo、locale などがあり、これらも profile スコープに含まれます(userinfo エンドポイントをリクエストする必要はありません)。上記のクレームとの違いは、これらのクレームは値が空でない場合のみ返される点です。一方、上記のクレームは値が空の場合 null が返されます。
標準クレーム (Standard Claims) とは異なり、created_at および updated_at クレームは秒ではなくミリ秒を使用しています。
email
| Claim name | Type | 説明 |
|---|---|---|
string | ユーザーのメールアドレス | |
| email_verified | boolean | メールアドレスが認証済みかどうか |
phone
| Claim name | Type | 説明 |
|---|---|---|
| phone_number | string | ユーザーの電話番号 |
| phone_number_verified | boolean | 電話番号が認証済みかどうか |
address
アドレスクレームの詳細については OpenID Connect Core 1.0 を参照してください。
(デフォルト) と記載されたスコープは常に Logto SDK によってリクエストされます。標準 OIDC スコープ下のクレーム (Claims) は、対応するスコープがリクエストされた場合、常に ID トークン (ID token) に含まれます — 無効化できません。
拡張スコープ
以下のスコープは Logto によって拡張されており、userinfo エンドポイント を通じてクレーム (Claims) を返します。これらのクレームは Console > Custom JWT を通じて ID トークン (ID token) に直接含めるよう設定することもできます。詳細は カスタム ID トークン を参照してください。
custom_data
| Claim name | Type | 説明 | デフォルトで ID トークンに含まれるか |
|---|---|---|---|
| custom_data | object | ユーザーのカスタムデータ |
identities
| Claim name | Type | 説明 | デフォルトで ID トークンに含まれるか |
|---|---|---|---|
| identities | object | ユーザーのリンク済みアイデンティティ | |
| sso_identities | array | ユーザーのリンク済み SSO アイデンティティ |
roles
| Claim name | Type | 説明 | デフォルトで ID トークンに含まれるか |
|---|---|---|---|
| roles | string[] | ユーザーのロール | ✅ |
urn:logto:scope:organizations
| Claim name | Type | 説明 | デフォルトで ID トークンに含まれるか |
|---|---|---|---|
| organizations | string[] | ユーザーが所属する組織 ID | ✅ |
| organization_data | object[] | ユーザーが所属する組織データ |
これらの組織クレーム (Organization Claims) は、不透明トークン (Opaque token) を使用している場合でも userinfo エンドポイント経由で取得できます。ただし、不透明トークン (Opaque token) は組織トークン (Organization token) として組織固有リソースへのアクセスには使用できません。詳細は 不透明トークン (Opaque token) と組織 (Organizations) を参照してください。
urn:logto:scope:organization_roles
| Claim name | Type | 説明 | デフォルトで ID トークンに含まれるか |
|---|---|---|---|
| organization_roles | string[] | ユーザーが所属する組織ロール(<organization_id>:<role_name> 形式) | ✅ |
API リソース
まず 🔐 ロールベースのアクセス制御 (RBAC) を読むことをお勧めします。これにより、Logto の RBAC の基本概念と API リソースを適切に設定する方法を理解できます。
Logto クライアントを設定する
API リソースを設定したら、アプリで Logto を設定する際にそれらを追加できます:
let config = try? LogtoConfig(
  endpoint: "<your-logto-endpoint>", // 例: http://localhost:3001
  appId: "<your-app-id>",
  resources: ["https://shopping.your-app.com/api", "https://store.your-app.com/api"], // API リソースを追加
)
let client = LogtoClient(useConfig: config)
各 API リソースには独自の権限 (スコープ) があります。
例えば、https://shopping.your-app.com/api リソースには shopping:read と shopping:write の権限があり、https://store.your-app.com/api リソースには store:read と store:write の権限があります。
これらの権限を要求するには、アプリで Logto を設定する際にそれらを追加できます:
let config = try? LogtoConfig(
  endpoint: "<your-logto-endpoint>",
  appId: "<your-app-id>",
  scopes: ["shopping:read", "shopping:write", "store:read", "store:write"],
  resources: ["https://shopping.your-app.com/api", "https://store.your-app.com/api"],
)
let client = LogtoClient(useConfig: config)
スコープが API リソースとは別に定義されていることに気付くかもしれません。これは、OAuth 2.0 のリソースインジケーター が、リクエストの最終的なスコープはすべてのターゲットサービスでのすべてのスコープの直積になると指定しているためです。
したがって、上記のケースでは、Logto での定義からスコープを簡略化できます。両方の API リソースは、プレフィックスなしで read と write スコープを持つことができます。その後、Logto の設定では:
let config = try? LogtoConfig(
  endpoint: "<your-logto-endpoint>",
  appId: "<your-app-id>",
  scopes: ["read", "write"],
  resources: ["https://shopping.your-app.com/api", "https://store.your-app.com/api"],
)
let client = LogtoClient(useConfig: config)
各 API リソースは、read と write の両方のスコープを要求します。
API リソースで定義されていないスコープを要求しても問題ありません。例えば、API リソースに email スコープが利用できなくても、email スコープを要求できます。利用できないスコープは安全に無視されます。
サインインが成功すると、Logto はユーザーのロールに応じて適切なスコープを API リソースに発行します。
API リソースのアクセス トークンを取得する
特定の API リソースのアクセス トークンを取得するには、getAccessToken メソッドを使用できます:
let accessToken = try await client.getAccessToken(for: "https://shopping.your-app.com/api")
このメソッドは、ユーザーが関連する権限を持っている場合に API リソースにアクセスするために使用できる JWT アクセス トークンを返します。現在キャッシュされているアクセス トークンが期限切れの場合、このメソッドは自動的にリフレッシュ トークンを使用して新しいアクセス トークンを取得しようとします。
アクセストークンをリクエストヘッダーに添付する
トークンを HTTP ヘッダーの Authorization フィールドに Bearer 形式 (Bearer YOUR_TOKEN) で配置し、準備完了です。
Bearer トークンの統合フローは、使用しているフレームワークやリクエスターによって異なる場合があります。リクエスト Authorization ヘッダーを適用する独自の方法を選択してください。
await LogtoRequest.get(
  useSession: session,
  endpoint: userInfoEndpoint,
  headers: ["Authorization": "Bearer \(accessToken)"]
)