為你的 .NET Core (Blazor WASM) 應用程式新增驗證 (Authentication)
- 以下示範基於 .NET Core 8.0 和 Blorc.OpenIdConnect。
- .NET Core 範例專案可在 GitHub 儲存庫 中找到。
先決條件
- 一個 Logto Cloud 帳戶或 自行託管的 Logto。
- 已建立的 Logto 單頁應用程式。
安裝
將 NuGet 套件新增到你的專案中:
dotnet add package Blorc.OpenIdConnect
整合
新增腳本引用
在 index.html 文件中包含 Blorc.Core/injector.js:
<head>
  <!-- ... -->
  <script src="_content/Blorc.Core/injector.js"></script>
  <!-- ... -->
</head>
註冊服務
將以下程式碼新增至 Program.cs 文件:
using Blorc.OpenIdConnect;
using Blorc.Services;

builder.Services.AddBlorcCore();
builder.Services.AddAuthorizationCore();
builder.Services.AddBlorcOpenIdConnect(
    options =>
    {
        builder.Configuration.Bind("IdentityServer", options);
    });

var webAssemblyHost = builder.Build();

await webAssemblyHost
    .ConfigureDocumentAsync(async documentService =>
    {
        await documentService.InjectBlorcCoreJsAsync();
        await documentService.InjectOpenIdConnectAsync();
    });

await webAssemblyHost.RunAsync();
不需要使用 Microsoft.AspNetCore.Components.WebAssembly.Authentication 套件。Blorc.OpenIdConnect 套件將負責驗證 (Authentication) 流程。
配置重定向 URI
在進入細節之前,這裡先快速說明一下終端使用者的體驗。登入流程可簡化如下:
- 你的應用程式呼叫登入方法。
- 使用者被重新導向至 Logto 登入頁面。對於原生應用程式,會開啟系統瀏覽器。
- 使用者登入後,會被重新導向回你的應用程式(設定為 redirect URI)。
關於基於重導的登入
- 此驗證流程遵循 OpenID Connect (OIDC) 協議,Logto 強制執行嚴格的安全措施以保護使用者登入。
- 如果你有多個應用程式,可以使用相同的身分提供者 (IdP, Identity provider)(Logto)。一旦使用者登入其中一個應用程式,Logto 將在使用者訪問另一個應用程式時自動完成登入流程。
欲了解更多關於基於重導登入的原理和優勢,請參閱 Logto 登入體驗解析。
在以下的程式碼片段中,我們假設你的應用程式運行在 http://localhost:3000/。
配置重定向 URI
切換到 Logto Console 的應用程式詳細資訊頁面。新增一個重定向 URI http://localhost:3000/callback。
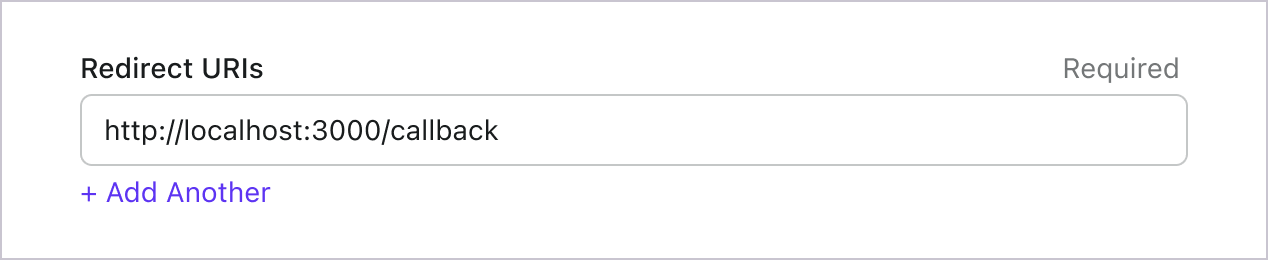
就像登入一樣,使用者應被重定向到 Logto 以登出共享會話。完成後,將使用者重定向回你的網站會很不錯。例如,將 http://localhost:3000/ 新增為登出後重定向 URI 區段。
然後點擊「儲存」以保存更改。
配置應用程式
將以下程式碼新增至 appsettings.json 文件:
{
// ...
IdentityServer: {
  Authority: 'https://<your-logto-endpoint>/oidc',
  ClientId: '<your-logto-app-id>',
  PostLogoutRedirectUri: 'http://localhost:3000/',
  RedirectUri: 'http://localhost:3000/callback',
  ResponseType: 'code',
  Scope: 'openid profile', // 如有需要可新增更多權限範圍 (Scopes)
},
}
記得將 RedirectUri 和 PostLogoutRedirectUri 新增至 Logto 應用程式設定中的允許重定向 URI 列表中。它們都是你的 WASM 應用程式的 URL。
新增 AuthorizeView 元件
在需要驗證的 Razor 頁面中,新增 AuthorizeView 元件。假設是 Home.razor 頁面:
@using Microsoft.AspNetCore.Components.Authorization
@page "/"

<AuthorizeView>
    <Authorized>
        @* 已登入視圖 *@
        <button @onclick="OnLogoutButtonClickAsync">
            登出
        </button>
    </Authorized>
    <NotAuthorized>
        @* 未驗證視圖 *@
        <button @onclick="OnLoginButtonClickAsync">
            登入
        </button>
    </NotAuthorized>
</AuthorizeView>
設定驗證 (Authentication)
在 Home.razor.cs 文件中(如果不存在則創建),新增以下程式碼:
using Microsoft.AspNetCore.Authorization;
using Microsoft.AspNetCore.Components;
using Microsoft.AspNetCore.Components.Web;
using Blorc.OpenIdConnect;
using Microsoft.AspNetCore.Components.Authorization;

[Authorize]
public partial class Home : ComponentBase
{
    [Inject]
    public required IUserManager UserManager { get; set; }

    public User<Profile>? User { get; set; }

    [CascadingParameter]
    protected Task<AuthenticationState>? AuthenticationStateTask { get; set; }

    protected override async Task OnInitializedAsync()
    {
        User = await UserManager.GetUserAsync<User<Profile>>(AuthenticationStateTask!);
    }

    private async Task OnLoginButtonClickAsync(MouseEventArgs obj)
    {
        await UserManager.SignInRedirectAsync();
    }

    private async Task OnLogoutButtonClickAsync(MouseEventArgs obj)
    {
        await UserManager.SignOutRedirectAsync();
    }
}
一旦使用者驗證成功,User 屬性將填入使用者資訊。
檢查點:測試你的應用程式
現在,你可以測試你的應用程式:
- 執行你的應用程式,你會看到登入按鈕。
- 點擊登入按鈕,SDK 會初始化登入流程並將你重定向到 Logto 登入頁面。
- 登入後,你將被重定向回應用程式並看到登出按鈕。
- 點擊登出按鈕以清除權杖存儲並登出。
獲取使用者資訊
顯示使用者資訊
以下是在 Home.razor 頁面中顯示使用者資訊的一些範例:
<AuthorizeView>
    <Authorized>
        @* 已登入視圖 *@
        @* ... *@
        <p>你已登入為 @(@User?.Profile?.Name ?? "(unknown name)").</p>
    </Authorized>
    @* ... *@
</AuthorizeView>
如需更多屬性和宣告,請檢查 Blorc.OpenIdConnect 套件中的 User 和 Profile 類別。
請求額外的宣告
你可能會發現從 User 返回的物件中缺少一些使用者資訊。這是因為 OAuth 2.0 和 OpenID Connect (OIDC) 的設計遵循最小權限原則 (PoLP, Principle of Least Privilege),而 Logto 是基於這些標準構建的。
預設情況下,僅返回有限的宣告 (Claims)。如果你需要更多資訊,可以請求額外的權限範圍 (Scopes) 以存取更多宣告。
「宣告 (Claim)」是對主體所做的斷言;「權限範圍 (Scope)」是一組宣告。在目前的情況下,宣告是關於使用者的一部分資訊。
以下是權限範圍與宣告關係的非規範性範例:
「sub」宣告表示「主體 (Subject)」,即使用者的唯一識別符(例如使用者 ID)。
Logto SDK 將始終請求三個權限範圍:openid、profile 和 offline_access。
要請求額外的權限範圍 (Scopes),可以在 appsettings.json 檔案中將有效的權限範圍新增到 IdentityServer.Scope 屬性。
{
  // ...
  "IdentityServer": {
    // ...
    "Scope": "openid profile email phone"
  }
}
需要網路請求的宣告
為了避免使用者物件過於龐大,某些宣告需要透過網路請求來獲取。例如,即使在權限範圍中請求了 custom_data 宣告,它也不會包含在使用者物件中。要獲取這些宣告,可以在 appsettings.json 檔案中將 IdentityServer.LoadUserInfo 屬性設為 true。
例如,要獲取使用者的電子郵件地址和自訂資料,可以使用以下配置:
{
  // ...
  "IdentityServer": {
    // ...
    "Scope": "openid profile email custom_data",
    "LoadUserInfo": true
  }
}
權限範圍 (Scopes) 和宣告 (Claims)
Logto 採用 OIDC 權限範圍 (Scopes) 與宣告 (Claims) 慣例 來定義從 ID 權杖 (ID token) 及 OIDC userinfo 端點 取得使用者資訊時的權限範圍與宣告。無論「權限範圍 (Scope)」還是「宣告 (Claim)」,皆為 OAuth 2.0 與 OpenID Connect (OIDC) 規範中的術語。
對於標準 OIDC 宣告 (Claims),其是否包含於 ID 權杖 (ID token) 內,完全取決於所請求的權限範圍 (Scopes)。擴充宣告(如 custom_data 與 organizations)則可透過 自訂 ID 權杖 (Custom ID token) 設定,額外配置於 ID 權杖中。
以下是支援的權限範圍 (Scopes) 及對應的宣告 (Claims) 清單:
標準 OIDC 權限範圍 (Scopes)
openid(預設)
| Claim name | Type | Description |
|---|---|---|
| sub | string | 使用者的唯一識別符 (The unique identifier of the user) |
profile(預設)
| Claim name | Type | Description |
|---|---|---|
| name | string | 使用者全名 (The full name of the user) |
| username | string | 使用者名稱 (The username of the user) |
| picture | string | 終端使用者大頭貼的 URL。此 URL 必須指向圖片檔案(如 PNG、JPEG 或 GIF),而非包含圖片的網頁。請注意,此 URL 應明確指向適合描述終端使用者的個人照片,而非任意由終端使用者拍攝的照片。(URL of the End-User's profile picture. This URL MUST refer to an image file (for example, a PNG, JPEG, or GIF image file), rather than to a Web page containing an image. Note that this URL SHOULD specifically reference a profile photo of the End-User suitable for displaying when describing the End-User, rather than an arbitrary photo taken by the End-User.) |
| created_at | number | 終端使用者建立時間。以自 Unix epoch(1970-01-01T00:00:00Z)以來的毫秒數表示。(Time the End-User was created. The time is represented as the number of milliseconds since the Unix epoch (1970-01-01T00:00:00Z).) |
| updated_at | number | 終端使用者資訊最後更新時間。以自 Unix epoch(1970-01-01T00:00:00Z)以來的毫秒數表示。(Time the End-User's information was last updated. The time is represented as the number of milliseconds since the Unix epoch (1970-01-01T00:00:00Z).) |
其他 標準宣告 (Standard claims) 包含 family_name、given_name、middle_name、nickname、preferred_username、profile、website、gender、birthdate、zoneinfo 及 locale 也會包含在 profile 權限範圍內,無需額外請求 userinfo endpoint。與上表宣告不同的是,這些宣告僅在其值不為空時才會回傳,而上表宣告若值為空則會回傳 null。
與標準宣告不同,created_at 與 updated_at 宣告使用毫秒而非秒為單位。
email
| Claim name | Type | Description |
|---|---|---|
string | 使用者的電子郵件地址 (The email address of the user) | |
| email_verified | boolean | 電子郵件地址是否已驗證 (Whether the email address has been verified) |
phone
| Claim name | Type | Description |
|---|---|---|
| phone_number | string | 使用者的電話號碼 (The phone number of the user) |
| phone_number_verified | boolean | 電話號碼是否已驗證 (Whether the phone number has been verified) |
address
請參閱 OpenID Connect Core 1.0 以瞭解 address 宣告的詳細資訊。
標註為 (預設) 的權限範圍 (Scopes) 會由 Logto SDK 自動請求。當請求對應權限範圍時,標準 OIDC 權限範圍下的宣告 (Claims) 會始終包含於 ID 權杖 (ID token) 中,且無法關閉。
擴充權限範圍 (Extended scopes)
以下權限範圍由 Logto 擴充,會透過 userinfo endpoint 回傳宣告 (Claims)。這些宣告也可透過 Console > Custom JWT 設定直接包含於 ID 權杖 (ID token) 中。詳情請參閱 自訂 ID 權杖 (Custom ID token)。
custom_data
| Claim name | Type | Description | Included in ID token by default |
|---|---|---|---|
| custom_data | object | 使用者的自訂資料 (The custom data of the user) |
identities
| Claim name | Type | Description | Included in ID token by default |
|---|---|---|---|
| identities | object | 使用者的連結身分 (The linked identities of the user) | |
| sso_identities | array | 使用者的連結 SSO 身分 (The linked SSO identities of the user) |
roles
| Claim name | Type | Description | Included in ID token by default |
|---|---|---|---|
| roles | string[] | 使用者的角色 (The roles of the user) | ✅ |
urn:logto:scope:organizations
| Claim name | Type | Description | Included in ID token by default |
|---|---|---|---|
| organizations | string[] | 使用者所屬的組織 ID (The organization IDs the user belongs to) | ✅ |
| organization_data | object[] | 使用者所屬的組織資料 (The organization data the user belongs to) |
這些組織宣告 (Organization claims) 也可在使用 不透明權杖 (Opaque token) 時,透過 userinfo endpoint 取得。然而,不透明權杖無法作為組織權杖 (Organization tokens) 來存取組織專屬資源。詳見 不透明權杖與組織 (Opaque token and organizations)。
urn:logto:scope:organization_roles
| Claim name | Type | Description | Included in ID token by default |
|---|---|---|---|
| organization_roles | string[] | 使用者所屬組織角色,格式為 <organization_id>:<role_name> (The organization roles the user belongs to with the format of <organization_id>:<role_name>) | ✅ |
API 資源
我們建議先閱讀 🔐 角色型存取控制 (RBAC, Role-Based Access Control),以瞭解 Logto RBAC 的基本概念以及如何正確設定 API 資源。
預設情況下,當你存取 User?.AccessToken 時,會取得一個不透明權杖 (Opaque token),其長度較短且不是 JWT (JSON Web Token)。此權杖用於存取 userinfo 端點。
新增 API 資源 (API resource) 至設定檔
若要取得可用於存取 Logto 中定義之 API 資源 (API resource) 的 JWT,請在 appsettings.json 檔案中新增以下參數(以 https://my-api-resource 為例):
{
  // ...
  "IdentityServer": {
    // ...
    "Scope": "openid profile email <your-api-scopes>", // 在此新增你的 API 權限範圍 (scopes)
    "Resource": "https://my-api-resource",
    "ExtraTokenParams": {
        "resource": "https://my-api-resource" // 請確保 key "resource" 為小寫
    }
  }
}
Resource 屬性用於將 API 資源 (API resource) 加入驗證請求 (auth request)。ExtraTokenParams 屬性則用於將 API 資源 (API resource) 加入權杖請求 (token request)。由於 Logto 遵循 RFC 8707 標準,這兩個屬性皆為必填。
由於 WebAssembly 屬於用戶端應用程式,權杖請求 (token request) 僅會發送至伺服器端一次。基於此特性,LoadUserInfo 與取得 API 資源 (API resource) 存取權杖 (access token) 會產生衝突。
使用存取權杖 (Access token)
使用者驗證後,你可以透過 User?.AccessToken 屬性存取 API 資源 (API resource)。例如,你可以使用 HttpClient 存取 API 資源 (API resource):
using Blorc.OpenIdConnect;

builder.Services
    .AddHttpClient("MyApiResource", client =>
    {
        client.BaseAddress = new Uri("https://my-api-resource");
    })
    .AddAccessToken(); // 將存取權杖 (access token) 加入請求標頭