Set up Single Sign-On with Microsoft Entra ID (SAML)
With minimal configuration efforts, this connector allows integration with Microsoft Entra ID (formerly Azure AD) for enterprise SSO.
For more information about SSO and how to configure SSO in Logto, please check out the Enterprise SSO (SAML & OIDC) documentation to get started.
Step 1: Create an Azure AD SSO application
Initiate the Azure AD SSO integration by creating an SSO application on the Azure AD side.
- Go to the Azure portal and sign in as an administrator.
- Select
Microsoft Entra IDservice. - Navigate to the
Enterprise applicationsusing the side menu. ClickNew application, and selectCreate your own application.
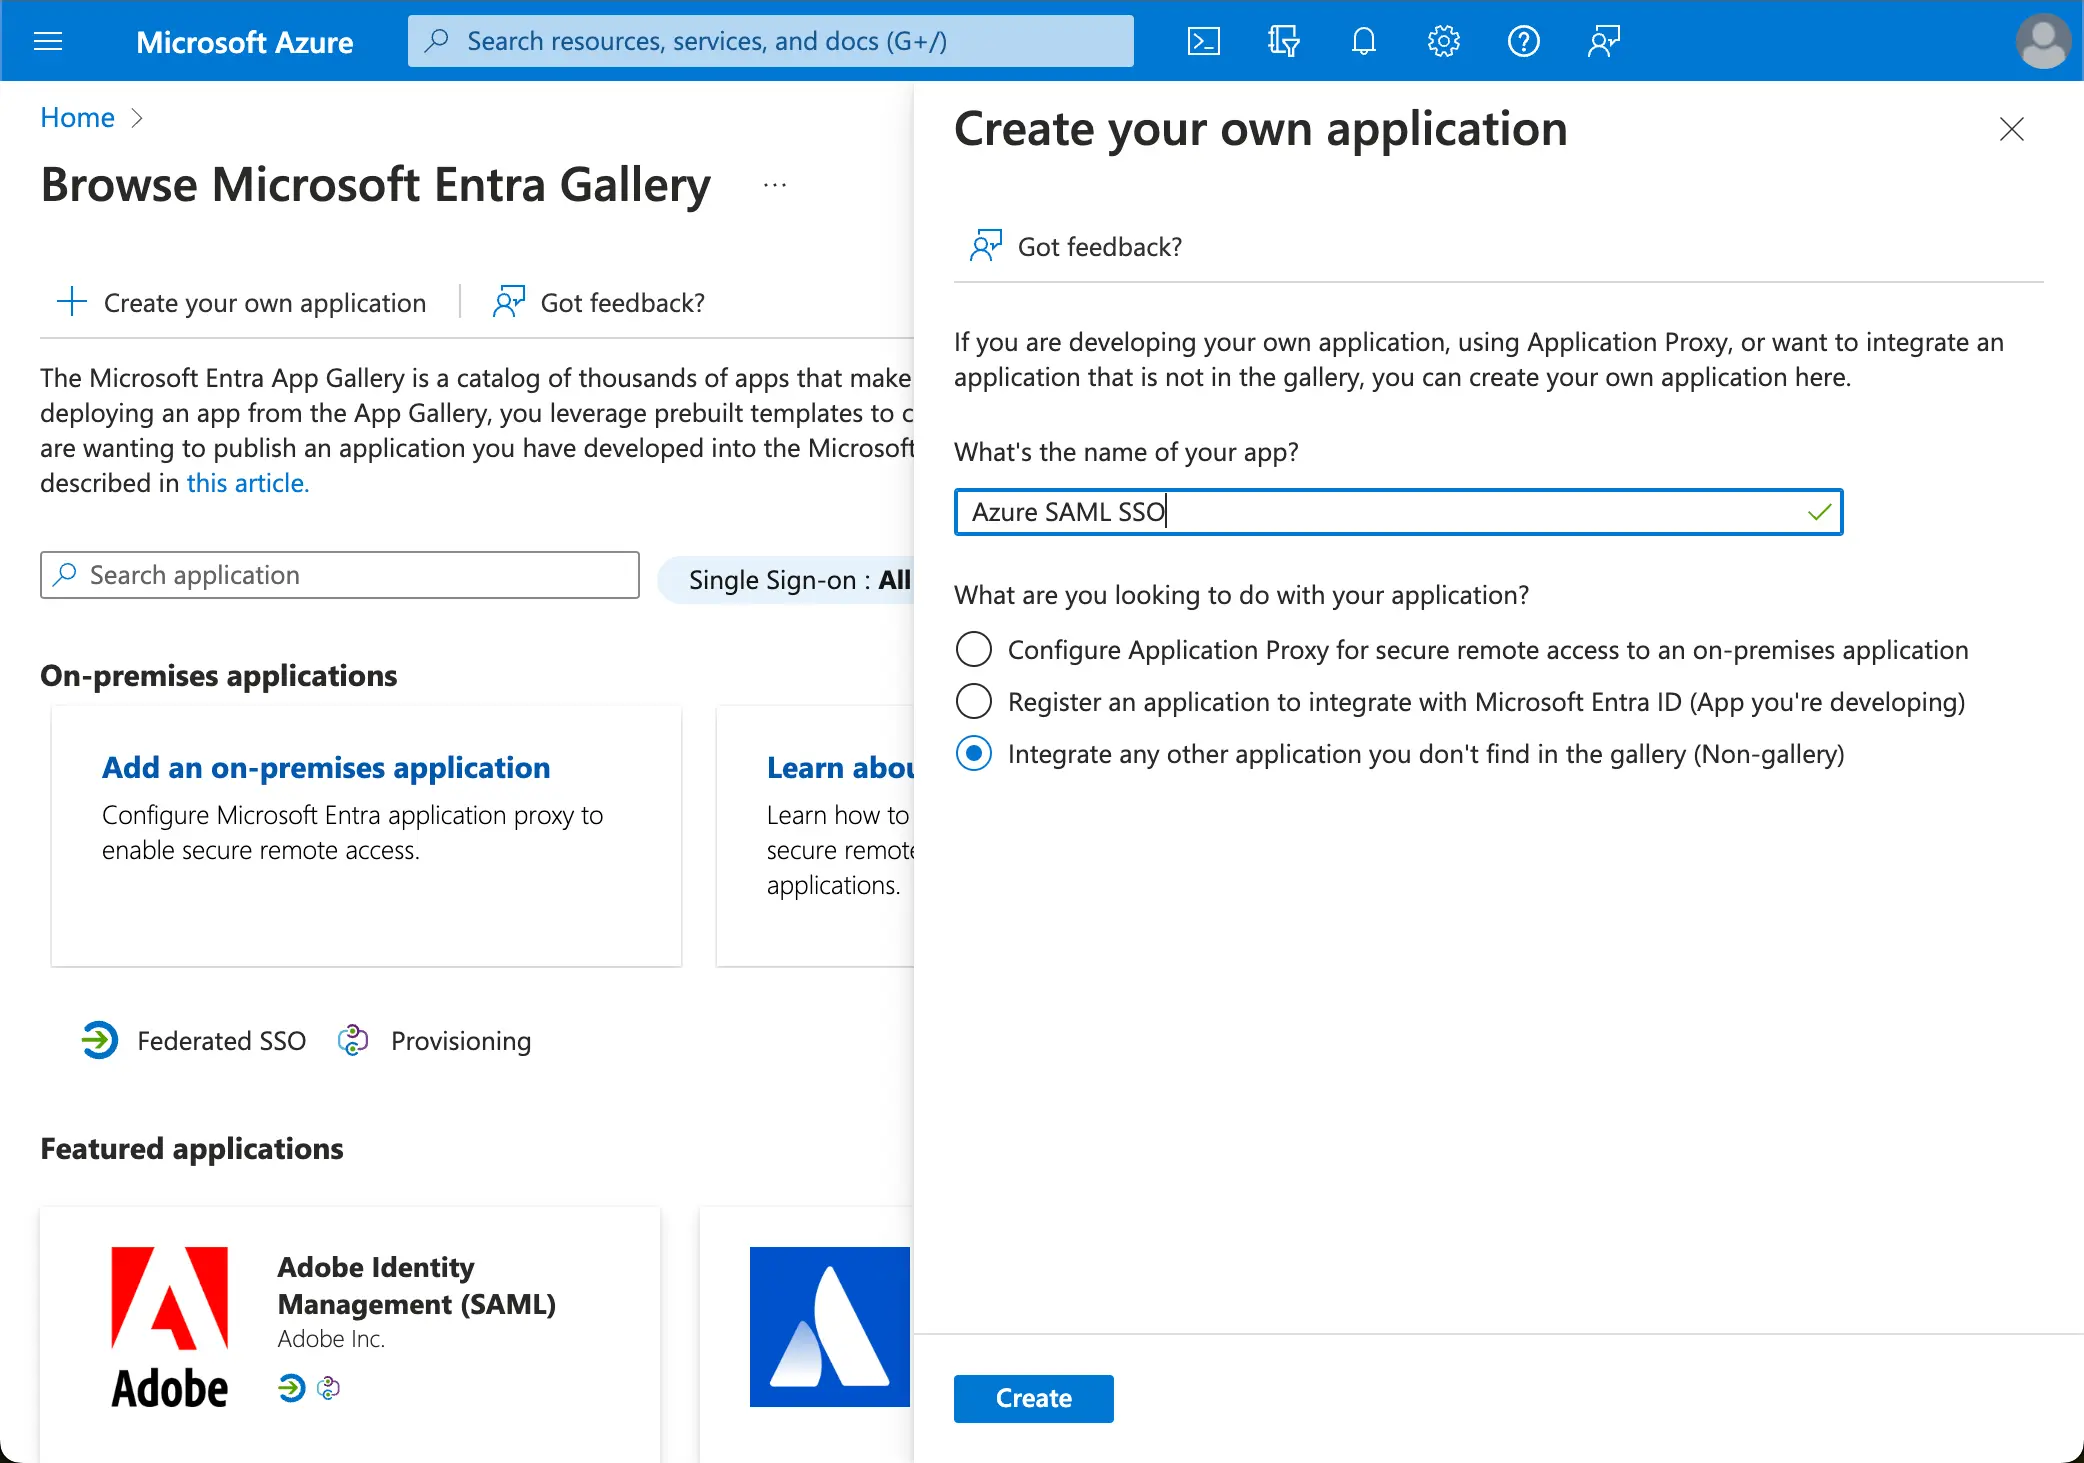
- Enter the application name and select
Integrate any other application you don't find in the gallery (Non-gallery). - Select
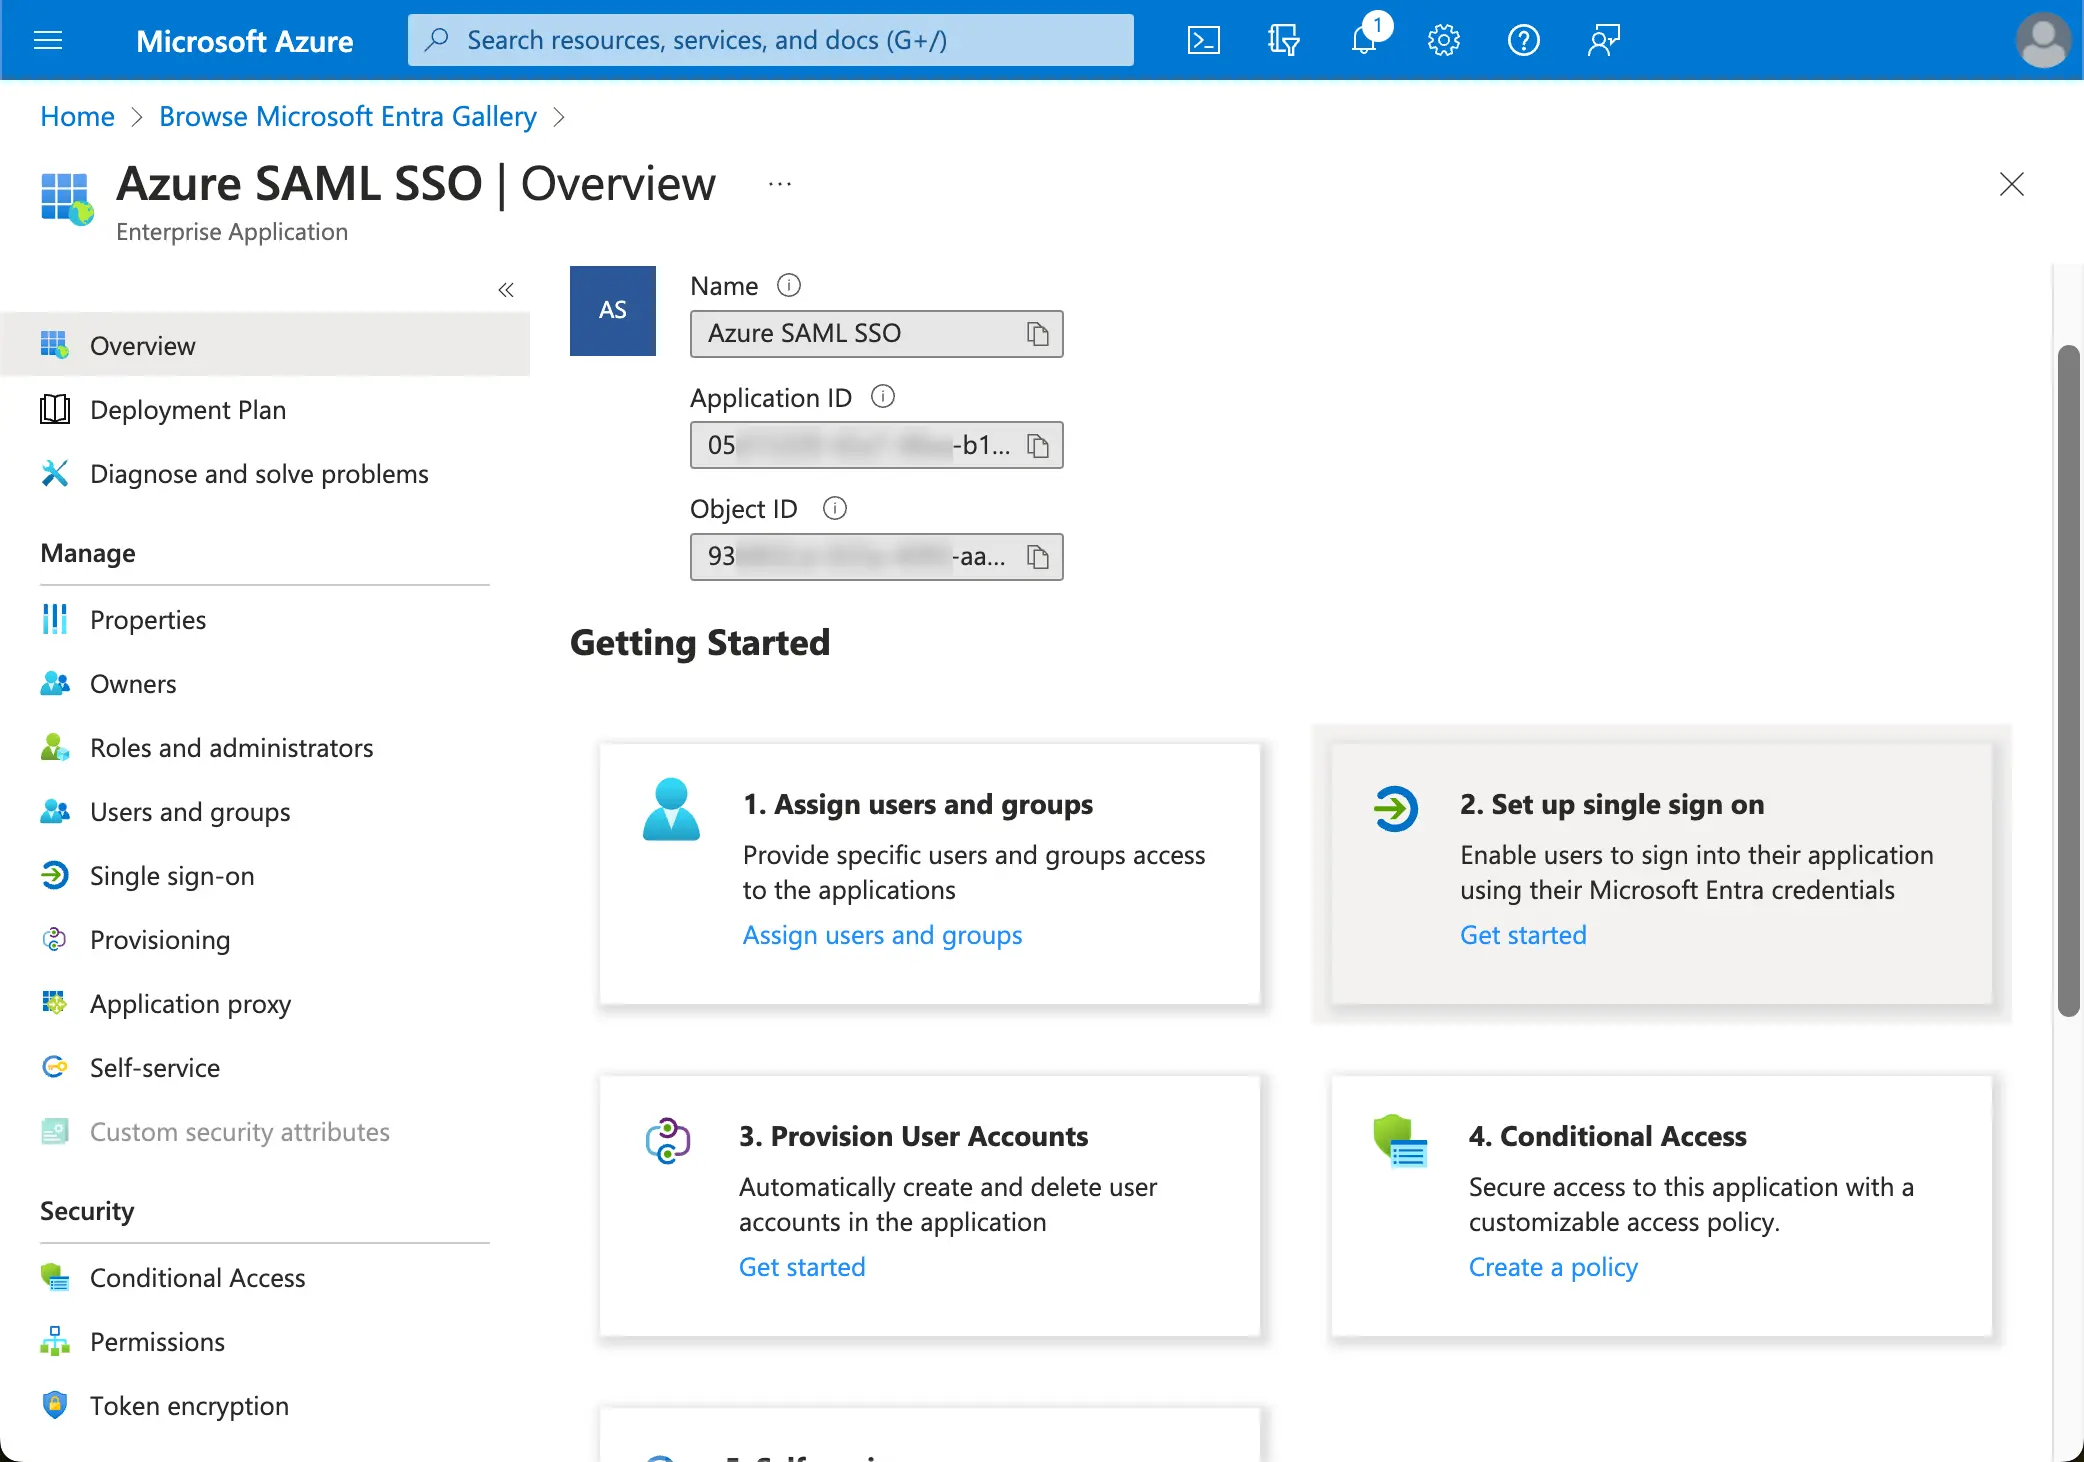
Setup single sign-on>SAML.
- Follow the instructions, as the first step, you will need to fill in the basic SAML configuration using the following information provided by Logto.
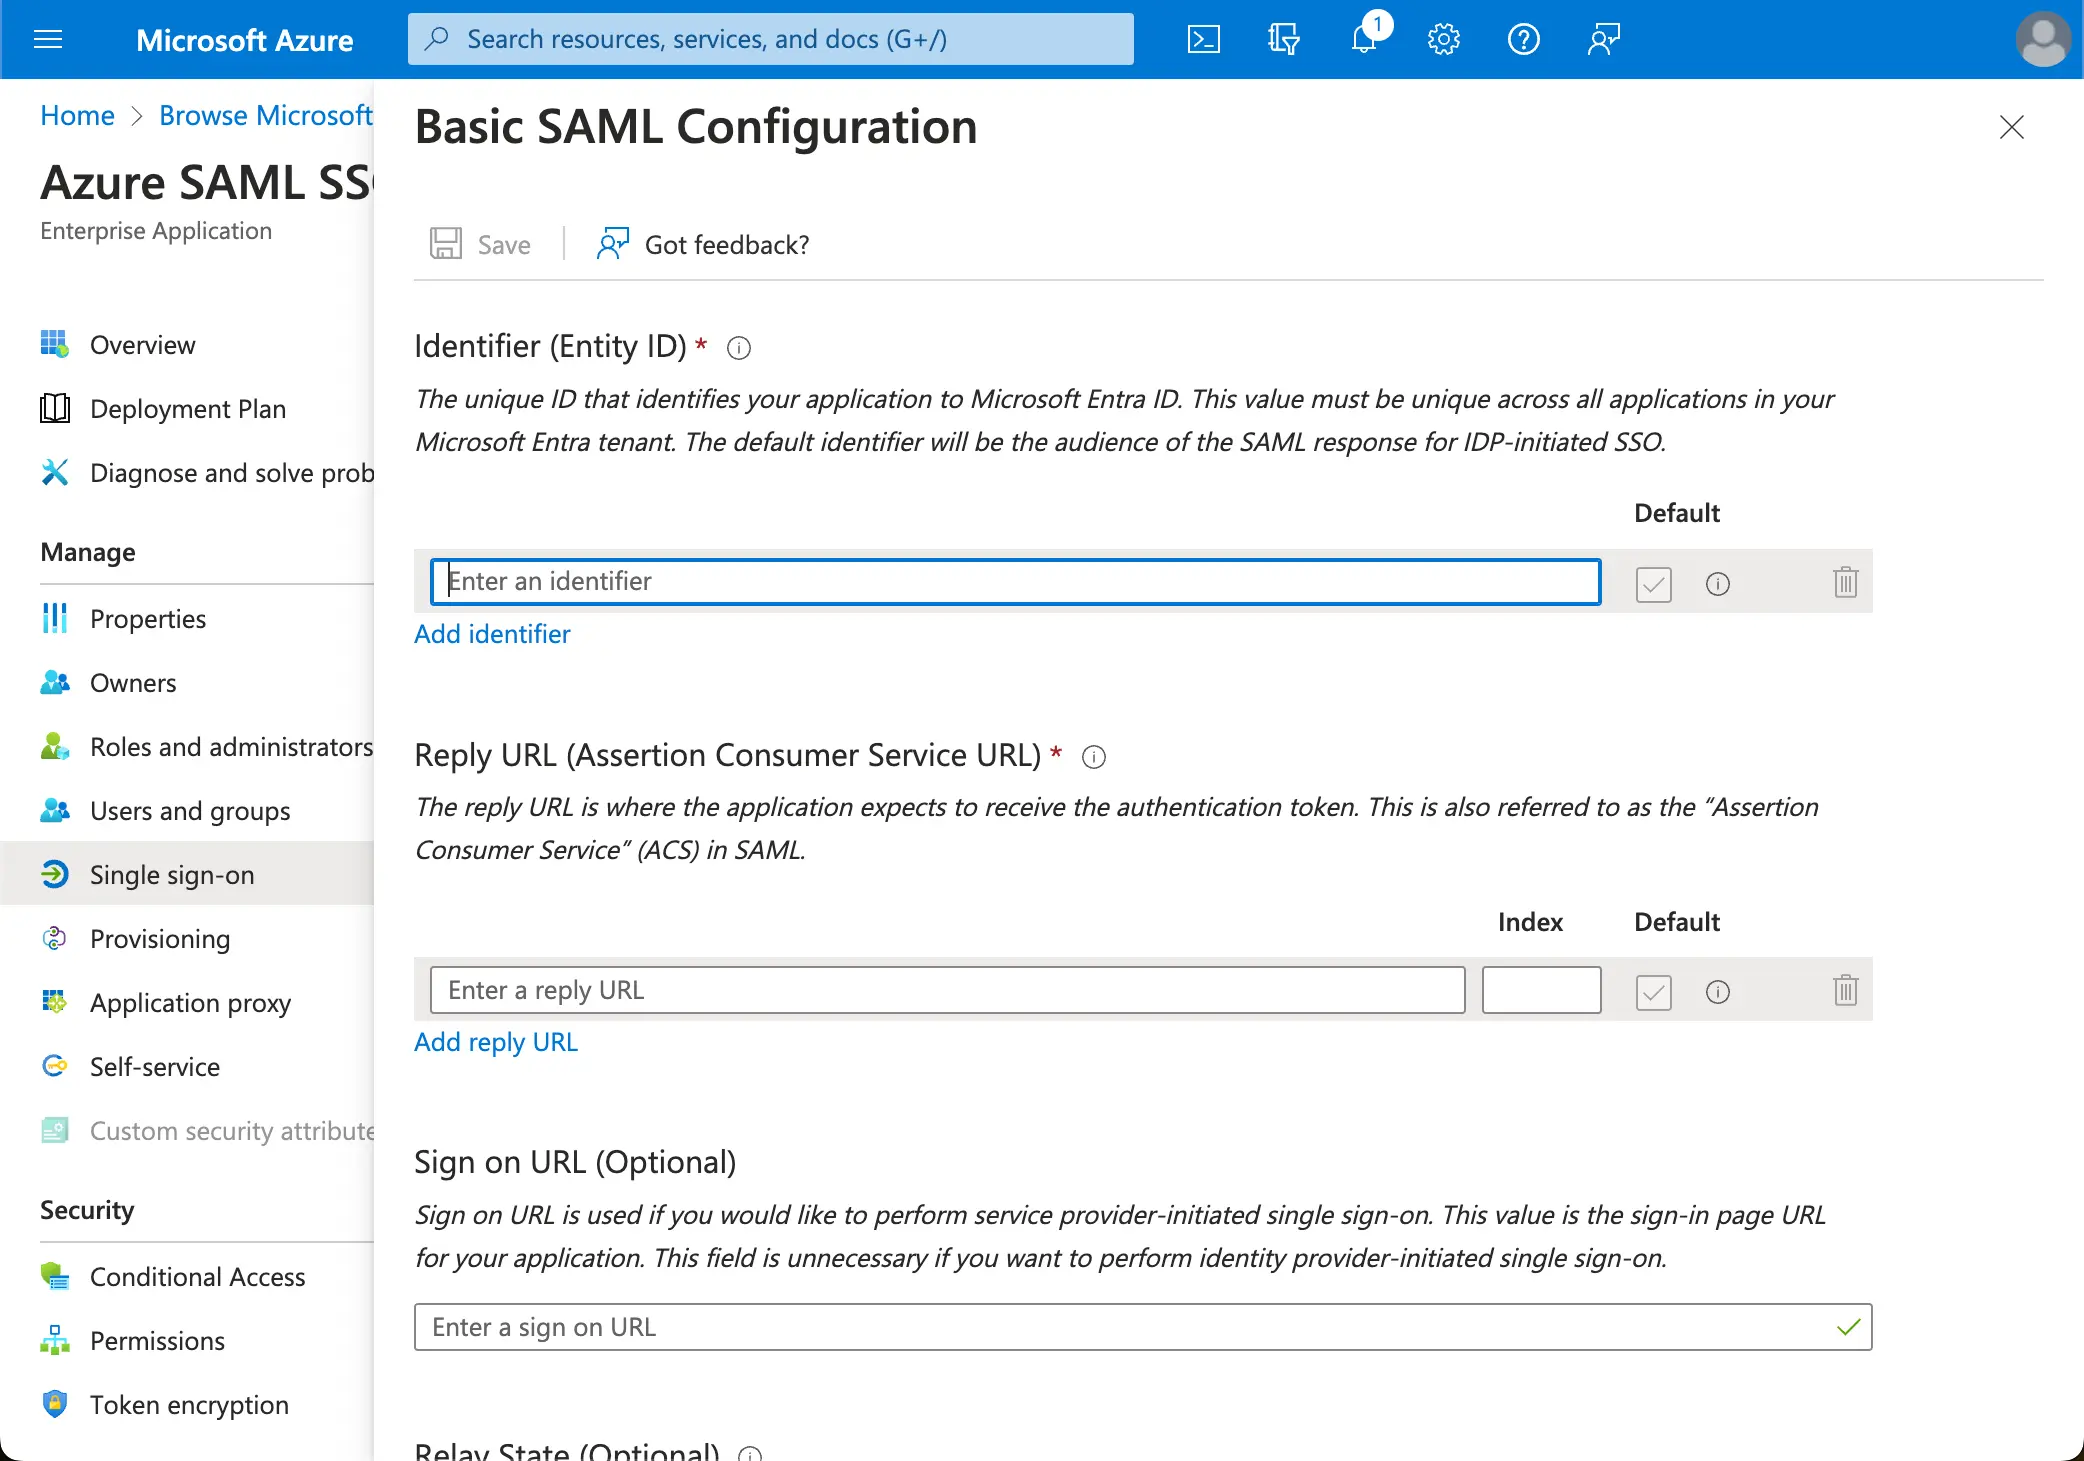
- Audience URI(SP Entity ID): It represents as a globally unique identifier for your Logto service, functioning as the EntityId for SP during authentication requests to the IdP. This identifier is pivotal for the secure exchange of SAML assertions and other authentication-related data between the IdP and Logto.
- ACS URL: The Assertion Consumer Service (ACS) URL is the location where the SAML assertion is sent with a POST request. This URL is used by the IdP to send the SAML assertion to Logto. It acts as a callback URL where Logto expects to receive and consume the SAML response containing the user's identity information.
Click Save to continue.
Step 2: Configure SAML SSO at Logto
To make the SAML SSO integration work, you will need to provide the IdP metadata back to Logto. Let's switch back to the Logto side, and navigate to the Connection tab of your Azure AD SSO connector.
Logto provides three different ways to configure the IdP metadata. The easiest way is by providing the metadata URL of the Azure AD SSO application.
Copy the App Federation Metadata Url from your Azure AD SSO application's SAML Certificates section and paste it into the Metadata URL field in Logto.
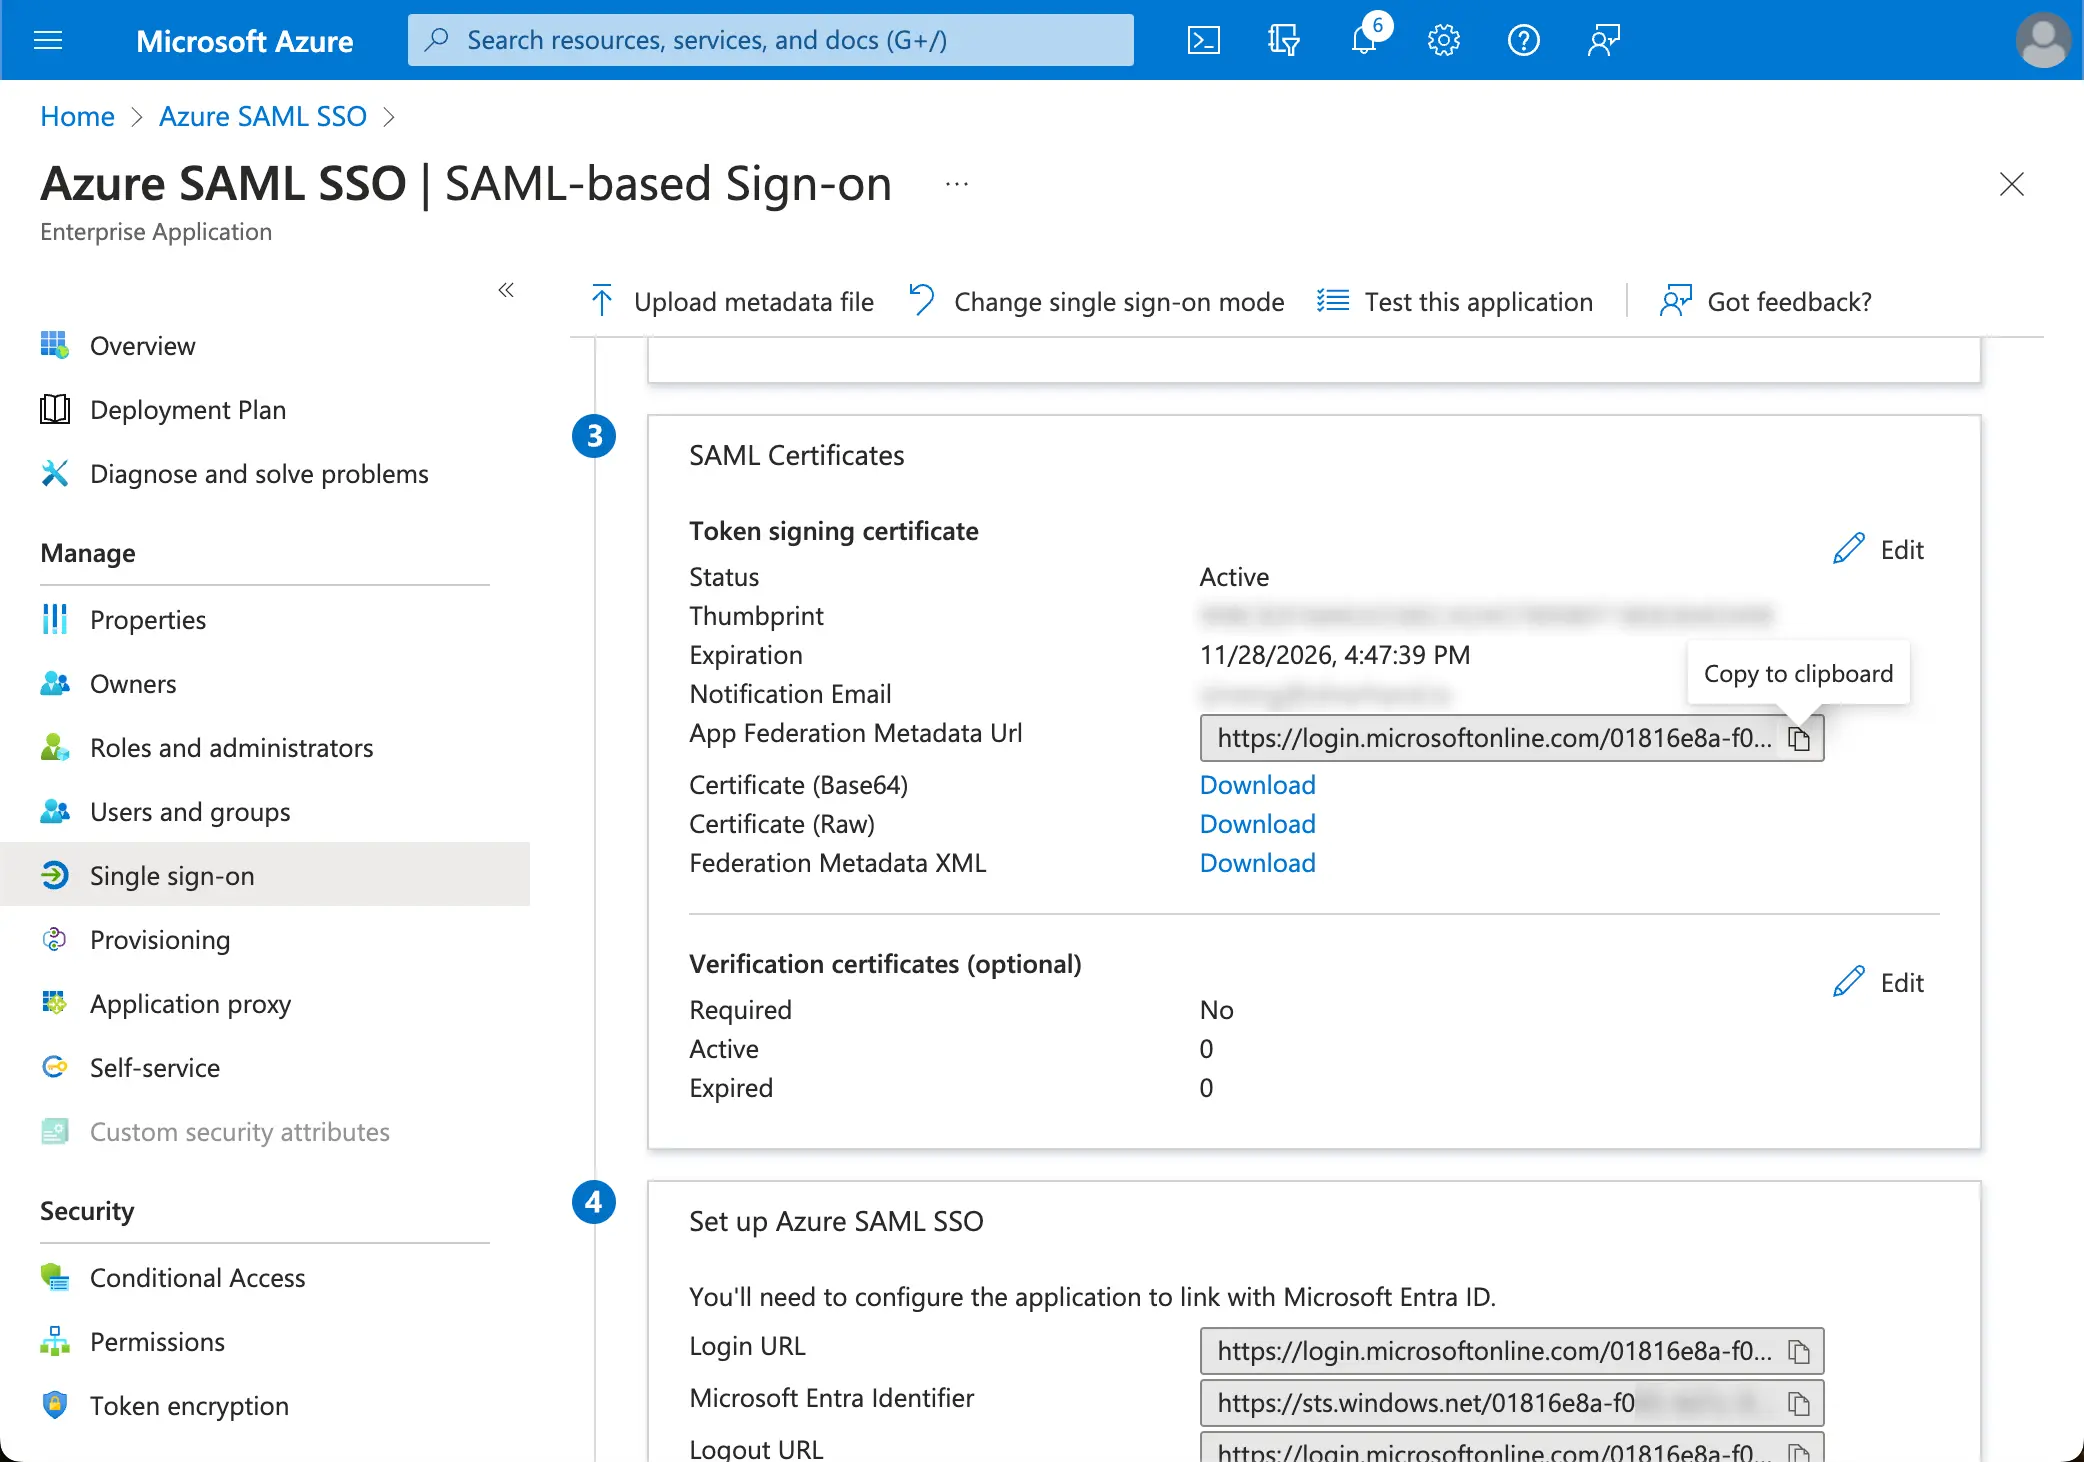
Logto will fetch the metadata from the URL and configure the SAML SSO integration automatically.
Step 3: Configure user attributes mapping
Logto provides a flexible way to map the user attributes returned from IdP to the user attributes in Logto. Logto will sync the following user attributes from IdP by default:
- id: The unique identifier of the user. Logto will read the
nameIDclaim from the SAML response as the user SSO identity id. - email: The email address of the user. Logto will read the
emailclaim from the SAML response as the user primary email by default. - name: The name of the user.
You may manage the user attributes mapping logic either on the Azure AD side or Logto side.
-
Map the AzureAD user attributes to Logto user attributes on Logto side.
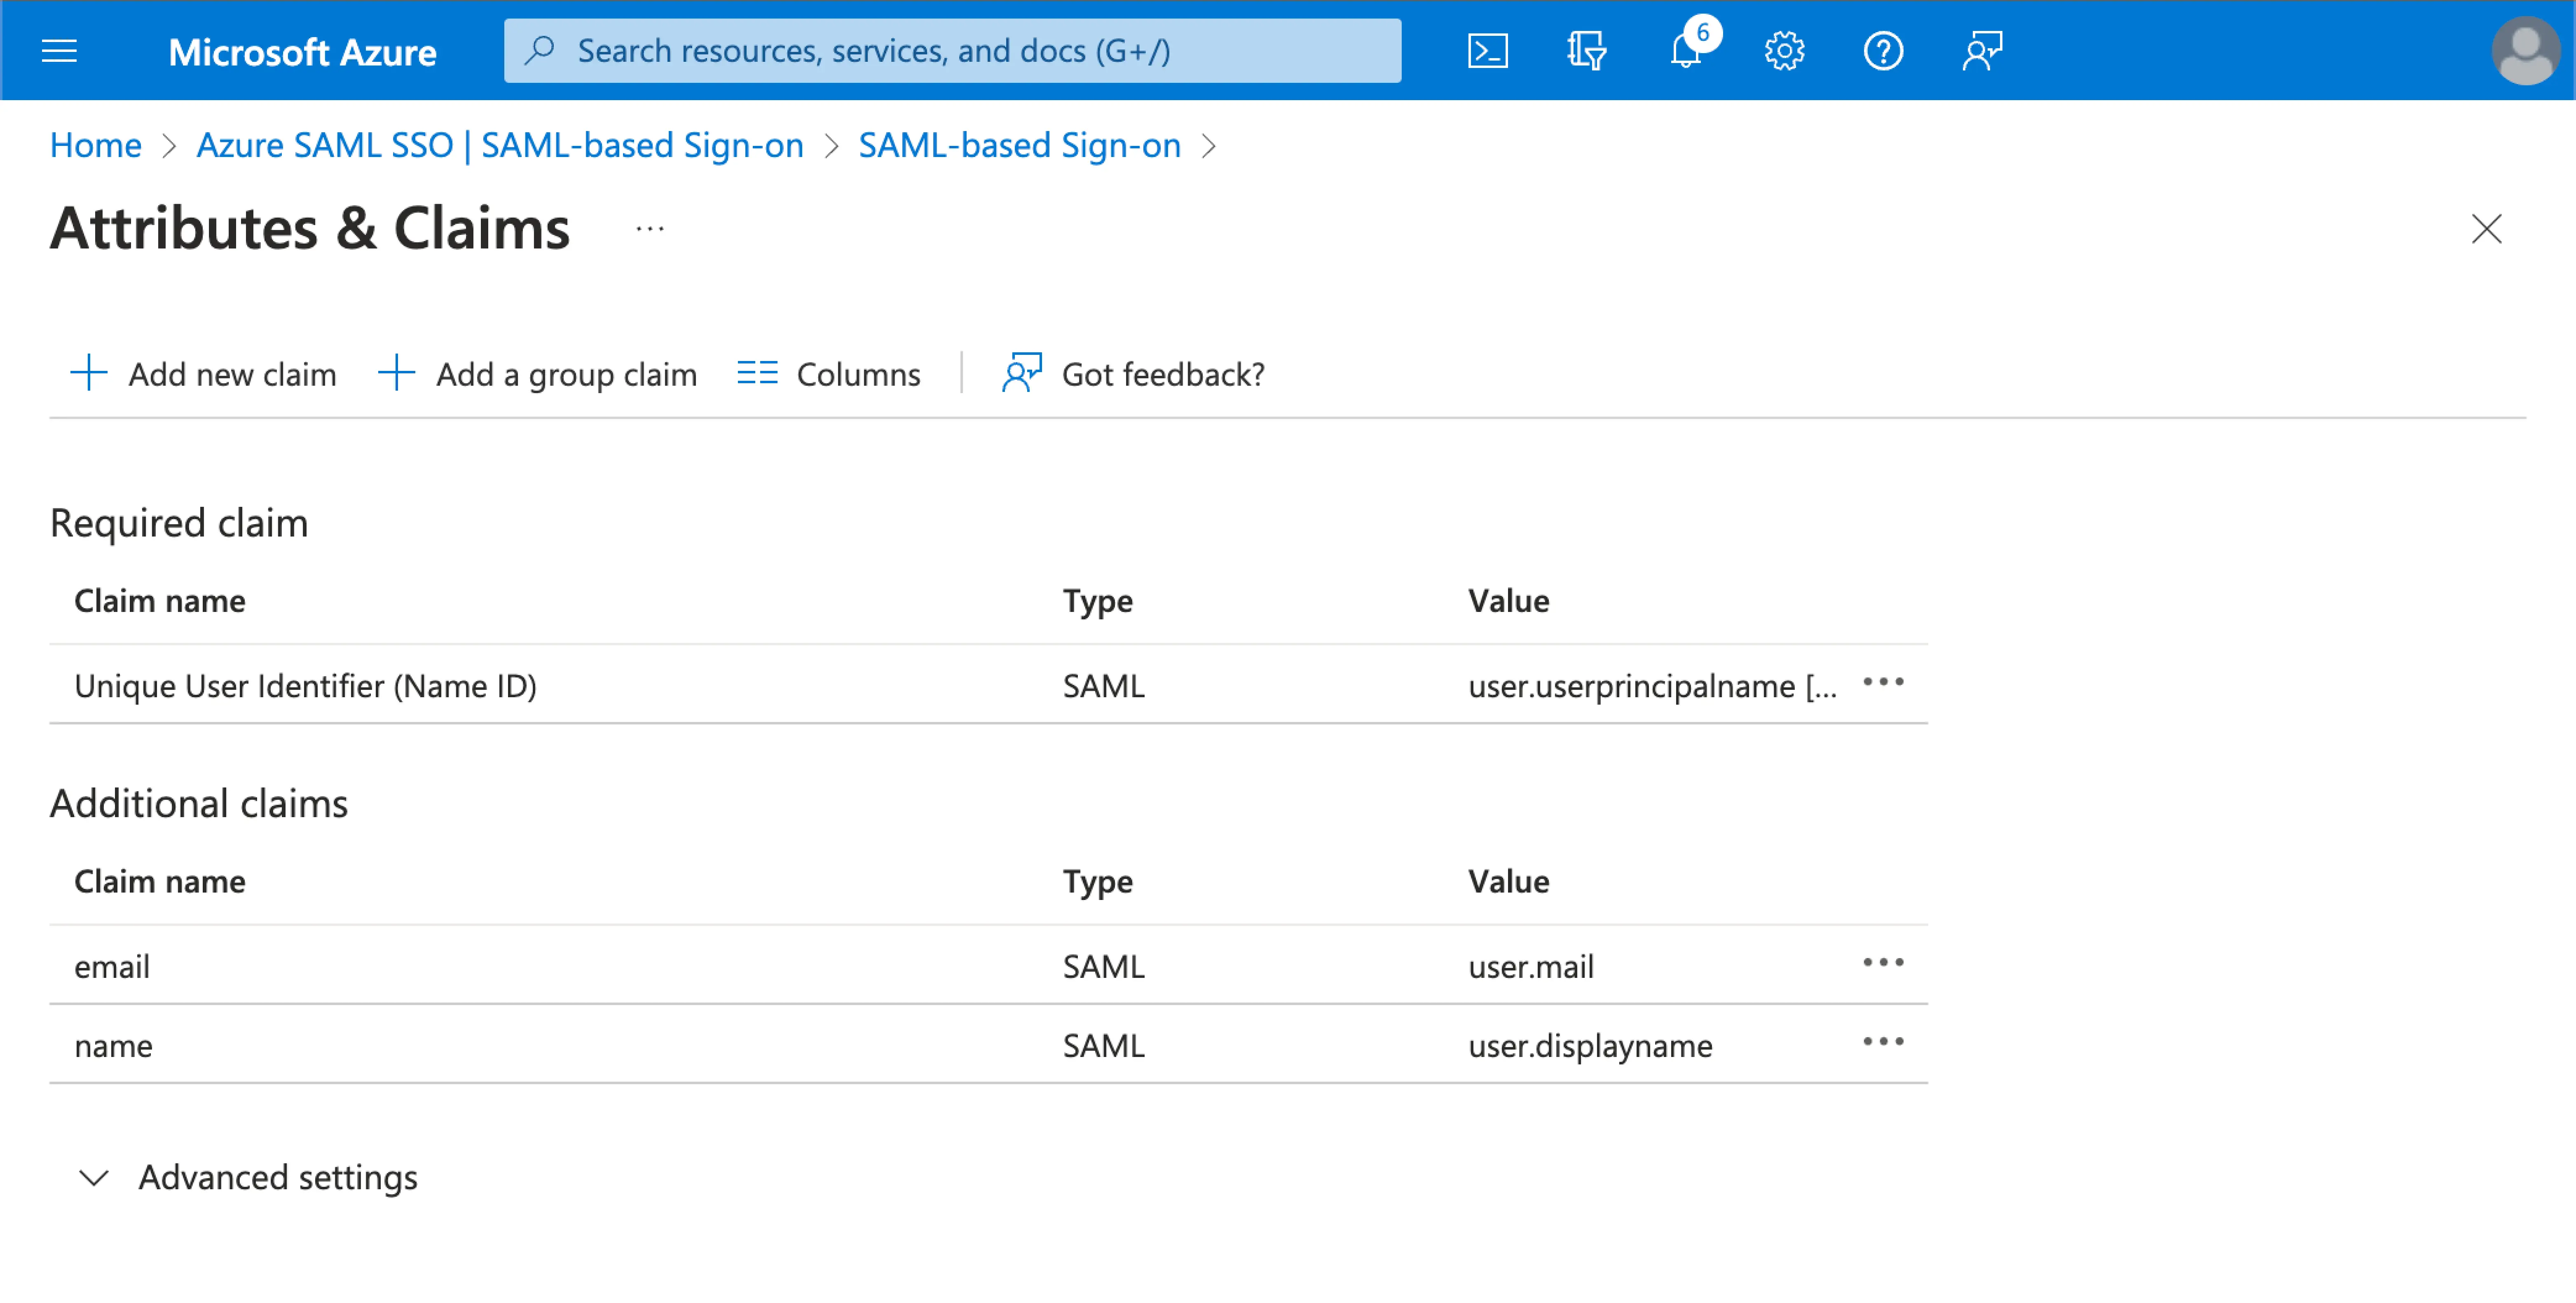
Visit the
Attributes & Claimssection of your Azure AD SSO application.Copy the following attribute names (with namespace prefix) and paste them into the corresponding fields in Logto.
http://schemas.xmlsoap.org/ws/2005/05/identity/claims/emailaddresshttp://schemas.xmlsoap.org/ws/2005/05/identity/claims/name(Recommendation: update this attribute value map touser.displaynamefor better user experience)a

-
Map the AzureAD user attributes to Logto user attributes at the AzureAD side.
Visit the
Attributes & Claimssection of your Azure AD SSO application.Click on
Edit, and update theAdditional claimsfields based on the Logto user attributes settings:- update the claim name value based on the Logto user attributes settings.
- remove the namespace prefix.
- click
Saveto continue.
Should end up with the following settings:
You may also specify additional user attributes on the Azure AD side. Logto will keep a record of the original user attributes returned from IdP under the user's sso_identity field.
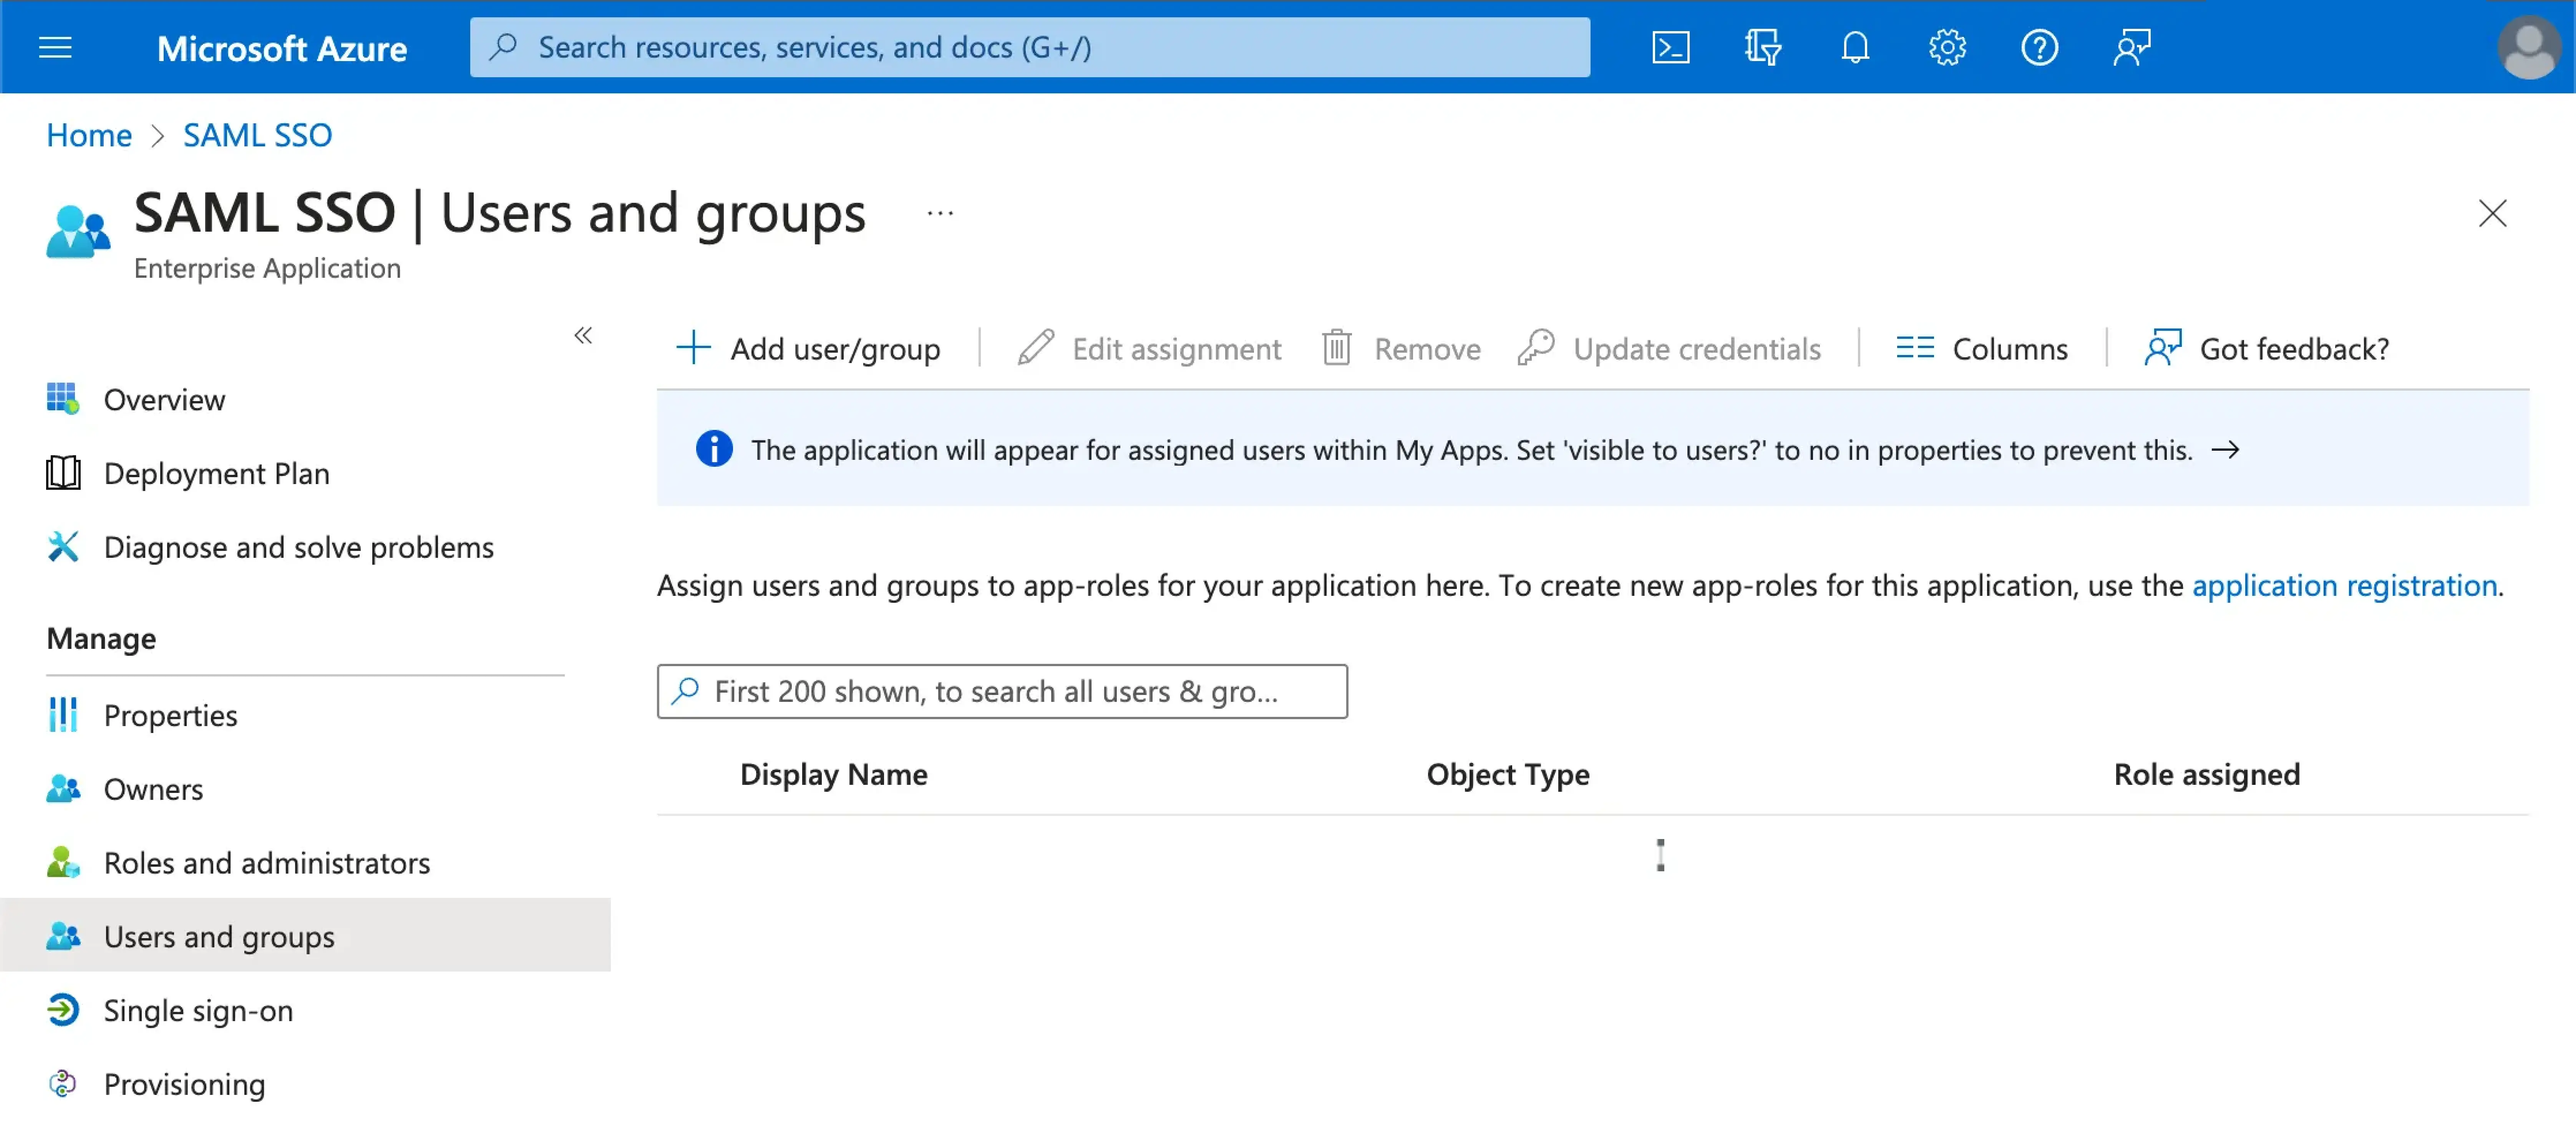
Step 4: Assign users to the Azure AD SSO application
Visit the Users and groups section of your Azure AD SSO application. Click on Add user/group to assign users to the Azure AD SSO application. Only users assigned to your Azure AD SSO application will be able to authenticate through the Azure AD SSO connector.
Step 5: Set email domains and enable the SSO connector
Provide the email domains of your organization at Logto's connector SSO experience tab. This will enable the SSO connector as an authentication method for those users.
Users with email addresses in the specified domains will be redirected to use the SAML SSO connector as their only authentication method.
Please check Azure AD's official documentation for more details about the Azure AD SSO integration.