Java Spring Boot 애플리케이션에 인증 (Authentication)을 추가하세요
이 가이드에서는 Logto를 Java Spring Boot 애플리케이션에 통합하는 방법을 안내합니다.
- 이 가이드의 샘플 코드는 spring-boot-sample github 저장소에서 확인할 수 있습니다.
- Java Spring Boot 애플리케이션에 Logto를 통합하기 위해 공식 SDK가 필요하지 않습니다. Logto와 함께 OIDC 인증 (Authentication) 플로우를 처리하기 위해 Spring Security 및 Spring Security OAuth2 라이브러리를 사용할 것입니다.
사전 준비 사항
- Logto Cloud 계정 또는 셀프 호스팅 Logto.
- 샘플 코드는 Spring Boot securing web starter를 사용하여 생성되었습니다. 웹 애플리케이션이 없다면 해당 안내에 따라 새로 부트스트랩하세요.
- 이 가이드에서는 Spring Security 및 Spring Security OAuth2 라이브러리를 사용하여 Logto와 OIDC 인증 (Authentication) 플로우를 처리합니다. 개념을 이해하기 위해 공식 문서를 꼭 참고하세요.
Java Spring Boot 애플리케이션 구성하기
의존성 추가하기
gradle 사용자의 경우, build.gradle 파일에 다음 의존성을 추가하세요:
dependencies {
  implementation 'org.springframework.boot:spring-boot-starter-thymeleaf'
	implementation 'org.springframework.boot:spring-boot-starter-web'
  implementation 'org.springframework.boot:spring-boot-starter-security'
	implementation 'org.springframework.boot:spring-boot-starter-oauth2-client'
}
maven 사용자의 경우, pom.xml 파일에 다음 의존성을 추가하세요:
<dependency>
  <groupId>org.springframework.boot</groupId>
  <artifactId>spring-boot-starter-thymeleaf</artifactId>
</dependency>
<dependency>
  <groupId>org.springframework.boot</groupId>
  <artifactId>spring-boot-starter-web</artifactId>
</dependency>
<dependency>
  <groupId>org.springframework.boot</groupId>
  <artifactId>spring-boot-starter-security</artifactId>
</dependency>
<dependency>
  <groupId>org.springframework.boot</groupId>
  <artifactId>spring-boot-starter-oauth2-client</artifactId>
</dependency>
OAuth2 클라이언트 구성
Logto Console에서 새로운 Java Spring Boot 애플리케이션을 등록하고, 웹 애플리케이션에 필요한 클라이언트 자격 증명 및 IdP 구성을 받으세요.
application.properties 파일에 다음 구성을 추가하세요:
spring.security.oauth2.client.registration.logto.client-name=logto
spring.security.oauth2.client.registration.logto.client-id={{YOUR_CLIENT_ID}}
spring.security.oauth2.client.registration.logto.client-secret={{YOUR_CLIENT_ID}}
spring.security.oauth2.client.registration.logto.redirect-uri={baseUrl}/login/oauth2/code/{registrationId}
spring.security.oauth2.client.registration.logto.authorization-grant-type=authorization_code
spring.security.oauth2.client.registration.logto.scope=openid,profile,offline_access
spring.security.oauth2.client.registration.logto.provider=logto

spring.security.oauth2.client.provider.logto.issuer-uri={{LOGTO_ENDPOINT}}/oidc
spring.security.oauth2.client.provider.logto.authorization-uri={{LOGTO_ENDPOINT}}/oidc/auth
spring.security.oauth2.client.provider.logto.jwk-set-uri={{LOGTO_ENDPOINT}}/oidc/jwks
구현
자세한 내용을 살펴보기 전에, 최종 사용자 경험에 대한 간단한 개요를 소개합니다. 로그인 과정은 다음과 같이 단순화할 수 있습니다:
- 귀하의 앱이 로그인 메서드를 호출합니다.
- 사용자는 Logto 로그인 페이지로 리디렉션됩니다. 네이티브 앱의 경우, 시스템 브라우저가 열립니다.
- 사용자가 로그인하면, 다시 귀하의 앱(리디렉션 URI로 설정됨)으로 리디렉션됩니다.
리디렉션 기반 로그인에 관하여
- 이 인증 과정은 OpenID Connect (OIDC) 프로토콜을 따르며, Logto는 사용자 로그인을 보호하기 위해 엄격한 보안 조치를 시행합니다.
- 여러 앱이 있는 경우, 동일한 아이덴티티 제공자 (Logto)를 사용할 수 있습니다. 사용자가 한 앱에 로그인하면, Logto는 사용자가 다른 앱에 접근할 때 자동으로 로그인 과정을 완료합니다.
리디렉션 기반 로그인에 대한 이론적 배경과 이점에 대해 더 알고 싶다면, Logto 로그인 경험 설명을 참조하세요.
사용자가 로그인 후 애플리케이션으로 다시 리디렉션될 수 있도록, 이전 단계에서 client.registration.logto.redirect-uri 속성을 사용해 리디렉션 URI를 설정해야 합니다.
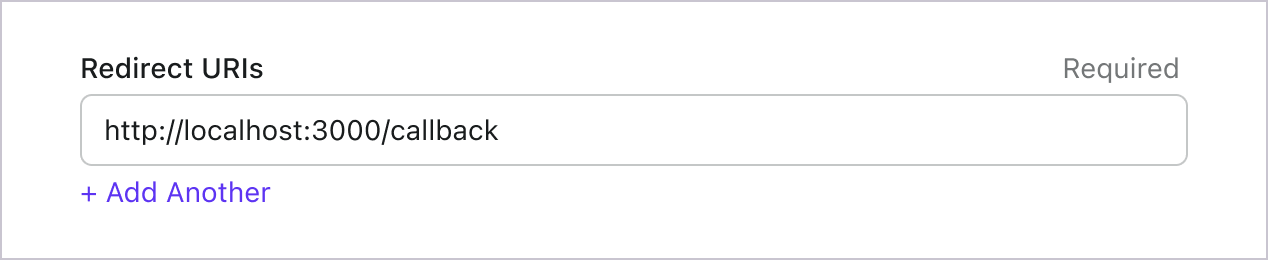
리디렉션 URI 구성
Logto Console의 애플리케이션 세부 정보 페이지로 이동합니다. 리디렉션 URI http://localhost:8080/login/oauth2/code/logto를 추가하세요.
로그인과 마찬가지로, 사용자는 공유 세션에서 로그아웃하기 위해 Logto로 리디렉션되어야 합니다. 완료되면 사용자를 다시 웹사이트로 리디렉션하면 좋습니다. 예를 들어, 로그아웃 후 리디렉션 URI 섹션에 http://localhost:3000/를 추가하세요.
그런 다음 "저장"을 클릭하여 변경 사항을 저장하세요.
WebSecurityConfig 구현하기
프로젝트에 새로운 클래스 WebSecurityConfig 생성하기
WebSecurityConfig 클래스는 애플리케이션의 보안 설정을 구성하는 데 사용됩니다. 인증 (Authentication) 및 인가 (Authorization) 플로우를 처리하는 핵심 클래스입니다. 자세한 내용은 Spring Security 문서를 참고하세요.
package com.example.securingweb;

import org.springframework.context.annotation.Configuration;
import org.springframework.security.config.annotation.web.configuration.EnableWebSecurity;

@Configuration
@EnableWebSecurity

public class WebSecurityConfig {
 // ...
}
idTokenDecoderFactory 빈 생성하기
Logto는 기본 알고리즘으로 ES384를 사용하므로, 기본 OidcIdTokenDecoderFactory를 동일한 알고리즘으로 덮어써야 합니다.
import org.springframework.context.annotation.Bean;
import org.springframework.security.oauth2.client.oidc.authentication.OidcIdTokenDecoderFactory;
import org.springframework.security.oauth2.client.registration.ClientRegistration;
import org.springframework.security.oauth2.jose.jws.SignatureAlgorithm;
import org.springframework.security.oauth2.jwt.JwtDecoderFactory;

public class WebSecurityConfig {
  // ...

  @Bean
  public JwtDecoderFactory<ClientRegistration> idTokenDecoderFactory() {
    OidcIdTokenDecoderFactory idTokenDecoderFactory = new OidcIdTokenDecoderFactory();
    idTokenDecoderFactory.setJwsAlgorithmResolver(clientRegistration -> SignatureAlgorithm.ES384);
    return idTokenDecoderFactory;
  }
}
로그인 성공 이벤트를 처리할 LoginSuccessHandler 클래스 생성하기
로그인에 성공하면 사용자를 /user 페이지로 리디렉션합니다.
package com.example.securingweb;

import java.io.IOException;

import org.springframework.security.core.Authentication;
import org.springframework.security.web.authentication.AuthenticationSuccessHandler;

import jakarta.servlet.ServletException;
import jakarta.servlet.http.HttpServletRequest;
import jakarta.servlet.http.HttpServletResponse;

public class CustomSuccessHandler implements AuthenticationSuccessHandler {
  @Override
  public void onAuthenticationSuccess(HttpServletRequest request, HttpServletResponse response,
      Authentication authentication) throws IOException, ServletException {
    response.sendRedirect("/user");
  }
}
로그아웃 성공 이벤트를 처리할 LogoutSuccessHandler 클래스 생성하기
세션을 삭제하고 사용자를 홈 페이지로 리디렉션합니다.
package com.example.securingweb;

import java.io.IOException;

import org.springframework.security.core.Authentication;
import org.springframework.security.web.authentication.logout.LogoutSuccessHandler;

import jakarta.servlet.ServletException;
import jakarta.servlet.http.HttpServletRequest;
import jakarta.servlet.http.HttpServletResponse;
import jakarta.servlet.http.HttpSession;

public class CustomLogoutHandler implements LogoutSuccessHandler {
  @Override
  public void onLogoutSuccess(HttpServletRequest request, HttpServletResponse response, Authentication authentication)
      throws IOException, ServletException {
    HttpSession session = request.getSession();

    if (session != null) {
      session.invalidate();
    }

    response.sendRedirect("/home");
  }
}
WebSecurityConfig 클래스에 securityFilterChain 추가하기
securityFilterChain은 들어오는 요청과 응답을 처리하는 필터 체인입니다.
securityFilterChain을 구성하여 홈 페이지 접근을 허용하고, 그 외 모든 요청에 인증 (Authentication)을 요구하도록 설정합니다. 로그인 및 로그아웃 이벤트 처리는 CustomSuccessHandler와 CustomLogoutHandler를 사용합니다.
import org.springframework.context.annotation.Bean;
import org.springframework.security.config.annotation.web.builders.HttpSecurity;
import org.springframework.security.web.DefaultSecurityFilterChain;

public class WebSecurityConfig {
  // ...

  @Bean
  public DefaultSecurityFilterChain securityFilterChain(HttpSecurity http) throws Exception {
    http
      .authorizeRequests(authorizeRequests ->
        authorizeRequests
          .antMatchers("/", "/home").permitAll() // 홈 페이지 접근 허용
          .anyRequest().authenticated() // 그 외 모든 요청은 인증 (Authentication) 필요
      )
      .oauth2Login(oauth2Login ->
        oauth2Login
          .successHandler(new CustomSuccessHandler())
      )
      .logout(logout ->
        logout
          .logoutSuccessHandler(new CustomLogoutHandler())
      );
    return http.build();
  }
}
홈 페이지 생성하기
(이미 프로젝트에 홈 페이지가 있다면 이 단계는 건너뛰어도 됩니다)
package com.example.securingweb;

import java.security.Principal;

import org.springframework.stereotype.Controller;
import org.springframework.web.bind.annotation.GetMapping;

@Controller
public class HomeController {
  @GetMapping({ "/", "/home" })
  public String home(Principal principal) {
    return principal != null ? "redirect:/user" : "home";
  }
}
이 컨트롤러는 사용자가 인증 (Authentication)된 경우 사용자 페이지로 리디렉션하고, 그렇지 않으면 홈 페이지를 보여줍니다. 홈 페이지에 로그인 링크를 추가하세요.
<body>
  <h1>Welcome!</h1>

  <p><a th:href="@{/oauth2/authorization/logto}">Logto로 로그인</a></p>
</body>
사용자 페이지 생성하기
사용자 페이지를 처리할 새로운 컨트롤러를 생성하세요:
package com.example.securingweb;

import java.security.Principal;
import java.util.Map;

import org.springframework.security.oauth2.client.authentication.OAuth2AuthenticationToken;
import org.springframework.security.oauth2.core.user.OAuth2User;
import org.springframework.stereotype.Controller;
import org.springframework.ui.Model;
import org.springframework.web.bind.annotation.GetMapping;
import org.springframework.web.bind.annotation.RequestMapping;

@Controller
@RequestMapping("/user")
public class UserController {

  @GetMapping
  public String user(Model model, Principal principal) {
    if (principal instanceof OAuth2AuthenticationToken) {
      OAuth2AuthenticationToken token = (OAuth2AuthenticationToken) principal;
      OAuth2User oauth2User = token.getPrincipal();
      Map<String, Object> attributes = oauth2User.getAttributes();

      model.addAttribute("username", attributes.get("username"));
      model.addAttribute("email", attributes.get("email"));
      model.addAttribute("sub", attributes.get("sub"));
    }

    return "user";
  }
}
사용자가 인증 (Authentication)되면, 인증된 principal 객체에서 OAuth2User 데이터를 가져옵니다. 자세한 내용은 OAuth2AuthenticationToken 및 OAuth2User를 참고하세요.
사용자 데이터를 읽어 user.html 템플릿에 전달합니다.
<body>
  <h1>사용자 정보</h1>
  <div>
    <p>
    <div><strong>이름:</strong> <span th:text="${username}"></span></div>
    <div><strong>이메일:</strong> <span th:text="${email}"></span></div>
    <div><strong>id:</strong> <span th:text="${sub}"></span></div>
    </p>
  </div>

  <form th:action="@{/logout}" method="post">
    <input type="submit" value="로그아웃" />
  </form>
</body>
추가 클레임 (Claim) 요청하기
principal (OAuth2AuthenticationToken)에서 반환된 객체에 일부 사용자 정보가 누락된 것을 발견할 수 있습니다.
이는 OAuth 2.0 및 OpenID Connect (OIDC)가 최소 권한 원칙 (PoLP)을 따르도록 설계되었기 때문이며,
Logto는 이러한 표준을 기반으로 구축되었습니다.
기본적으로 제한된 클레임 (Claim)만 반환됩니다. 더 많은 정보를 원하시면, 추가적인 스코프 (Scope)를 요청하여 더 많은 클레임에 접근할 수 있습니다.
"클레임 (Claim)"은 주체에 대해 주장하는 내용이며, "스코프 (Scope)"는 클레임의 그룹입니다. 현재의 경우, 클레임은 사용자에 대한 정보입니다.
다음은 스코프 - 클레임 관계의 비규범적 예시입니다:
"sub" 클레임은 "주체"를 의미하며, 이는 사용자의 고유 식별자 (즉, 사용자 ID)입니다.
Logto SDK는 항상 세 가지 스코프를 요청합니다: openid, profile, 그리고 offline_access.
추가 사용자 정보를 가져오려면, application.properties 파일에 추가 스코프 (Scope)를 넣을 수 있습니다. 예를 들어, email, phone, urn:logto:scope:organizations 스코프를 요청하려면 다음과 같이 추가하세요:
spring.security.oauth2.client.registration.logto.scope=openid,profile,offline_access,email,phone,urn:logto:scope:organizations
이후 OAuth2User 객체에서 추가 클레임 (Claim)에 접근할 수 있습니다.
애플리케이션 실행 및 테스트하기
애플리케이션을 실행하고 http://localhost:8080으로 이동하세요.
- 로그인 링크가 있는 홈 페이지가 보입니다.
- 링크를 클릭하여 Logto로 로그인하세요.
- 인증 (Authentication)에 성공하면 사용자 정보가 있는 사용자 페이지로 리디렉션됩니다.
- 로그아웃 버튼을 클릭하면 로그아웃되고 다시 홈 페이지로 이동합니다.
스코프 (Scope)와 클레임 (Claim)
Logto는 OIDC 스코프 및 클레임 규약을 사용하여 ID 토큰 및 OIDC userinfo 엔드포인트에서 사용자 정보를 가져오기 위한 스코프 및 클레임을 정의합니다. "스코프"와 "클레임"은 OAuth 2.0 및 OpenID Connect (OIDC) 사양의 용어입니다.
간단히 말해, 스코프를 요청하면 사용자 정보에서 해당하는 클레임을 받게 됩니다. 예를 들어, email 스코프를 요청하면 사용자의 email 및 email_verified 데이터를 받게 됩니다.
지원되는 스코프와 해당 클레임(Claim)의 목록은 다음과 같습니다:
표준 OIDC 스코프
openid (기본값)
| 클레임(Claim) 이름 | 타입 | 설명 |
|---|---|---|
| sub | string | 사용자의 고유 식별자 |
profile (기본값)
| 클레임(Claim) 이름 | 타입 | 설명 |
|---|---|---|
| name | string | 사용자의 전체 이름 |
| username | string | 사용자의 사용자명 |
| picture | string | 최종 사용자의 프로필 사진 URL. 이 URL은 이미지 파일(예: PNG, JPEG, GIF 이미지 파일)을 가리켜야 하며, 이미지를 포함한 웹 페이지가 아니어야 합니다. 이 URL은 최종 사용자를 설명할 때 표시하기에 적합한 프로필 사진을 명확히 참조해야 하며, 최종 사용자가 임의로 촬영한 사진이 아니어야 합니다. |
| created_at | number | 최종 사용자가 생성된 시간. 시간은 Unix epoch (1970-01-01T00:00:00Z) 이후 밀리초로 표시됩니다. |
| updated_at | number | 최종 사용자의 정보가 마지막으로 업데이트된 시간. 시간은 Unix epoch (1970-01-01T00:00:00Z) 이후 밀리초로 표시됩니다. |
기타 표준 클레임(Claim)에는 family_name, given_name, middle_name, nickname, preferred_username, profile, website, gender, birthdate, zoneinfo, locale 등이 있으며, 이들은 userinfo 엔드포인트를 요청하지 않아도 profile 스코프에 포함됩니다. 위의 클레임과의 차이점은, 이 클레임들은 값이 비어 있지 않을 때만 반환되며, 위의 클레임들은 값이 비어 있으면 null을 반환합니다.
표준 클레임(Claim)과 달리, created_at 및 updated_at 클레임은 초 단위가 아닌 밀리초 단위를 사용합니다.
email
| 클레임(Claim) 이름 | 타입 | 설명 |
|---|---|---|
string | 사용자의 이메일 주소 | |
| email_verified | boolean | 이메일 주소가 인증되었는지 여부 |
phone
| 클레임(Claim) 이름 | 타입 | 설명 |
|---|---|---|
| phone_number | string | 사용자의 전화번호 |
| phone_number_verified | boolean | 전화번호가 인증되었는지 여부 |
address
주소 클레임(Claim)의 세부 사항은 OpenID Connect Core 1.0 을 참조하세요.
**(기본값)**으로 표시된 스코프는 항상 Logto SDK에서 요청합니다. 표준 OIDC 스코프의 클레임(Claim)은 해당 스코프가 요청될 때 항상 ID 토큰 (ID token)에 포함되며, 비활성화할 수 없습니다.
확장 스코프
다음 스코프는 Logto에서 확장한 것으로, userinfo 엔드포인트를 통해 클레임(Claim)을 반환합니다. 이 클레임들은 Console > Custom JWT를 통해 ID 토큰 (ID token)에 직접 포함되도록 설정할 수도 있습니다. 자세한 내용은 커스텀 ID 토큰을 참고하세요.
custom_data
| 클레임(Claim) 이름 | 타입 | 설명 | 기본적으로 ID 토큰에 포함됨 |
|---|---|---|---|
| custom_data | object | 사용자의 커스텀 데이터 |
identities
| 클레임(Claim) 이름 | 타입 | 설명 | 기본적으로 ID 토큰에 포함됨 |
|---|---|---|---|
| identities | object | 사용자의 연결된 아이덴티티 | |
| sso_identities | array | 사용자의 연결된 SSO 아이덴티티 |
roles
| 클레임(Claim) 이름 | 타입 | 설명 | 기본적으로 ID 토큰에 포함됨 |
|---|---|---|---|
| roles | string[] | 사용자의 역할 (Role) | ✅ |
urn:logto:scope:organizations
| 클레임(Claim) 이름 | 타입 | 설명 | 기본적으로 ID 토큰에 포함됨 |
|---|---|---|---|
| organizations | string[] | 사용자가 속한 조직 (Organization) ID | ✅ |
| organization_data | object[] | 사용자가 속한 조직 (Organization) 데이터 |
이러한 조직 (Organization) 클레임(Claim)은 불투명 토큰 (Opaque token)을 사용할 때도 userinfo 엔드포인트를 통해 조회할 수 있습니다. 그러나 불투명 토큰 (Opaque token)은 조직 토큰 (Organization token)으로 사용되어 조직별 리소스에 접근할 수 없습니다. 자세한 내용은 불투명 토큰 (Opaque token)과 조직 (Organization)을 참고하세요.
urn:logto:scope:organization_roles
| 클레임(Claim) 이름 | 타입 | 설명 | 기본적으로 ID 토큰에 포함됨 |
|---|---|---|---|
| organization_roles | string[] | 사용자가 속한 조직 (Organization)의 역할 (Role), 형식: <organization_id>:<role_name> | ✅ |
추가 사용자 정보를 요청하기 위해 application.properties 파일에 추가 스코프 및 클레임을 추가하세요. 예를 들어, urn:logto:scope:organizations 스코프를 요청하려면 application.properties 파일에 다음 줄을 추가하세요:
spring.security.oauth2.client.registration.logto.scope=openid,profile,offline_access,urn:logto:scope:organizations
사용자 조직 클레임은 인가 토큰에 포함됩니다.