เพิ่มการยืนยันตัวตนให้กับแอป Java Spring Boot ของคุณ (Add authentication to your Java Spring Boot application)
คู่มือนี้จะแสดงวิธีการผสาน Logto เข้ากับแอปพลิเคชัน Java Spring Boot ของคุณ
- คุณสามารถดูตัวอย่างโค้ดสำหรับคู่มือนี้ได้ที่ spring-boot-sample ใน github repository ของเรา
- ไม่จำเป็นต้องใช้ SDK อย่างเป็นทางการในการผสาน Logto กับแอป Java Spring Boot ของคุณ เราจะใช้ไลบรารี Spring Security และ Spring Security OAuth2 เพื่อจัดการโฟลว์การยืนยันตัวตน OIDC กับ Logto
ข้อกำหนดเบื้องต้น
- บัญชี Logto Cloud หรือ Logto ที่ติดตั้งเอง
- ตัวอย่างโค้ดของเราสร้างขึ้นโดยใช้ Spring Boot securing web starter หากคุณยังไม่มีแอปพลิเคชันเว็บใหม่ ให้ทำตามคำแนะนำเพื่อบูตแอป
- ในคู่มือนี้ เราจะใช้ไลบรารี Spring Security และ Spring Security OAuth2 เพื่อจัดการโฟลว์ OIDC authentication กับ Logto โปรดศึกษาคู่มืออย่างเป็นทางการเพื่อเข้าใจแนวคิด
ตั้งค่าแอป Java Spring Boot ของคุณ
การเพิ่ม dependencies
สำหรับผู้ใช้ gradle ให้เพิ่ม dependencies ต่อไปนี้ในไฟล์ build.gradle ของคุณ:
dependencies {
  implementation 'org.springframework.boot:spring-boot-starter-thymeleaf'
	implementation 'org.springframework.boot:spring-boot-starter-web'
  implementation 'org.springframework.boot:spring-boot-starter-security'
	implementation 'org.springframework.boot:spring-boot-starter-oauth2-client'
}
สำหรับผู้ใช้ maven ให้เพิ่ม dependencies ต่อไปนี้ในไฟล์ pom.xml ของคุณ:
<dependency>
  <groupId>org.springframework.boot</groupId>
  <artifactId>spring-boot-starter-thymeleaf</artifactId>
</dependency>
<dependency>
  <groupId>org.springframework.boot</groupId>
  <artifactId>spring-boot-starter-web</artifactId>
</dependency>
<dependency>
  <groupId>org.springframework.boot</groupId>
  <artifactId>spring-boot-starter-security</artifactId>
</dependency>
<dependency>
  <groupId>org.springframework.boot</groupId>
  <artifactId>spring-boot-starter-oauth2-client</artifactId>
</dependency>
การตั้งค่า OAuth2 Client
ลงทะเบียนแอป Java Spring Boot ใหม่ใน Logto Console และรับ client credential และการตั้งค่า IdP สำหรับแอปเว็บของคุณ
เพิ่มการตั้งค่าต่อไปนี้ในไฟล์ application.properties ของคุณ:
spring.security.oauth2.client.registration.logto.client-name=logto
spring.security.oauth2.client.registration.logto.client-id={{YOUR_CLIENT_ID}}
spring.security.oauth2.client.registration.logto.client-secret={{YOUR_CLIENT_ID}}
spring.security.oauth2.client.registration.logto.redirect-uri={baseUrl}/login/oauth2/code/{registrationId}
spring.security.oauth2.client.registration.logto.authorization-grant-type=authorization_code
spring.security.oauth2.client.registration.logto.scope=openid,profile,offline_access
spring.security.oauth2.client.registration.logto.provider=logto

spring.security.oauth2.client.provider.logto.issuer-uri={{LOGTO_ENDPOINT}}/oidc
spring.security.oauth2.client.provider.logto.authorization-uri={{LOGTO_ENDPOINT}}/oidc/auth
spring.security.oauth2.client.provider.logto.jwk-set-uri={{LOGTO_ENDPOINT}}/oidc/jwks
การนำไปใช้ (Implementation)
ก่อนที่เราจะลงลึกในรายละเอียด นี่คือภาพรวมประสบการณ์ของผู้ใช้ปลายทาง กระบวนการลงชื่อเข้าใช้สามารถสรุปได้ดังนี้:
- แอปของคุณเรียกใช้งานเมธอดลงชื่อเข้าใช้
- ผู้ใช้จะถูกเปลี่ยนเส้นทางไปยังหน้าลงชื่อเข้าใช้ของ Logto สำหรับแอปเนทีฟ ระบบจะเปิดเบราว์เซอร์ของระบบ
- ผู้ใช้ลงชื่อเข้าใช้และถูกเปลี่ยนเส้นทางกลับไปยังแอปของคุณ (ตามที่กำหนดไว้ใน redirect URI)
เกี่ยวกับการลงชื่อเข้าใช้แบบเปลี่ยนเส้นทาง (redirect-based sign-in)
- กระบวนการยืนยันตัวตนนี้เป็นไปตามโปรโตคอล OpenID Connect (OIDC) และ Logto บังคับใช้มาตรการรักษาความปลอดภัยอย่างเข้มงวดเพื่อปกป้องการลงชื่อเข้าใช้ของผู้ใช้
- หากคุณมีหลายแอป คุณสามารถใช้ผู้ให้บริการข้อมูลระบุตัวตน (Logto) เดียวกันได้ เมื่อผู้ใช้ลงชื่อเข้าใช้แอปหนึ่งแล้ว Logto จะดำเนินการลงชื่อเข้าใช้โดยอัตโนมัติเมื่อผู้ใช้เข้าถึงแอปอื่น
หากต้องการเรียนรู้เพิ่มเติมเกี่ยวกับเหตุผลและประโยชน์ของการลงชื่อเข้าใช้แบบเปลี่ยนเส้นทาง โปรดดูที่ อธิบายประสบการณ์การลงชื่อเข้าใช้ของ Logto
เพื่อเปลี่ยนเส้นทางผู้ใช้กลับมายังแอปของคุณหลังจากลงชื่อเข้าใช้ คุณต้องตั้งค่า redirect URI โดยใช้ property client.registration.logto.redirect-uri ในขั้นตอนก่อนหน้า
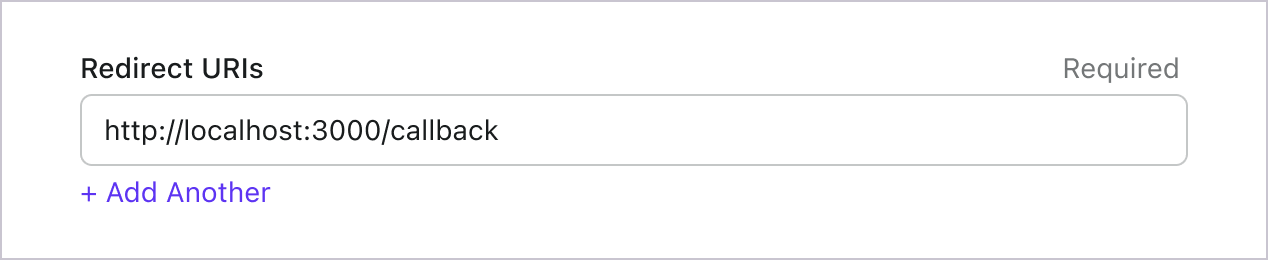
กำหนดค่า Redirect URI
ไปที่หน้ารายละเอียดแอปพลิเคชันใน Logto Console เพิ่ม redirect URI http://localhost:8080/login/oauth2/code/logto
เช่นเดียวกับการลงชื่อเข้าใช้ ผู้ใช้ควรถูกเปลี่ยนเส้นทางไปที่ Logto เพื่อออกจากเซสชันที่ใช้ร่วมกัน เมื่อเสร็จสิ้นแล้ว ควรเปลี่ยนเส้นทางผู้ใช้กลับไปยังเว็บไซต์ของคุณ ตัวอย่างเช่น เพิ่ม http://localhost:3000/ ในส่วน post sign-out redirect URI
จากนั้นคลิก "Save" เพื่อบันทึกการเปลี่ยนแปลง
สร้าง WebSecurityConfig
สร้างคลาสใหม่ชื่อ WebSecurityConfig ในโปรเจกต์ของคุณ
คลาส WebSecurityConfig จะใช้สำหรับตั้งค่าความปลอดภัยของแอปพลิเคชัน เป็นคลาสสำคัญที่จัดการโฟลว์การยืนยันตัวตนและการอนุญาต โปรดดู Spring Security documentation สำหรับรายละเอียดเพิ่มเติม
package com.example.securingweb;

import org.springframework.context.annotation.Configuration;
import org.springframework.security.config.annotation.web.configuration.EnableWebSecurity;

@Configuration
@EnableWebSecurity

public class WebSecurityConfig {
 // ...
}
สร้าง bean idTokenDecoderFactory
จำเป็นต้องทำเพราะ Logto ใช้ ES384 เป็นอัลกอริทึมเริ่มต้น เราต้องเขียนทับ OidcIdTokenDecoderFactory เริ่มต้นเพื่อใช้อัลกอริทึมเดียวกัน
import org.springframework.context.annotation.Bean;
import org.springframework.security.oauth2.client.oidc.authentication.OidcIdTokenDecoderFactory;
import org.springframework.security.oauth2.client.registration.ClientRegistration;
import org.springframework.security.oauth2.jose.jws.SignatureAlgorithm;
import org.springframework.security.oauth2.jwt.JwtDecoderFactory;

public class WebSecurityConfig {
  // ...

  @Bean
  public JwtDecoderFactory<ClientRegistration> idTokenDecoderFactory() {
    OidcIdTokenDecoderFactory idTokenDecoderFactory = new OidcIdTokenDecoderFactory();
    idTokenDecoderFactory.setJwsAlgorithmResolver(clientRegistration -> SignatureAlgorithm.ES384);
    return idTokenDecoderFactory;
  }
}
สร้างคลาส LoginSuccessHandler เพื่อจัดการเหตุการณ์เข้าสู่ระบบสำเร็จ
เราจะเปลี่ยนเส้นทางผู้ใช้ไปยังหน้า /user หลังจากเข้าสู่ระบบสำเร็จ
package com.example.securingweb;

import java.io.IOException;

import org.springframework.security.core.Authentication;
import org.springframework.security.web.authentication.AuthenticationSuccessHandler;

import jakarta.servlet.ServletException;
import jakarta.servlet.http.HttpServletRequest;
import jakarta.servlet.http.HttpServletResponse;

public class CustomSuccessHandler implements AuthenticationSuccessHandler {
  @Override
  public void onAuthenticationSuccess(HttpServletRequest request, HttpServletResponse response,
      Authentication authentication) throws IOException, ServletException {
    response.sendRedirect("/user");
  }
}
สร้างคลาส LogoutSuccessHandler เพื่อจัดการเหตุการณ์ออกจากระบบสำเร็จ
ล้าง session และเปลี่ยนเส้นทางผู้ใช้ไปยังหน้าแรก
package com.example.securingweb;

import java.io.IOException;

import org.springframework.security.core.Authentication;
import org.springframework.security.web.authentication.logout.LogoutSuccessHandler;

import jakarta.servlet.ServletException;
import jakarta.servlet.http.HttpServletRequest;
import jakarta.servlet.http.HttpServletResponse;
import jakarta.servlet.http.HttpSession;

public class CustomLogoutHandler implements LogoutSuccessHandler {
  @Override
  public void onLogoutSuccess(HttpServletRequest request, HttpServletResponse response, Authentication authentication)
      throws IOException, ServletException {
    HttpSession session = request.getSession();

    if (session != null) {
      session.invalidate();
    }

    response.sendRedirect("/home");
  }
}
อัปเดตคลาส WebSecurityConfig ด้วย securityFilterChain
securityFilterChain คือชุดของฟิลเตอร์ที่รับผิดชอบในการประมวลผล request และ response ที่เข้ามา
เราจะตั้งค่า securityFilterChain เพื่ออนุญาตเข้าถึงหน้าแรก และต้องยืนยันตัวตนสำหรับ request อื่น ๆ ทั้งหมด ใช้ CustomSuccessHandler และ CustomLogoutHandler เพื่อจัดการเหตุการณ์เข้าสู่ระบบและออกจากระบบ
import org.springframework.context.annotation.Bean;
import org.springframework.security.config.annotation.web.builders.HttpSecurity;
import org.springframework.security.web.DefaultSecurityFilterChain;

public class WebSecurityConfig {
  // ...

  @Bean
  public DefaultSecurityFilterChain securityFilterChain(HttpSecurity http) throws Exception {
    http
      .authorizeRequests(authorizeRequests ->
        authorizeRequests
          .antMatchers("/", "/home").permitAll() // อนุญาตเข้าถึงหน้าแรก
          .anyRequest().authenticated() // คำขออื่น ๆ ต้องยืนยันตัวตน
      )
      .oauth2Login(oauth2Login ->
        oauth2Login
          .successHandler(new CustomSuccessHandler())
      )
      .logout(logout ->
        logout
          .logoutSuccessHandler(new CustomLogoutHandler())
      );
    return http.build();
  }
}
สร้างหน้าแรก (home page)
(คุณสามารถข้ามขั้นตอนนี้ได้หากมีหน้าแรกในโปรเจกต์ของคุณแล้ว)
package com.example.securingweb;

import java.security.Principal;

import org.springframework.stereotype.Controller;
import org.springframework.web.bind.annotation.GetMapping;

@Controller
public class HomeController {
  @GetMapping({ "/", "/home" })
  public String home(Principal principal) {
    return principal != null ? "redirect:/user" : "home";
  }
}
คอนโทรลเลอร์นี้จะเปลี่ยนเส้นทางผู้ใช้ไปยังหน้าผู้ใช้หากผู้ใช้ได้รับการยืนยันตัวตนแล้ว มิฉะนั้นจะแสดงหน้าแรก เพิ่มลิงก์เข้าสู่ระบบในหน้าแรก
<body>
  <h1>Welcome!</h1>

  <p><a th:href="@{/oauth2/authorization/logto}">Login with Logto</a></p>
</body>
สร้างหน้าผู้ใช้ (user page)
สร้างคอนโทรลเลอร์ใหม่เพื่อจัดการหน้าผู้ใช้:
package com.example.securingweb;

import java.security.Principal;
import java.util.Map;

import org.springframework.security.oauth2.client.authentication.OAuth2AuthenticationToken;
import org.springframework.security.oauth2.core.user.OAuth2User;
import org.springframework.stereotype.Controller;
import org.springframework.ui.Model;
import org.springframework.web.bind.annotation.GetMapping;
import org.springframework.web.bind.annotation.RequestMapping;

@Controller
@RequestMapping("/user")
public class UserController {

  @GetMapping
  public String user(Model model, Principal principal) {
    if (principal instanceof OAuth2AuthenticationToken) {
      OAuth2AuthenticationToken token = (OAuth2AuthenticationToken) principal;
      OAuth2User oauth2User = token.getPrincipal();
      Map<String, Object> attributes = oauth2User.getAttributes();

      model.addAttribute("username", attributes.get("username"));
      model.addAttribute("email", attributes.get("email"));
      model.addAttribute("sub", attributes.get("sub"));
    }

    return "user";
  }
}
เมื่อผู้ใช้ได้รับการยืนยันตัวตนแล้ว เราจะดึงข้อมูล OAuth2User จาก principal ที่ยืนยันตัวตนแล้ว โปรดดู OAuth2AuthenticationToken และ OAuth2User สำหรับรายละเอียดเพิ่มเติม
อ่านข้อมูลผู้ใช้และส่งต่อไปยังเทมเพลต user.html
<body>
  <h1>User Details</h1>
  <div>
    <p>
    <div><strong>name:</strong> <span th:text="${username}"></span></div>
    <div><strong>email:</strong> <span th:text="${email}"></span></div>
    <div><strong>id:</strong> <span th:text="${sub}"></span></div>
    </p>
  </div>

  <form th:action="@{/logout}" method="post">
    <input type="submit" value="Logout" />
  </form>
</body>
ขอข้อมูล claims เพิ่มเติม
คุณอาจพบว่าข้อมูลผู้ใช้บางอย่างหายไปในอ็อบเจกต์ที่ส่งคืนจาก principal (OAuth2AuthenticationToken) สาเหตุเนื่องจาก OAuth 2.0 และ OpenID Connect (OIDC) ถูกออกแบบมาให้สอดคล้องกับหลักการสิทธิ์น้อยที่สุด (principle of least privilege; PoLP) และ Logto ถูกสร้างขึ้นบนมาตรฐานเหล่านี้
โดยปกติแล้ว จะมีการส่งคืนการอ้างสิทธิ์ (claim) แบบจำกัด หากคุณต้องการข้อมูลเพิ่มเติม คุณสามารถร้องขอขอบเขต (scope) เพิ่มเติมเพื่อเข้าถึงการอ้างสิทธิ์ (claim) ที่มากขึ้นได้
"การอ้างสิทธิ์ (Claim)" คือการยืนยันข้อมูลบางอย่างเกี่ยวกับผู้ถูกอ้างถึง (subject); "ขอบเขต (Scope)" คือกลุ่มของการอ้างสิทธิ์ (claim) ในกรณีนี้ การอ้างสิทธิ์ (claim) คือข้อมูลบางอย่างเกี่ยวกับผู้ใช้
ตัวอย่างที่ไม่เป็นทางการของความสัมพันธ์ระหว่างขอบเขต (scope) กับการอ้างสิทธิ์ (claim) มีดังนี้:
การอ้างสิทธิ์ (claim) "sub" หมายถึง "ผู้ถูกอ้างถึง (subject)" ซึ่งคือตัวระบุที่ไม่ซ้ำของผู้ใช้ (เช่น user ID)
Logto SDK จะร้องขอขอบเขต (scope) สามรายการเสมอ ได้แก่ openid, profile และ offline_access
หากต้องการดึงข้อมูลผู้ใช้เพิ่มเติม คุณสามารถเพิ่ม scopes เพิ่มเติมในไฟล์ application.properties ตัวอย่างเช่น หากต้องการขอ scope email, phone และ urn:logto:scope:organizations ให้เพิ่มบรรทัดนี้ในไฟล์ application.properties:
spring.security.oauth2.client.registration.logto.scope=openid,profile,offline_access,email,phone,urn:logto:scope:organizations
จากนั้นคุณสามารถเข้าถึง claims เพิ่มเติมในอ็อบเจกต์ OAuth2User
รันและทดสอบแอปพลิเคชัน
รันแอปพลิเคชันและไปที่ http://localhost:8080
- คุณจะเห็นหน้าแรกพร้อมลิงก์เข้าสู่ระบบ
- คลิกที่ลิงก์เพื่อเข้าสู่ระบบด้วย Logto
- หลังจากยืนยันตัวตนสำเร็จ คุณจะถูกเปลี่ยนเส้นทางไปยังหน้าผู้ใช้พร้อมรายละเอียดผู้ใช้ของคุณ
- คลิกปุ่มออกจากระบบเพื่อออกจากระบบ คุณจะถูกเปลี่ยนเส้นทางกลับไปยังหน้าแรก
ขอบเขต (Scopes) และ การอ้างสิทธิ์ (Claims)
Logto ใช้มาตรฐาน ขอบเขต (scopes) และ การอ้างสิทธิ์ (claims) ของ OIDC เพื่อกำหนดขอบเขตและการอ้างสิทธิ์สำหรับดึงข้อมูลผู้ใช้จากโทเค็น ID (ID token) และ OIDC userinfo endpoint ทั้ง "ขอบเขต (scope)" และ "การอ้างสิทธิ์ (claim)" เป็นคำศัพท์จากข้อกำหนดของ OAuth 2.0 และ OpenID Connect (OIDC)
โดยสรุป เมื่อคุณร้องขอขอบเขต (scope) ใด คุณจะได้รับการอ้างสิทธิ์ (claim) ที่เกี่ยวข้องในข้อมูลผู้ใช้ เช่น หากคุณร้องขอขอบเขต email คุณจะได้รับข้อมูล email และ email_verified ของผู้ใช้
ต่อไปนี้คือรายการขอบเขต (Scopes) ที่รองรับและการอ้างสิทธิ์ (Claims) ที่เกี่ยวข้อง:
ขอบเขต OIDC มาตรฐาน
openid (ค่าเริ่มต้น)
| ชื่อการอ้างสิทธิ์ | ประเภท | คำอธิบาย |
|---|---|---|
| sub | string | ตัวระบุที่ไม่ซ้ำของผู้ใช้ |
profile (ค่าเริ่มต้น)
| ชื่อการอ้างสิทธิ์ | ประเภท | คำอธิบาย |
|---|---|---|
| name | string | ชื่อเต็มของผู้ใช้ |
| username | string | ชื่อผู้ใช้ของผู้ใช้ |
| picture | string | URL ของรูปโปรไฟล์ผู้ใช้ปลายทาง (End-User) URL นี้ต้องอ้างถึงไฟล์รูปภาพ (เช่น PNG, JPEG, หรือ GIF) ไม่ใช่หน้าเว็บที่มีรูปภาพ โปรดทราบว่า URL นี้ควรอ้างอิงถึงรูปโปรไฟล์ของผู้ใช้ปลายทางโดยเฉพาะ เหมาะสำหรับแสดงเมื่ออธิบายผู้ใช้ปลายทาง ไม่ใช่รูปภาพใด ๆ ที่ผู้ใช้ถ่ายมาโดยพลการ |
| created_at | number | เวลาที่สร้างผู้ใช้ปลายทาง เวลานี้แสดงเป็นจำนวนมิลลิวินาทีตั้งแต่ Unix epoch (1970-01-01T00:00:00Z) |
| updated_at | number | เวลาที่ข้อมูลของผู้ใช้ปลายทางถูกอัปเดตล่าสุด เวลานี้แสดงเป็นจำนวนมิลลิวินาทีตั้งแต่ Unix epoch (1970-01-01T00:00:00Z) |
การอ้างสิทธิ์มาตรฐาน อื่น ๆ เช่น family_name, given_name, middle_name, nickname, preferred_username, profile, website, gender, birthdate, zoneinfo, และ locale จะถูกรวมอยู่ในขอบเขต profile ด้วยโดยไม่จำเป็นต้องร้องขอ endpoint userinfo ความแตกต่างเมื่อเทียบกับการอ้างสิทธิ์ข้างต้นคือ การอ้างสิทธิ์เหล่านี้จะถูกส่งกลับเมื่อค่าของมันไม่ว่างเปล่าเท่านั้น ในขณะที่การอ้างสิทธิ์ข้างต้นจะคืนค่า null หากค่าว่างเปล่า
ต่างจากการอ้างสิทธิ์มาตรฐาน การอ้างสิทธิ์ created_at และ updated_at ใช้หน่วยเป็นมิลลิวินาทีแทนที่จะเป็นวินาที
email
| ชื่อการอ้างสิทธิ์ | ประเภท | คำอธิบาย |
|---|---|---|
string | อีเมลของผู้ใช้ | |
| email_verified | boolean | อีเมลได้รับการยืนยันแล้วหรือไม่ |
phone
| ชื่อการอ้างสิทธิ์ | ประเภท | คำอธิบาย |
|---|---|---|
| phone_number | string | เบอร์โทรศัพท์ของผู้ใช้ |
| phone_number_verified | boolean | เบอร์โทรศัพท์ได้รับการยืนยันแล้วหรือไม่ |
address
โปรดดูรายละเอียดของการอ้างสิทธิ์ที่อยู่ได้ที่ OpenID Connect Core 1.0
ขอบเขตที่มีเครื่องหมาย (ค่าเริ่มต้น) จะถูกร้องขอเสมอโดย Logto SDK การอ้างสิทธิ์ภายใต้ขอบเขต OIDC มาตรฐานจะถูกรวมอยู่ในโทเค็น ID เสมอเมื่อมีการร้องขอขอบเขตที่เกี่ยวข้อง — ไม่สามารถปิดได้
ขอบเขตเพิ่มเติม
ขอบเขตต่อไปนี้เป็นขอบเขตที่ Logto ขยายขึ้นและจะคืนค่าการอ้างสิทธิ์ผ่าน userinfo endpoint การอ้างสิทธิ์เหล่านี้ยังสามารถตั้งค่าให้ถูกรวมอยู่ในโทเค็น ID ได้โดยตรงผ่าน Console > Custom JWT ดู Custom ID token สำหรับรายละเอียดเพิ่มเติม
custom_data
| ชื่อการอ้างสิทธิ์ | ประเภท | คำอธิบาย | รวมในโทเค็น ID โดยค่าเริ่มต้น |
|---|---|---|---|
| custom_data | object | ข้อมูลกำหนดเองของผู้ใช้ |
identities
| ชื่อการอ้างสิทธิ์ | ประเภท | คำอธิบาย | รวมในโทเค็น ID โดยค่าเริ่มต้น |
|---|---|---|---|
| identities | object | ข้อมูลตัวตนที่เชื่อมโยงของผู้ใช้ | |
| sso_identities | array | ข้อมูล SSO ที่เชื่อมโยงของผู้ใช้ |
roles
| ชื่อการอ้างสิทธิ์ | ประเภท | คำอธิบาย | รวมในโทเค็น ID โดยค่าเริ่มต้น |
|---|---|---|---|
| roles | string[] | บทบาท (Role) ของผู้ใช้ | ✅ |
urn:logto:scope:organizations
| ชื่อการอ้างสิทธิ์ | ประเภท | คำอธิบาย | รวมในโทเค็น ID โดยค่าเริ่มต้น |
|---|---|---|---|
| organizations | string[] | รหัสองค์กรที่ผู้ใช้สังกัด | ✅ |
| organization_data | object[] | ข้อมูลองค์กรที่ผู้ใช้สังกัด |
การอ้างสิทธิ์ขององค์กรเหล่านี้สามารถดึงได้ผ่าน userinfo endpoint เมื่อใช้ โทเค็นทึบ (Opaque token) อย่างไรก็ตาม โทเค็นทึบไม่สามารถใช้เป็นโทเค็นองค์กรสำหรับเข้าถึงทรัพยากรเฉพาะองค์กร ดู โทเค็นทึบและองค์กร สำหรับรายละเอียดเพิ่มเติม
urn:logto:scope:organization_roles
| ชื่อการอ้างสิทธิ์ | ประเภท | คำอธิบาย | รวมในโทเค็น ID โดยค่าเริ่มต้น |
|---|---|---|---|
| organization_roles | string[] | บทบาทขององค์กรที่ผู้ใช้สังกัดในรูปแบบ <organization_id>:<role_name> | ✅ |
เพิ่มขอบเขตและการอ้างสิทธิ์เพิ่มเติมในไฟล์ application.properties เพื่อร้องขอข้อมูลผู้ใช้เพิ่มเติม ตัวอย่างเช่น หากต้องการร้องขอขอบเขต urn:logto:scope:organizations ให้เพิ่มบรรทัดต่อไปนี้ในไฟล์ application.properties:
spring.security.oauth2.client.registration.logto.scope=openid,profile,offline_access,urn:logto:scope:organizations
การอ้างสิทธิ์ขององค์กรผู้ใช้จะถูกรวมอยู่ในโทเค็นการอนุญาต (authorization token)