Create a custom token claims script
To add custom claims to the access token, you need to provide a script that returns an object containing those claims. The script should be written as a JavaScript function that returns an object with the custom claims.
-
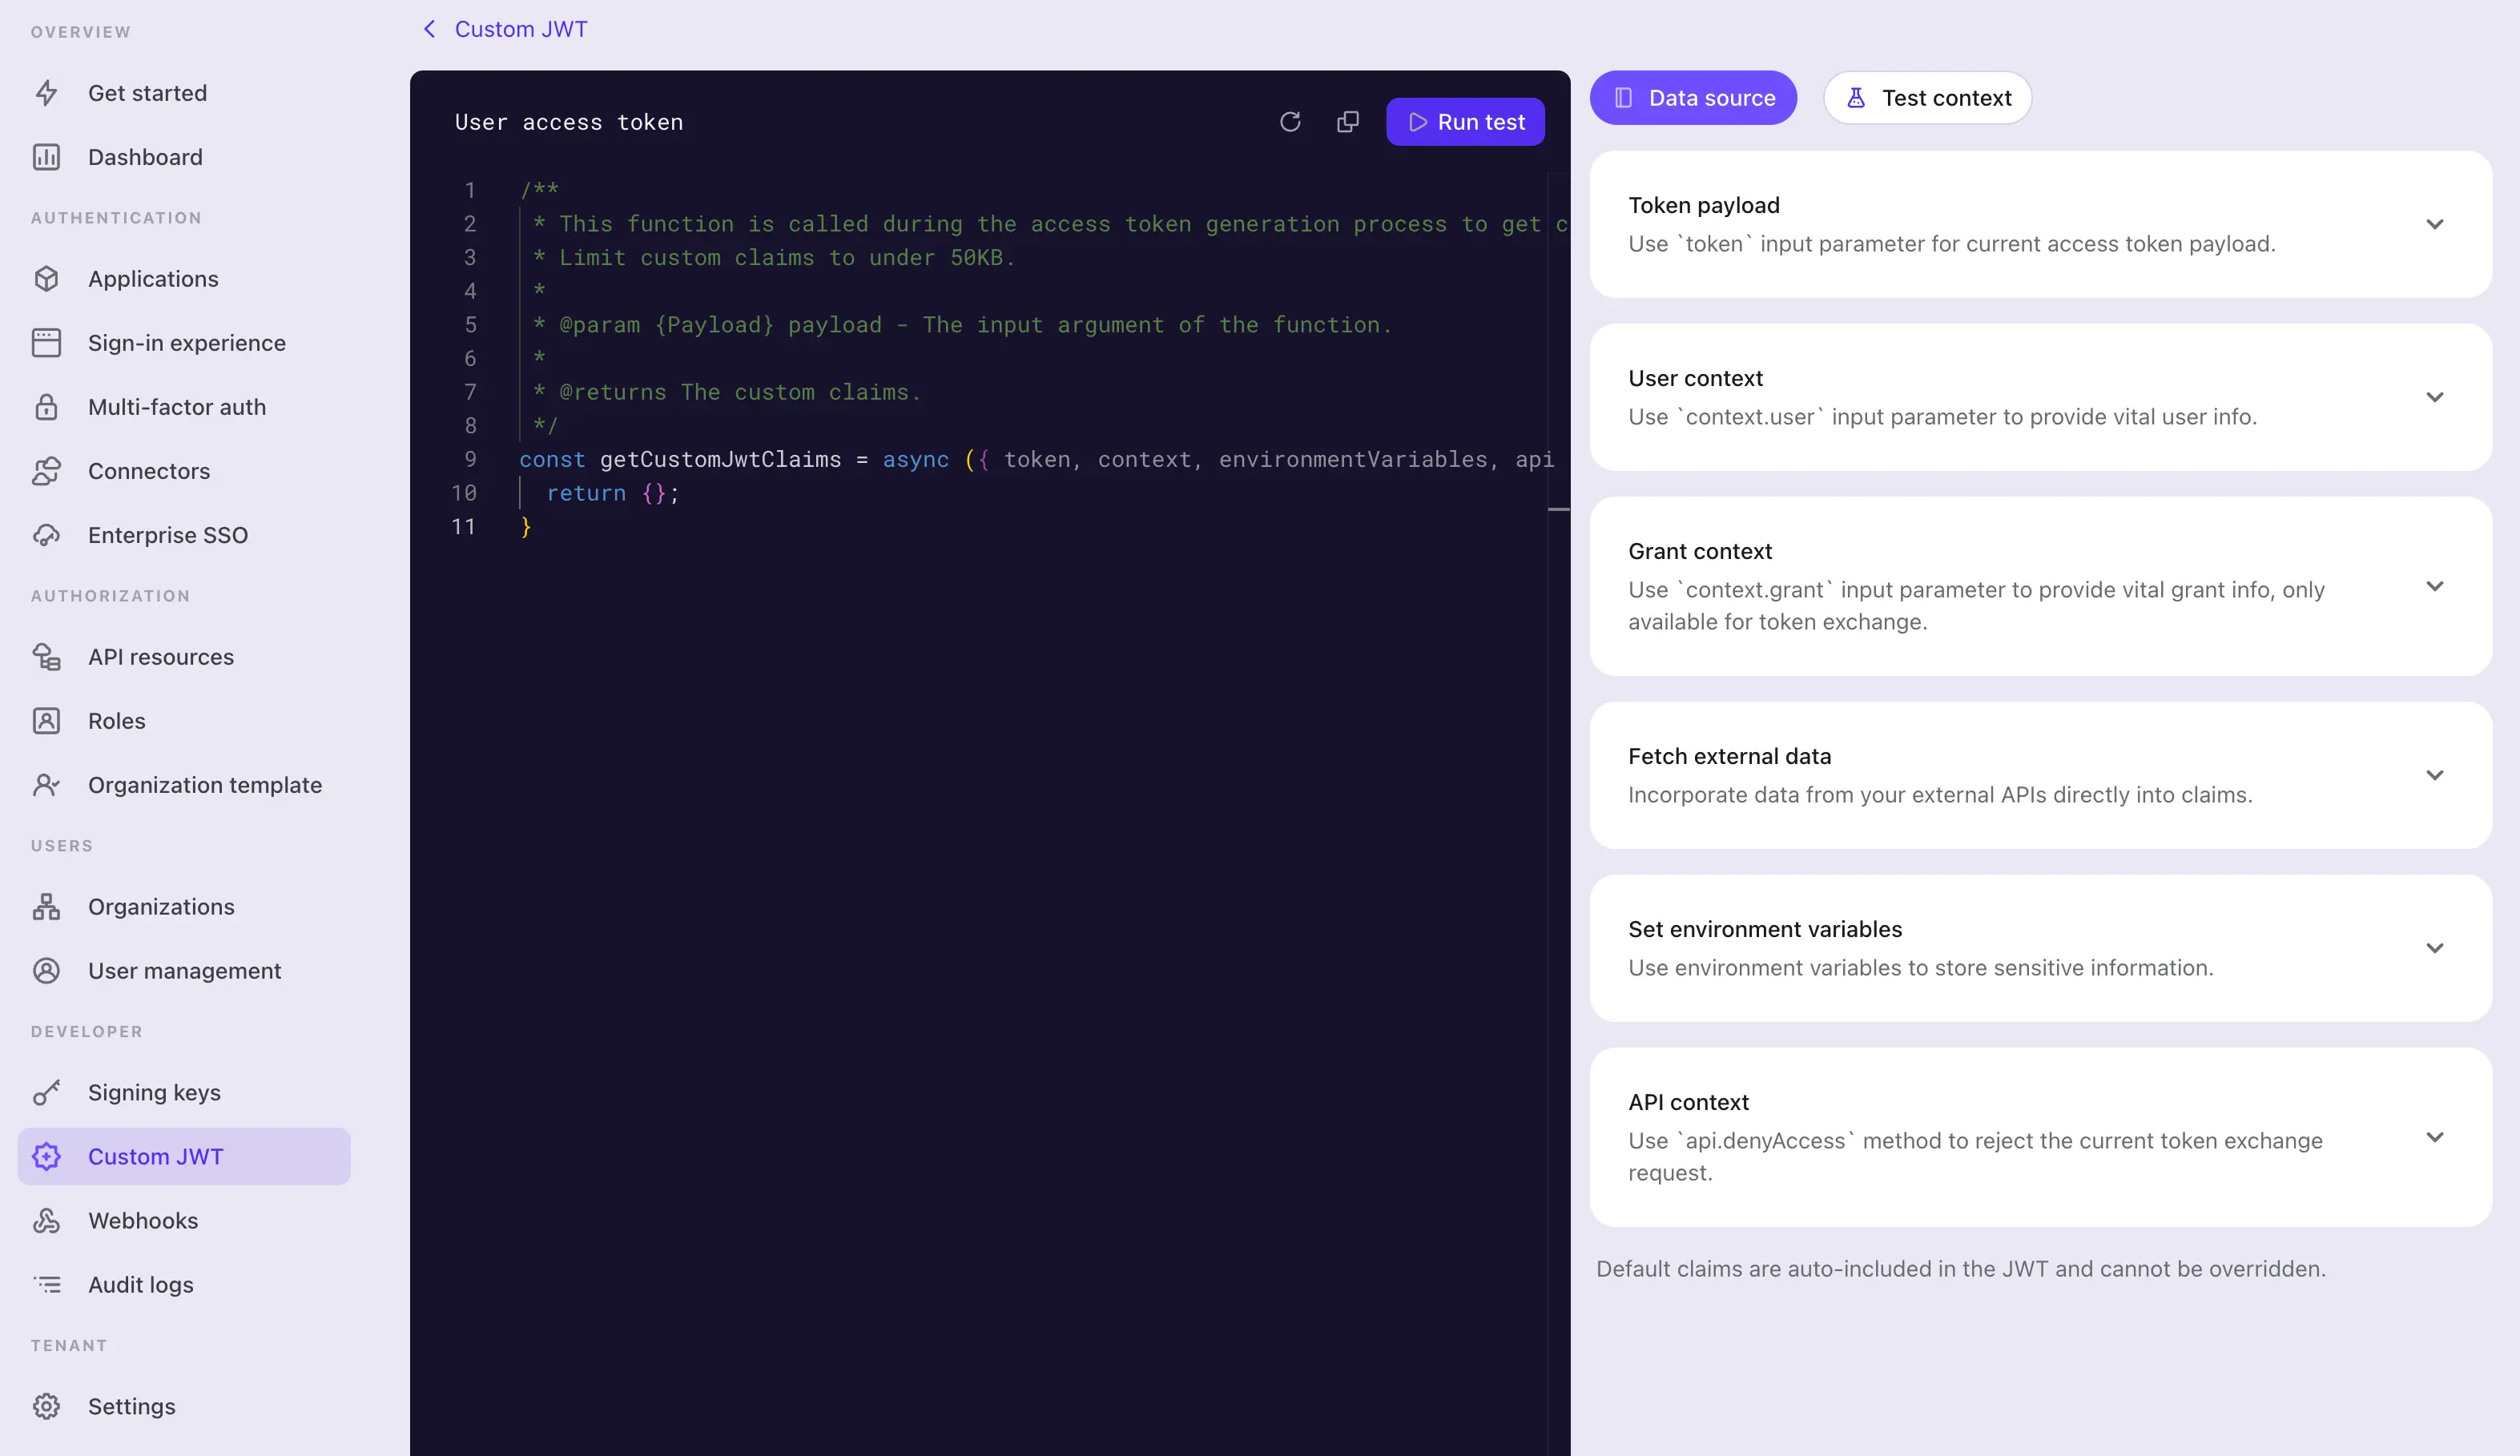
Navigate to Console > Custom JWT.
-
There are two different types of access tokens that you can customize the access token claims for:
- User access token: The access token issued for end users. E.g., for Web applications or mobile applications.
- Machine-to-Machine access token: The access token issued for the services or applications. E.g. for machine-to-machine applications.
Different types of access tokens may have different token payload contexts. You may customize the token claims for each type of access token separately.
Pick any type of access token you want to customize the token claims for, and click on the Add custom claims button to create a new script.
The custom token claims feature is only available to:
- Logto OSS users
- Logto Cloud tenants with development environment
- Logto Cloud paid tenants with production environment (including Pro tenants and Enterprise tenants)
Implement getCustomJwtClaims() function
In the Custom JWT details page, you may find the script editor to write your custom token claims script. The script should be a JavaScript function that returns an object of custom claims.

Step 1: Edit the script
Use the code editor on the left side to modify the script. A default getCustomJwtClaims with an empty object return value is provided for you to start with. You may modify the function to return an object of your own custom claims.
const getCustomJwtClaims = async ({ token, context, environmentVariables }) => {
  return {};
};
This editor uses the JavaScript language server to provide basic syntax highlighting, code completion, and error checking. The input parameter are well typed and documented in jsDoc style. You may use the IntelliSense of the editor to access the properties of the input object correctly. You may find the detailed parameter definitions on the right side of the page.
This function will be exported as a module. Make sure remain the function name as getCustomJwtClaims so the module can export the function correctly.
Step 2: Input parameters
The getCustomJwtClaims function takes an object as the input parameter. The input object contains the following properties:
token
The token payload object. This object contains original token claims and metadata that you may need to access in the script.
You may find the detailed type definition of the token payload object and user data object on the right side of the page. The IntelliSense of the editor will also help you access these properties of the input object correctly.
- User access token data object
Property Description Type jtiThe unique JWT id stringaudThe audience of the token stringscopeThe scopes of the token stringclientIdThe client id of the token stringaccountIdThe user id of the token stringexpiresWithSessionWhether the token will expire with the session booleangrantIdThe current authentication grant id of the token stringgtyThe grant type of the token stringkindThe token kind AccessToken - Machine-to-machine access token data object
Property Description Type jtiThe unique JWT id stringaudThe audience of the token stringscopeThe scopes of the token stringclientIdThe client id of the token stringkindThe token kind ClientCredentials
context (Only available for user access token)
The context object contains the user data and grant data that relevant to the current authorization process.
-
User data object For user access token, Logto provides additional user data context for you to access. The user data object contains all the user profile data and organization membership data you may need to set up the custom claims. Please check Users and Organizations for more details.
-
Grant data object For user access token granted by impersonation token exchange, Logto provides additional grant data context for you to access. The grant data object contains the custom context from the subject token. Please check Impersonation for more details.
-
User interaction data object For a given user access token, there may be instances where you need to access the user's interaction details for the current authorization session. For example, you might need to retrieve the user's enterprise SSO identity used for sign-in. This user interaction data object contains the most recent user submitted interaction data, including:
Property Description Type interactionEventThe interaction event of the current user interaction SignInorRegisteruserIdThe user id of the current user interaction stringverificationRecordsA list of verification records submitted by the user to identify and verify their identity during interactions. VerificationRecord[]Verification record type:
// VerificationType.Password
{
  id: string;
  type: 'Password';
  identifier: {
    type: 'username' | 'email' | 'phone' | 'userId';
    value: string;
  }
  verified: boolean;
}
// VerificationType.EmailVerificationCode
{
id: string;
templateType: 'SignIn' | 'Register' | 'ForgotPassword' | 'Generic';
verified: boolean;
type: 'EmailVerificationCode';
identifier: {
type: 'email';
value: string;
}
}// VerificationType.PhoneVerificationCode
{
id: string;
templateType: 'SignIn' | 'Register' | 'ForgotPassword' | 'Generic';
verified: boolean;
type: 'PhoneVerificationCode';
identifier: {
type: 'phone';
value: string;
}
}// VerificationType.Social
{
id: string;
type: 'Social';
connectorId: string;
socialUserInfo?: {
id: string;
email?: string | undefined;
phone?: string | undefined;
name?: string | undefined;
avatar?: string | undefined;
rawData?: Record<string, unknown> | undefined;
} | undefined;
}// VerificationType.EnterpriseSso
{
id: string;
type: 'EnterpriseSso';
connectorId: string;
enterpriseUserInfo?: {
id: string;
email?: string | undefined;
phone?: string | undefined;
name?: string | undefined;
avatar?: string | undefined;
[key: string]?: unknown;
} | undefined;
issuer?: string | undefined;
}// VerificationType.Totp (MFA)
{
id: string;
type: 'Totp';
userId: string;
verified: boolean;
}// VerificationType.WebAuthn (MFA)
{
id: string;
type: 'WebAuthn';
userId: string;
verified: boolean;
}// VerificationType.BackupCode (MFA)
{
id: string;
type: "BackupCode";
userId: string;
code?: string | undefined;
}// VerificationType.OneTimeToken
{
id: string;
type: "OneTimeToken";
verified: boolean;
identifier: {
type: "email";
value: string;
};
oneTimeTokenContext?: {
jitOrganizationIds?: string[] | undefined;
} | undefined;
}note:There might be multiple verification records in the user interaction data object, especially when the user has gone through multiple sign-in or registration processes.
E.g. the user has signed in using a
Socialverification record, and then bind a new email address through aEmailVerificationCodeverification record, and then verified the MFA status with aTotpverification record. In this case, you may need to handle all the verification records accordingly in your script.Each type of verification record will only be present once in the user interaction data object.
environmentVariables
Use the Set environment variables section on the right to set up the environment variables for your script. You may use these variables to store sensitive information or configuration data that you don't want to hardcode in the script. e.g. API keys, secrets, or URLs.
All the environment variables you set here will be available in the script. Use the environmentVariables object in the input parameter to access these variables.
api
The api object provides a set of utility functions that you may use in your script for additional access control over the token issuing process. The api object contains the following functions:
api.denyAccess(message?: string): void
The api.denyAccess() function allows you to deny the token issuing process with a custom message. You may use this function to enforce additional access validation over the token issuing process.
Step 3: Fetch external data
You may use the node built-in fetch function to fetch external data in your script. The fetch function is a promise-based function that allows you to make HTTP requests to external APIs.
const getCustomJwtClaims = async ({ environmentVariables }) => {
  const response = await fetch('https://api.example.com/data', {
    headers: {
      Authorization: `Bearer ${environmentVariables.API_KEY}`,
    },
  });

  const data = await response.json();

  return {
    data,
  };
};
Be aware, any external data fetching may introduce latency to the token issuing process. Make sure the external API is reliable and fast enough to meet your requirements.
What's more:
- Handle the error and timeout properly in your script to avoid the token issuing process being blocked.
- Use proper authorization headers to protect your external API from unauthorized access.
Step 4: Test the script
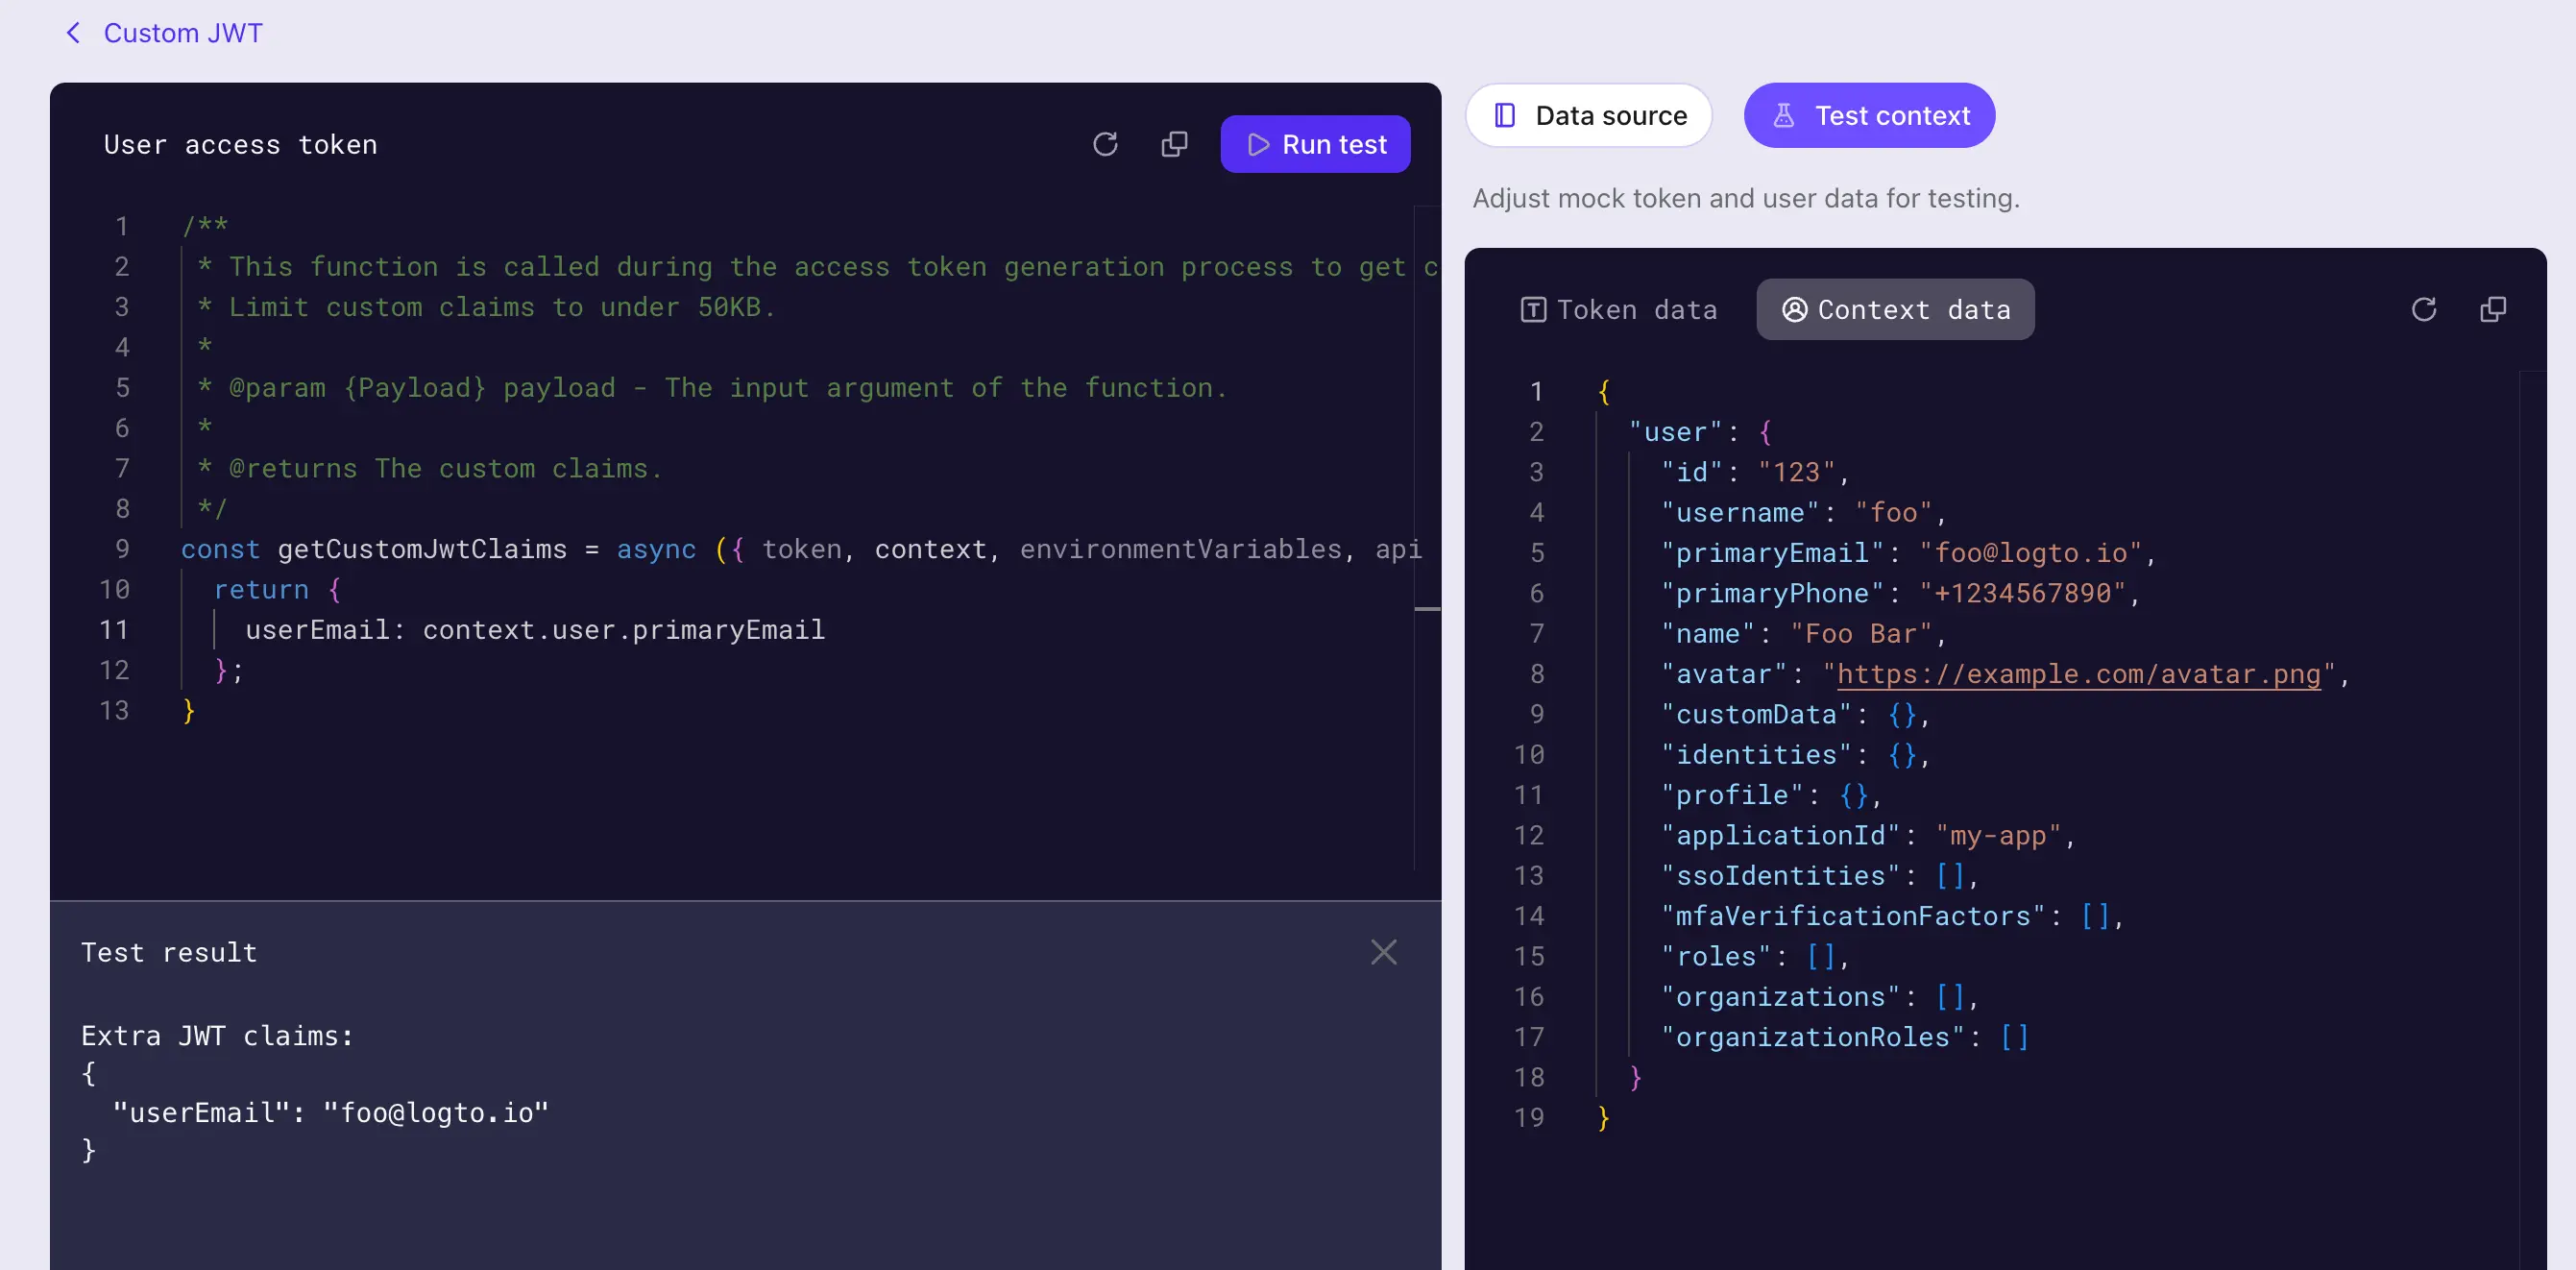
Make sure to test your script before saving it. Click on the Test context tab on the right side of the page to modify the mock token payload and user data context for testing.
Click on the Run test on the right-top corner of the editor to run the script with the mock data. The output of the script will be displayed in the Test Result drawer.

The test result is the output of the getCustomJwtClaims function with the mock data you set ("extra token claims" got after completing the step 3 in the sequence diagram). The real token payload and user data context will be different when the script is executed in the token issuing process.
Click on the Create button to save the script. The custom token claims script will be saved and applied to the access token issuing process.