Logto は、モダンなアプリや SaaS 製品向けに設計された Auth0 の代替です。 Cloud と オープンソース の両方のサービスを提供し、アイデンティティと管理 (IAM) システムを迅速に立ち上げるのに役立ちます。認証 (Authentication)、認可 (Authorization)、マルチテナント管理を すべて一つに まとめて楽しんでください。
Logto Cloud で無料の開発テナントから始めることをお勧めします。これにより、すべての機能を簡単に探索できます。
この記事では、Flutter と Logto を使用して、Okta enterprise SSO サインイン体験(ユーザー認証 (Authentication))を迅速に構築する手順を説明します。
前提条件
Create an application in Logto
Logto は OpenID Connect (OIDC) 認証 (Authentication) と OAuth 2.0 認可 (Authorization) に基づいています。これは、複数のアプリケーション間でのフェデレーテッドアイデンティティ管理をサポートし、一般的にシングルサインオン (SSO) と呼ばれます。
あなたの ネイティブアプリ アプリケーションを作成するには、次の手順に従ってください:
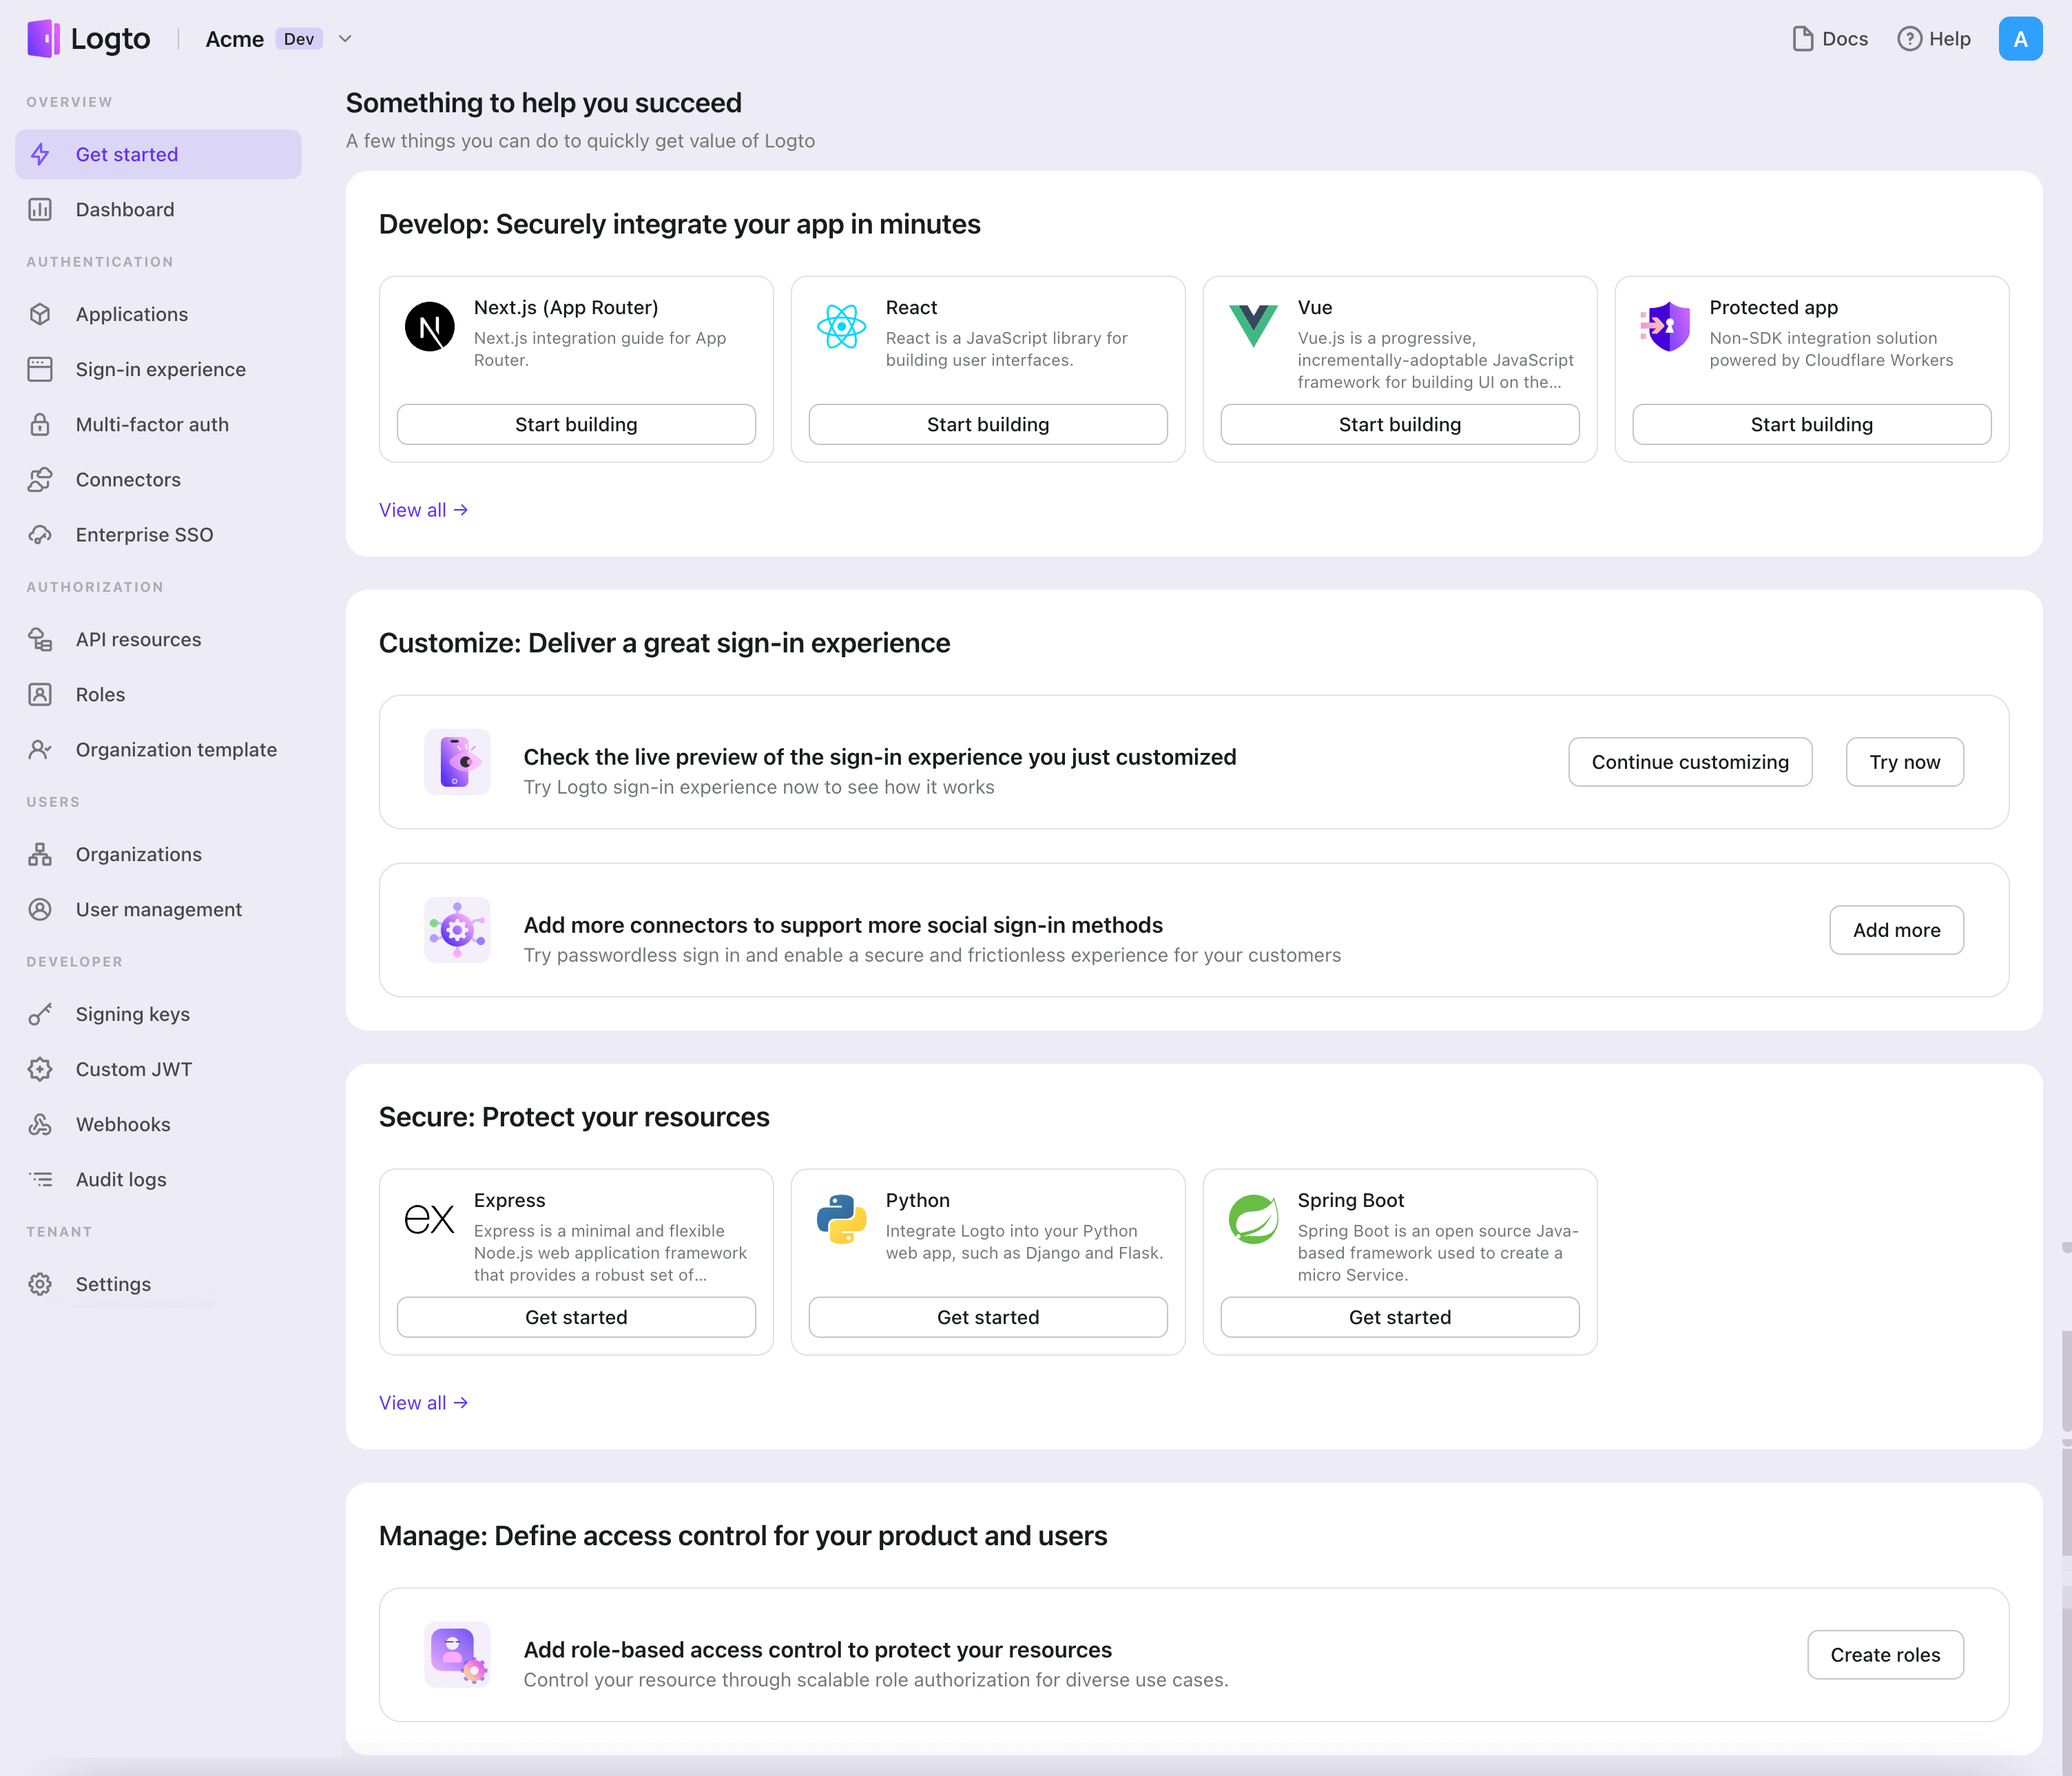
- Logto コンソール を開きます。「Get started」セクションで、「View all」リンクをクリックしてアプリケーションフレームワークのリストを開きます。あるいは、Logto Console > Applications に移動し、「Create application」ボタンをクリックします。
- 開いたモーダルで、左側のクイックフィルターチェックボックスを使用して、利用可能なすべての "ネイティブアプリ" フレームワークをフィルタリングするか、"ネイティブアプリ" セクションをクリックします。"Flutter" フレームワークカードをクリックして、アプリケーションの作成を開始します。
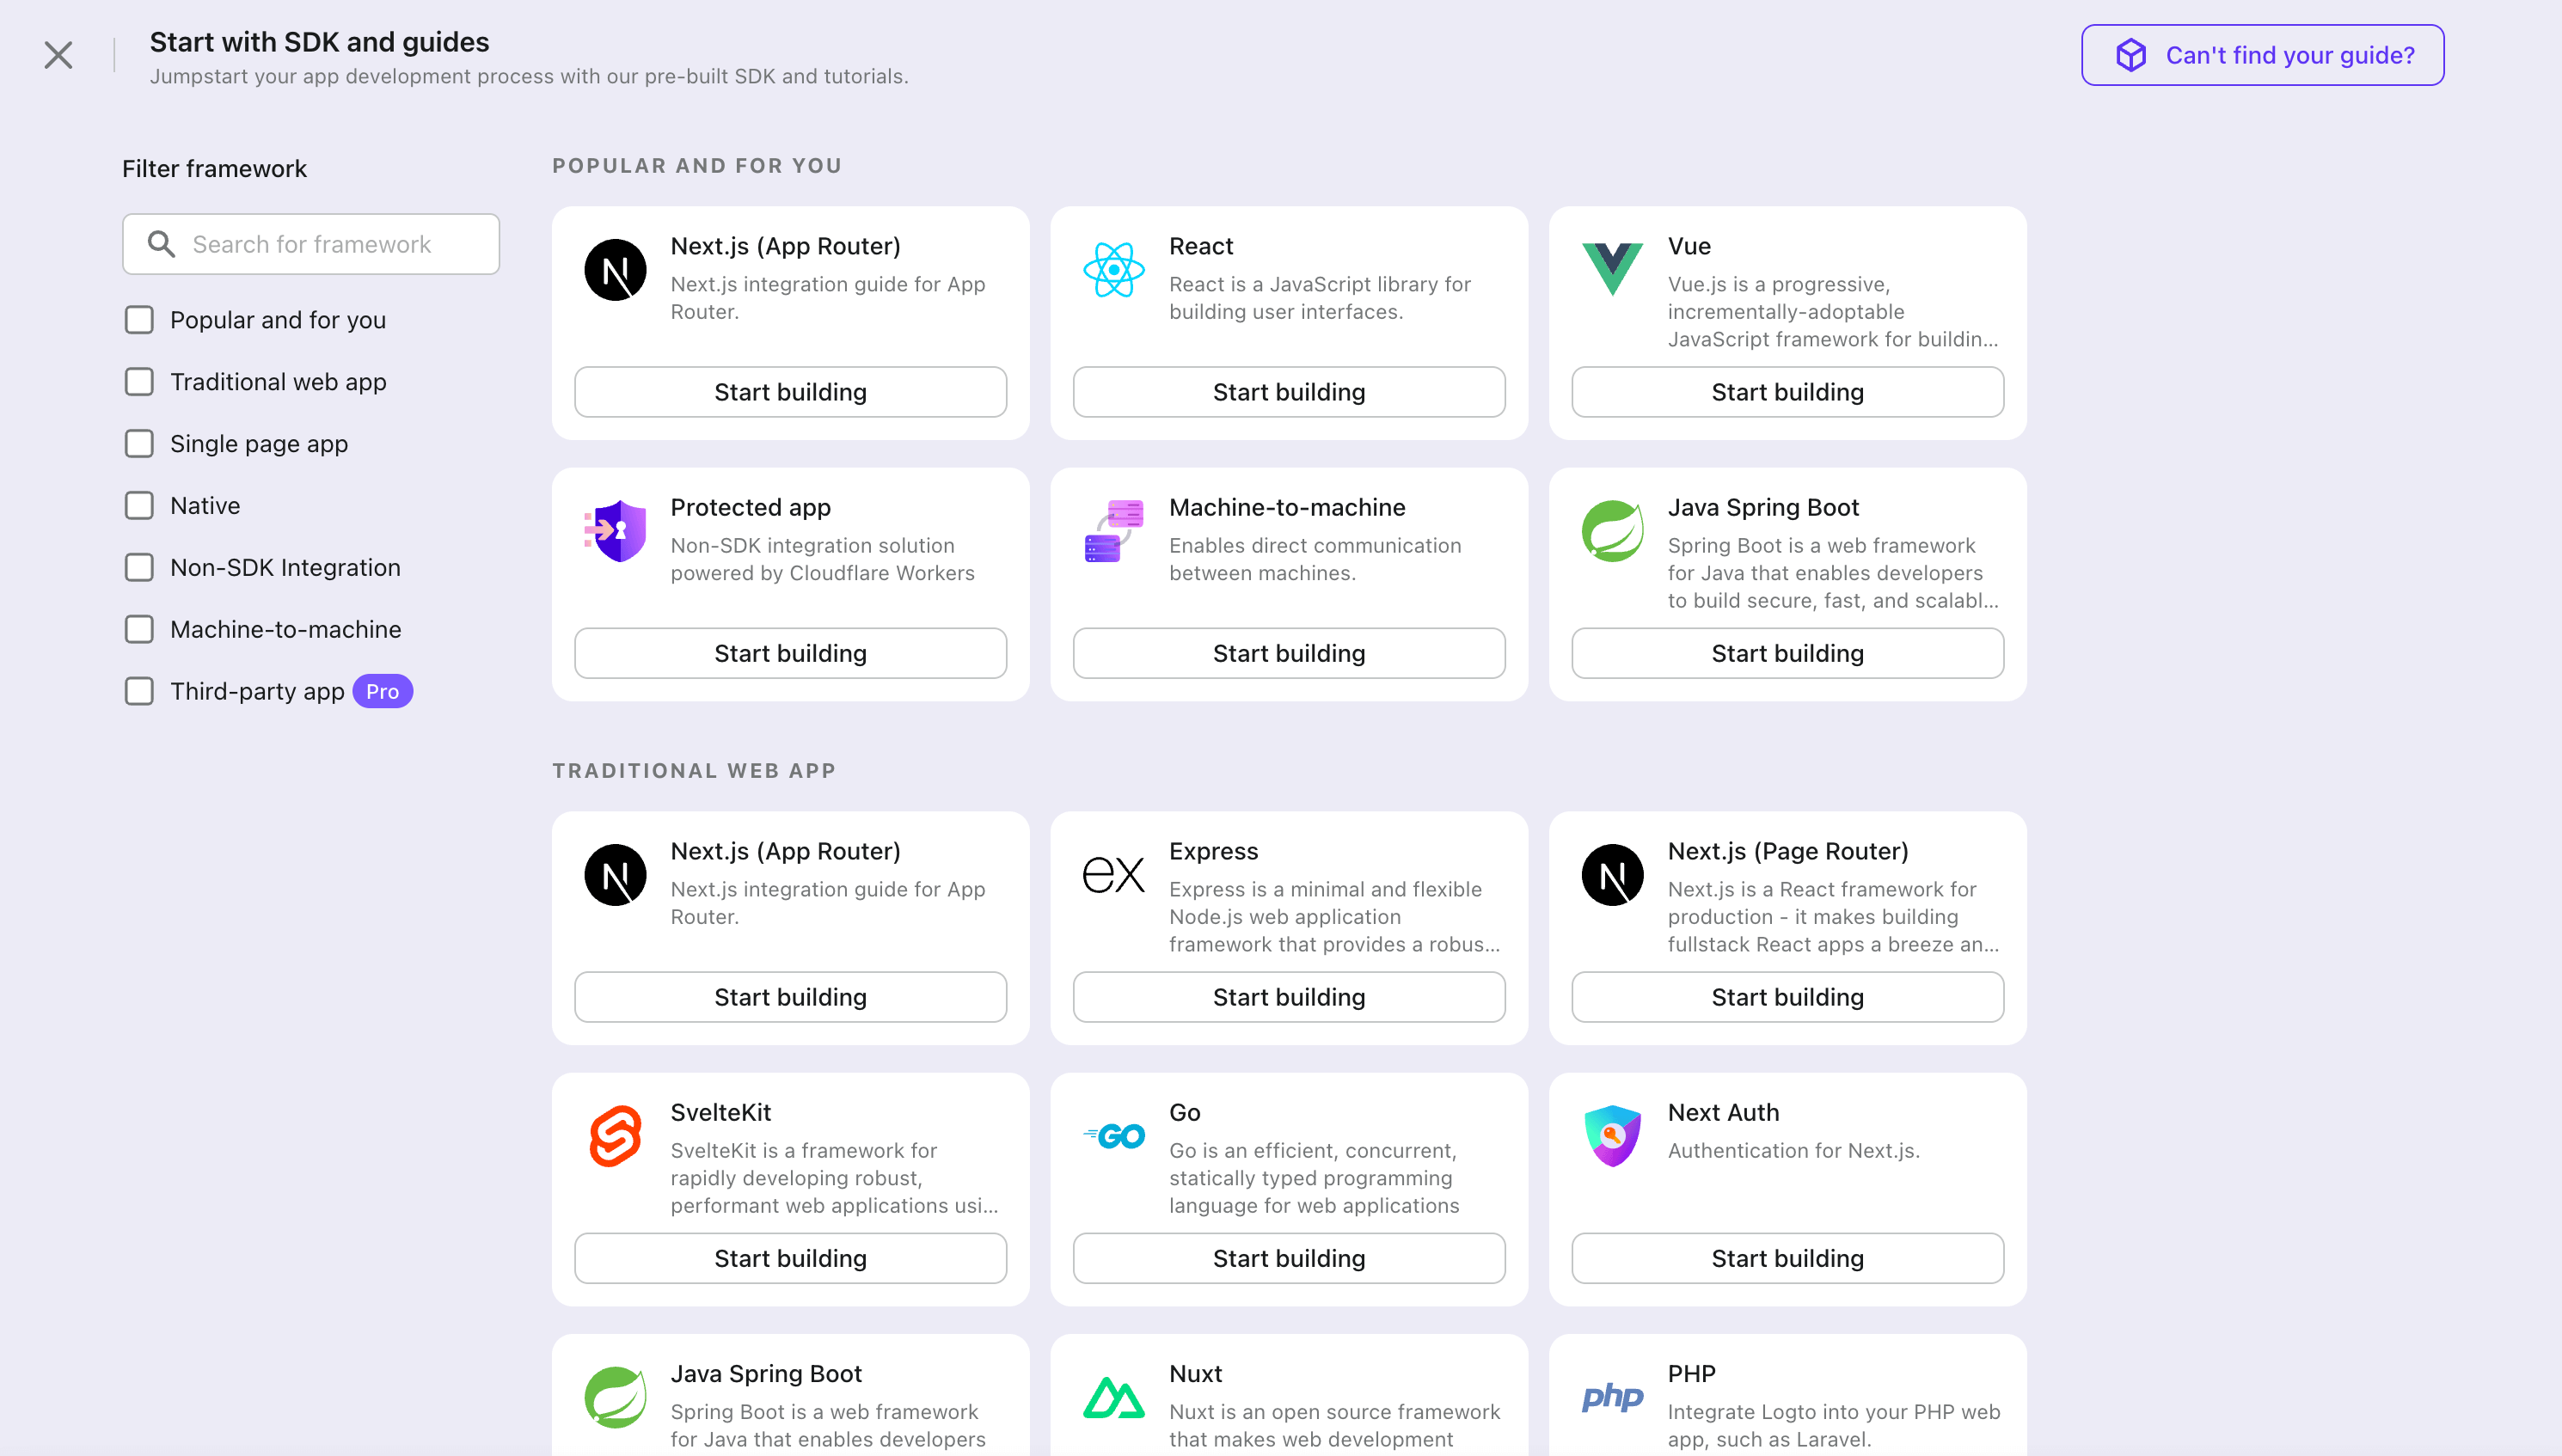
- アプリケーション名を入力します。例:「Bookstore」と入力し、「Create application」をクリックします。
🎉 タダーン!Logto で最初のアプリケーションを作成しました。詳細な統合ガイドを含むお祝いページが表示されます。ガイドに従って、アプリケーションでの体験を確認してください。
Integrate Flutter SDK
- SDK パッケージは pub.dev と Logto の GitHub リポジトリ で利用可能です。
- サンプルプロジェクトは Flutter material を使用して構築されています。pub.dev で見つけることができます。
- この SDK は iOS、Android、Web プラットフォームの Flutter アプリケーションと互換性があります。他のプラットフォームとの互換性はテストされていません。
インストール
- pub.dev
- GitHub
logto_dart_sdk package を pub パッケージマネージャーを使用して直接インストールできます。
プロジェクトのルートで次のコマンドを実行してください:
flutter pub add logto_dart_sdk
または、次の内容を pubspec.yaml ファイルに追加してください:
dependencies:
  logto_dart_sdk: ^3.0.0
その後、次を実行します:
flutter pub get
SDK の独自バージョンをフォークしたい場合は、GitHub からリポジトリを直接クローンできます。
git clone https://github.com/logto-io/dart
依存関係と構成
SDK バージョンの互換性
| Logto SDK バージョン | Dart SDK バージョン | Dart 3.0 互換性 |
|---|---|---|
| < 2.0.0 | >= 2.17.6 < 3.0.0 | false |
| >= 2.0.0 < 3.0.0 | >= 3.0.0 | true |
| >= 3.0.0 | >= 3.6.0 | true |
flutter_secure_storage のセットアップ
この SDK は、クロスプラットフォームの永続的なセキュアトークンストレージを実装するために flutter_secure_storage を使用しています。
- iOS では Keychain が使用されます。
- Android では AES 暗号化が使用されます。
Android バージョンの設定
プロジェクトの android/app/build.gradle ファイルで android:minSdkVersion を >= 18 に設定します。
  android {
      ...

      defaultConfig {
          ...
          minSdkVersion 18
          ...
      }
  }
Android での自動バックアップの無効化
デフォルトでは、Android は Google Drive にデータをバックアップします。これにより、例外 java.security.InvalidKeyException:Failed が発生する可能性があります。これを避けるために、
-
自動バックアップを無効にするには、アプリのマニフェストファイルに移動し、
android:allowBackupとandroid:fullBackupContent属性をfalseに設定します。AndroidManifest.xml<manifest ... >
...
<application
android:allowBackup="false"
android:fullBackupContent="false"
...
>
...
</application>
</manifest> -
FlutterSecureStorageからsharedprefsを除外します。アプリのために
android:fullBackupContentを無効にするのではなく保持する必要がある場合は、バックアップからsharedprefsディレクトリを除外できます。 詳細は Android ドキュメント を参照してください。AndroidManifest.xml ファイルで、次の例のように
<application>要素に android:fullBackupContent 属性を追加します。この属性は、バックアップルールを含む XML ファイルを指します。AndroidManifest.xml<application ...
android:fullBackupContent="@xml/backup_rules">
</application>res/xml/ディレクトリに@xml/backup_rulesという名前の XML ファイルを作成します。このファイルに<include>と<exclude>要素を使用してルールを追加します。次のサンプルは、device.xml を除くすべての共有設定をバックアップします:@xml/backup_rules<?xml version="1.0" encoding="utf-8"?>
<full-backup-content>
<exclude domain="sharedpref" path="FlutterSecureStorage"/>
</full-backup-content>
詳細については、flutter_secure_storage を確認してください。
flutter_web_auth_2 のセットアップ
この SDK は、Logto でユーザーを認証 (Authentication) するために flutter_web_auth_2 を使用しています。このパッケージは、システム WebView またはブラウザを使用して Logto でユーザーを認証 (Authentication) するための簡単な方法を提供します。
このプラグインは、iOS 12+ および macOS 10.15+ では ASWebAuthenticationSession を、iOS 11 では SFAuthenticationSession を、Android では Chrome Custom Tabs を使用し、Web では新しいウィンドウを開きます。
-
iOS: 追加のセットアップは不要
-
Android: Android でコールバック URL を登録
Logto のサインイン Web ページからコールバック URL をキャプチャするために、サインイン redirectUri を
AndroidManifest.xmlファイルに登録する必要があります。AndroidManifest.xml<manifest>
<application>
<activity
android:name="com.linusu.flutter_web_auth_2.CallbackActivity"
android:exported="true">
<intent-filter android:label="flutter_web_auth_2">
<action android:name="android.intent.action.VIEW" />
<category android:name="android.intent.category.DEFAULT" />
<category android:name="android.intent.category.BROWSABLE" />
<data android:scheme="YOUR_CALLBACK_URL_SCHEME_HERE" />
</intent-filter>
</activity>
</application>
</manifest> -
Web ブラウザ: コールバック URL を処理するエンドポイントを作成
Web プラットフォームを使用している場合、コールバック URL を処理し、
postMessageAPI を使用してアプリケーションに返すエンドポイントを作成する必要があります。callback.html<!doctype html>
<title>Authentication complete</title>
<p>認証 (Authentication) が完了しました。自動的に閉じない場合は、ウィンドウを閉じてください。</p>
<script>
function postAuthenticationMessage() {
const message = {
'flutter-web-auth-2': window.location.href,
};
if (window.opener) {
window.opener.postMessage(message, window.location.origin);
window.close();
} else if (window.parent && window.parent !== window) {
window.parent.postMessage(message, window.location.origin);
} else {
localStorage.setItem('flutter-web-auth-2', window.location.href);
window.close();
}
}
postAuthenticationMessage();
</script>
詳細については、flutter_web_auth_2 パッケージのセットアップガイドを確認してください。
統合
LogtoClient を初期化する
logto_dart_sdk パッケージをインポートし、アプリケーションのルートで LogtoClient インスタンスを初期化します。
import 'package:logto_dart_sdk/logto_dart_sdk.dart';
import 'package:http/http.dart' as http;
void main() async {
WidgetsFlutterBinding.ensureInitialized();
runApp(const MyApp());
}
class MyApp extends StatelessWidget {
const MyApp({Key? key}) : super(key: key);
Widget build(BuildContext context) {
return const MaterialApp(
title: 'Flutter Demo',
home: MyHomePage(title: 'Logto Demo Home Page'),
);
}
}
class MyHomePage extends StatefulWidget {
const MyHomePage({Key? key, required this.title}) : super(key: key);
final String title;
State<MyHomePage> createState() => _MyHomePageState();
}
class _MyHomePageState extends State<MyHomePage> {
late LogtoClient logtoClient;
void render() {
// state change
}
// LogtoConfig
final logtoConfig = const LogtoConfig(
endpoint: "<your-logto-endpoint>",
appId: "<your-app-id>"
);
void _init() {
logtoClient = LogtoClient(
config: logtoConfig,
httpClient: http.Client(), // Optional http client
);
render();
}
void initState() {
super.initState();
_init();
}
// ...
}
サインインを実装する
詳細に入る前に、エンドユーザーの体験について簡単に説明します。サインインプロセスは次のように簡略化できます:
- あなたのアプリがサインインメソッドを呼び出します。
- ユーザーは Logto のサインインページにリダイレクトされます。ネイティブアプリの場合、システムブラウザが開かれます。
- ユーザーがサインインし、あなたのアプリにリダイレクトされます(リダイレクト URI として設定されています)。
リダイレクトベースのサインインについて
- この認証 (Authentication) プロセスは OpenID Connect (OIDC) プロトコルに従い、Logto はユーザーのサインインを保護するために厳格なセキュリティ対策を講じています。
- 複数のアプリがある場合、同じアイデンティティプロバイダー (Logto) を使用できます。ユーザーがあるアプリにサインインすると、Logto は別のアプリにアクセスした際に自動的にサインインプロセスを完了します。
リダイレクトベースのサインインの理論と利点について詳しく知るには、Logto サインイン体験の説明を参照してください。
始める前に、アプリケーションのために管理コンソールでリダイレクト URI を追加する必要があります。
Logto コンソールのアプリケーション詳細ページに切り替えましょう。リダイレクト URI io.logto://callback を追加し、「変更を保存」をクリックします。

- iOS の場合、
ASWebAuthenticationSessionクラスがリダイレクト URI を登録しているかどうかに関係なくリダイレクト URI をリッスンするため、リダイレクト URI スキームは実際には重要ではありません。 - Android の場合、リダイレクト URI スキームは
AndroidManifest.xmlファイルに登録する必要があります。
リダイレクト URI が設定されたら、ページにサインインボタンを追加し、logtoClient.signIn API を呼び出して Logto サインインフローを開始します:
class _MyHomePageState extends State<MyHomePage> {
// ...
final redirectUri = 'io.logto://callback';
Widget build(BuildContext context) {
// ...
Widget signInButton = TextButton(
onPressed: () async {
await logtoClient.signIn(redirectUri);
render();
},
child: const Text('Sign In'),
);
return Scaffold(
appBar: AppBar(
title: Text(widget.title),
),
body: Center(
child: Column(
mainAxisAlignment: MainAxisAlignment.center,
children: <Widget>[
SelectableText('My Demo App'),
signInButton,
],
),
),
);
}
}
サインアウトを実装する
Logto コンソールのアプリケーション詳細ページに切り替えましょう。ポストサインアウトリダイレクト URI
io.logto://callback を追加し、「変更を保存」をクリックします。

ポストサインアウトリダイレクト URI は、サインアウト後にリダイレクトする場所を示す OAuth 2.0 の概念です。
次に、メインページにサインアウトボタンを追加して、ユーザーがアプリケーションからサインアウトできるようにします。
class _MyHomePageState extends State<MyHomePage> {
// ...
final postSignOutRedirectUri = 'io.logto//home';
Widget build(BuildContext context) {
// ...
Widget signOutButton = TextButton(
onPressed: () async {
await logtoClient.signOut(postSignOutRedirectUri);
render();
},
child: const Text('Sign Out'),
);
return Scaffold(
appBar: AppBar(
title: Text(widget.title),
),
body: Center(
child: Column(
mainAxisAlignment: MainAxisAlignment.center,
children: <Widget>[
SelectableText('My Demo App'),
signInButton,
signOutButton,
],
),
),
);
}
}
認証 (Authentication) ステータスを処理する
Logto SDK は、認証 (Authentication) ステータスを確認するための非同期メソッドを提供します。このメソッドは logtoClient.isAuthenticated です。このメソッドは、ユーザーが認証 (Authentication) されている場合は true を、そうでない場合は false を返します。
この例では、認証 (Authentication) ステータスに基づいてサインインボタンとサインアウトボタンを条件付きでレンダリングします。次に、状態変更を処理するために Widget の render メソッドを更新しましょう:
class _MyHomePageState extends State<MyHomePage> {
// ...
bool? isAuthenticated = false;
void render() {
setState(() async {
isAuthenticated = await logtoClient.isAuthenticated;
});
}
Widget build(BuildContext context) {
// ...
return Scaffold(
appBar: AppBar(
title: Text(widget.title),
),
body: Center(
child: Column(
mainAxisAlignment: MainAxisAlignment.center,
children: <Widget>[
SelectableText('My Demo App'),
isAuthenticated == true ? signOutButton : signInButton,
],
),
),
);
}
}
チェックポイント: アプリケーションをテストする
これで、アプリケーションをテストできます:
- アプリケーションを実行すると、サインインボタンが表示されます。
- サインインボタンをクリックすると、SDK がサインインプロセスを初期化し、Logto のサインインページにリダイレクトされます。
- サインインすると、アプリケーションに戻り、サインアウトボタンが表示されます。
- サインアウトボタンをクリックして、トークンストレージをクリアし、サインアウトします。
Add Okta enterprise SSO connector
アクセス管理を簡素化し、大規模なクライアント向けにエンタープライズレベルの保護を得るために、Flutter をフェデレーテッドアイデンティティプロバイダーとして接続します。Logto エンタープライズシングルサインオン (SSO) コネクターは、いくつかのパラメーター入力を許可することで、この接続を数分で確立するのに役立ちます。
エンタープライズ SSO コネクターを追加するには、次の手順に従ってください:
- Logto コンソール > エンタープライズ SSO に移動します。
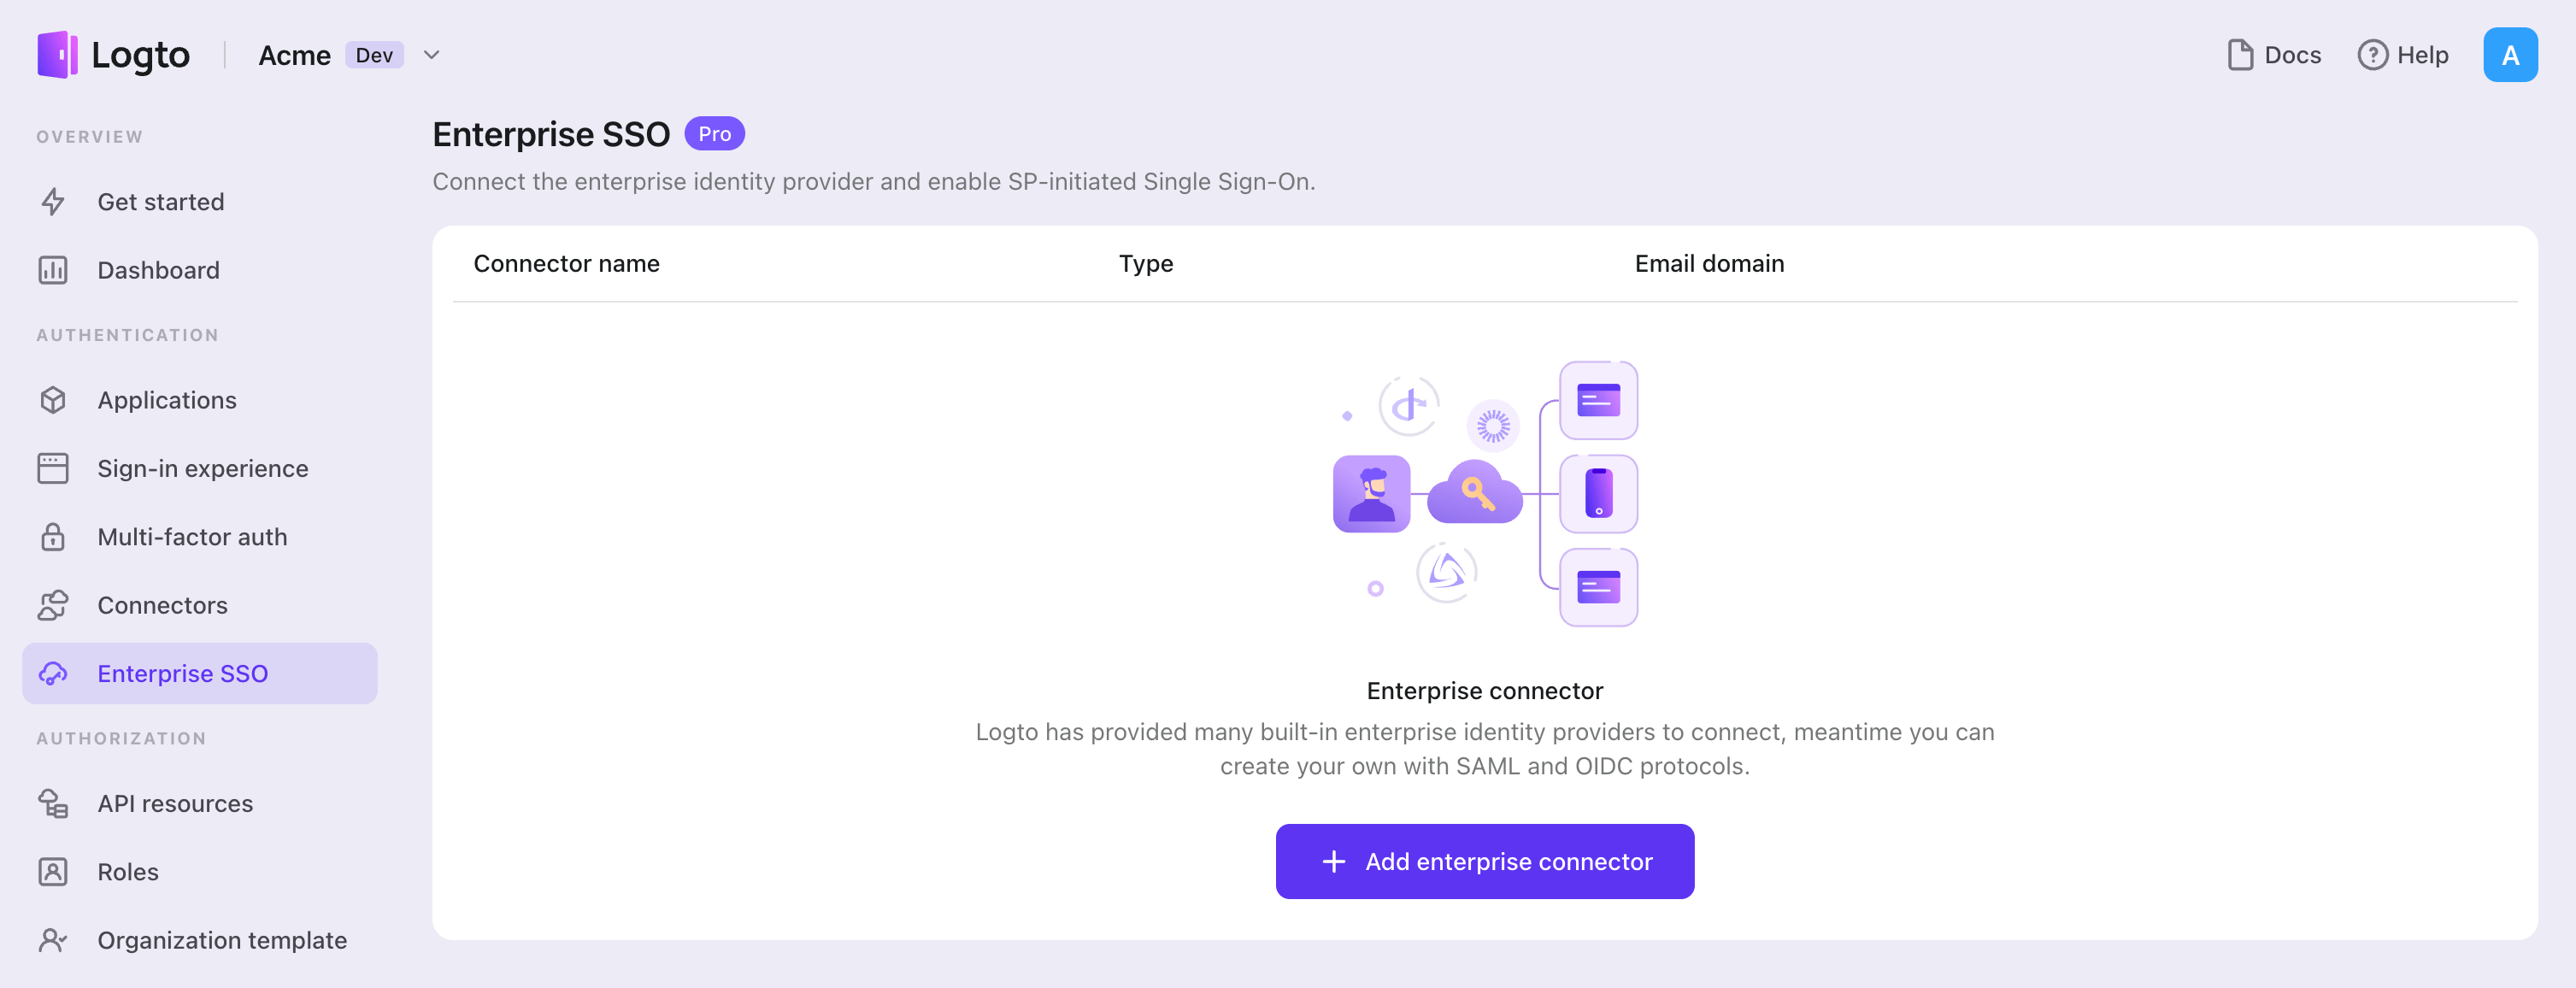
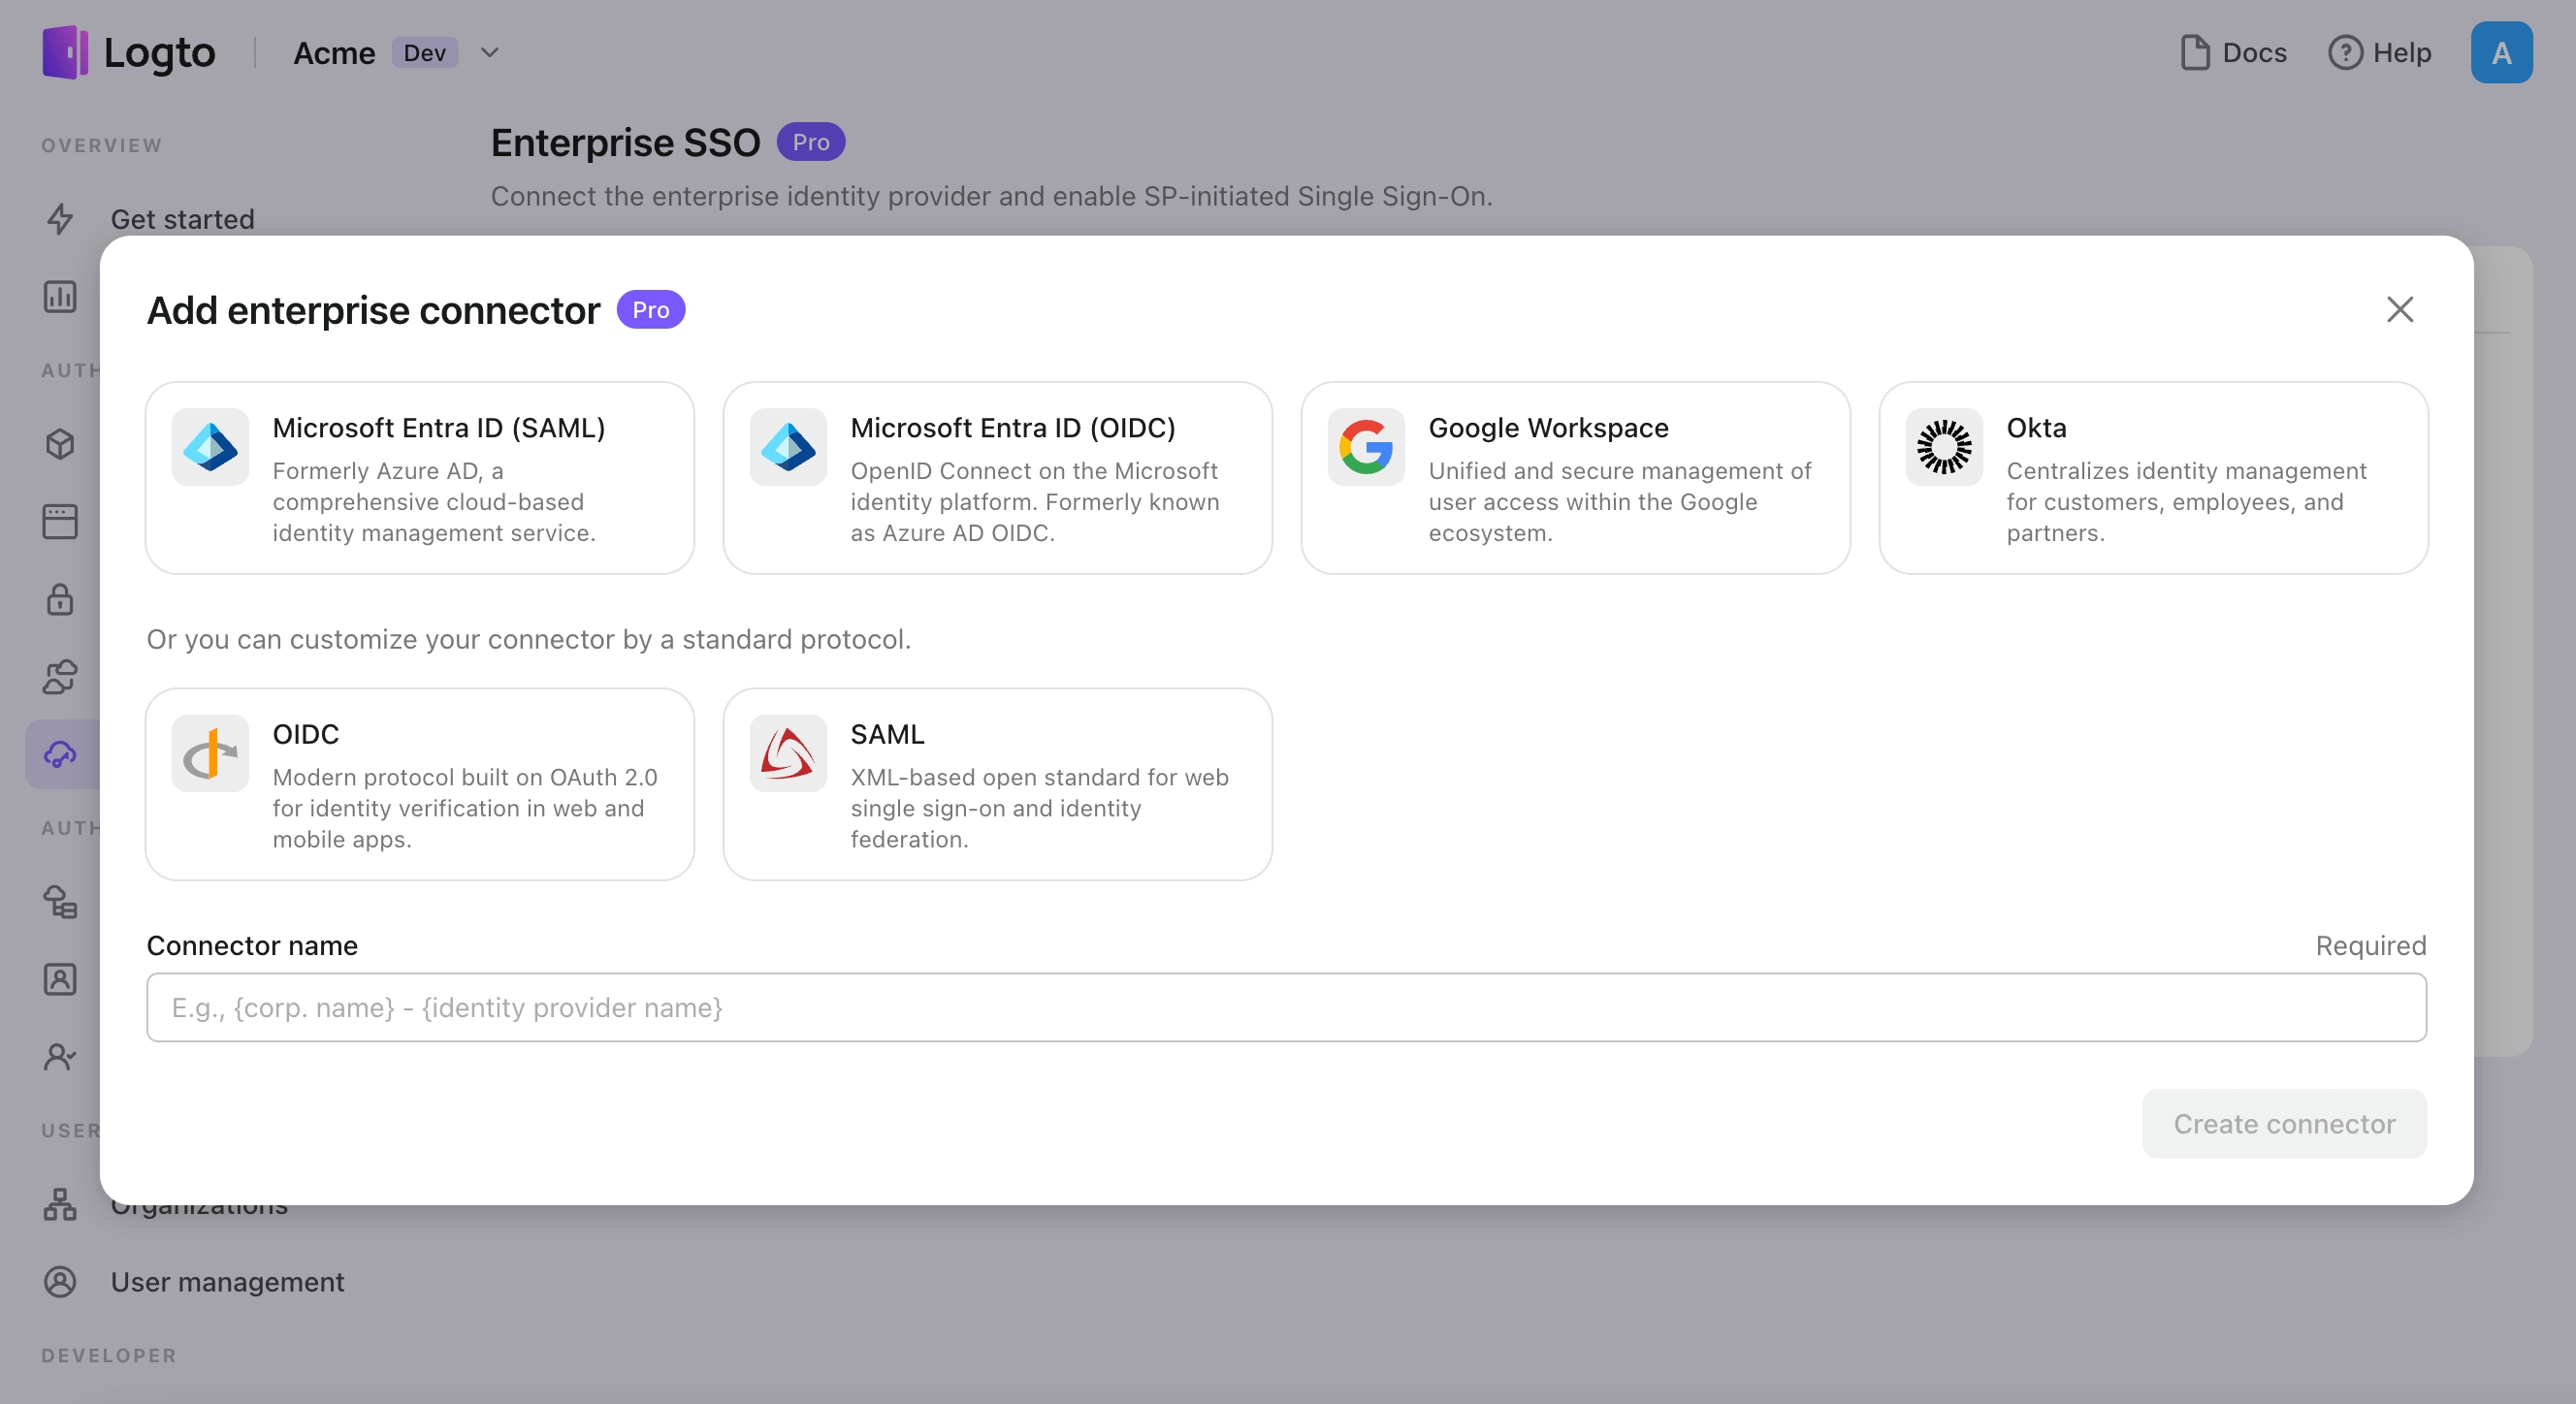
- 「エンタープライズコネクターを追加」ボタンをクリックし、SSO プロバイダーのタイプを選択します。Microsoft Entra ID (Azure AD)、Google Workspace、Okta の事前構築されたコネクターから選択するか、標準の OpenID Connect (OIDC) または SAML プロトコルを使用してカスタム SSO 接続を作成します。
- 一意の名前を指定します(例:Acme Company の SSO サインイン)。
- 「接続」タブで IdP と接続を構成します。各コネクタータイプのガイドを上記で確認してください。
- 「体験 (Experience)」タブで SSO 体験と企業の メールドメイン をカスタマイズします。SSO 対応のメールドメインでサインインするユーザーは、SSO 認証にリダイレクトされます。

- 変更を保存します。
Set up Okta 管理ポータルでの OIDC アプリケーション
ステップ 1: Okta 管理ポータルで OIDC アプリケーションを作成する {#step-1-create-an-oidc-application-on-okta-admin-portal}
- Okta 管理ポータルにアクセスし、管理者としてサインインします。
- サイドメニューを使用して
Applications/Applicationsページに移動します。 Create App Integrationボタンをクリックして、新しい OIDC アプリケーションを作成します。Sign-in methodとしてOIDC - OpenID Connectオプションを選択します。Application typeとしてWeb Applicationオプションを選択します。
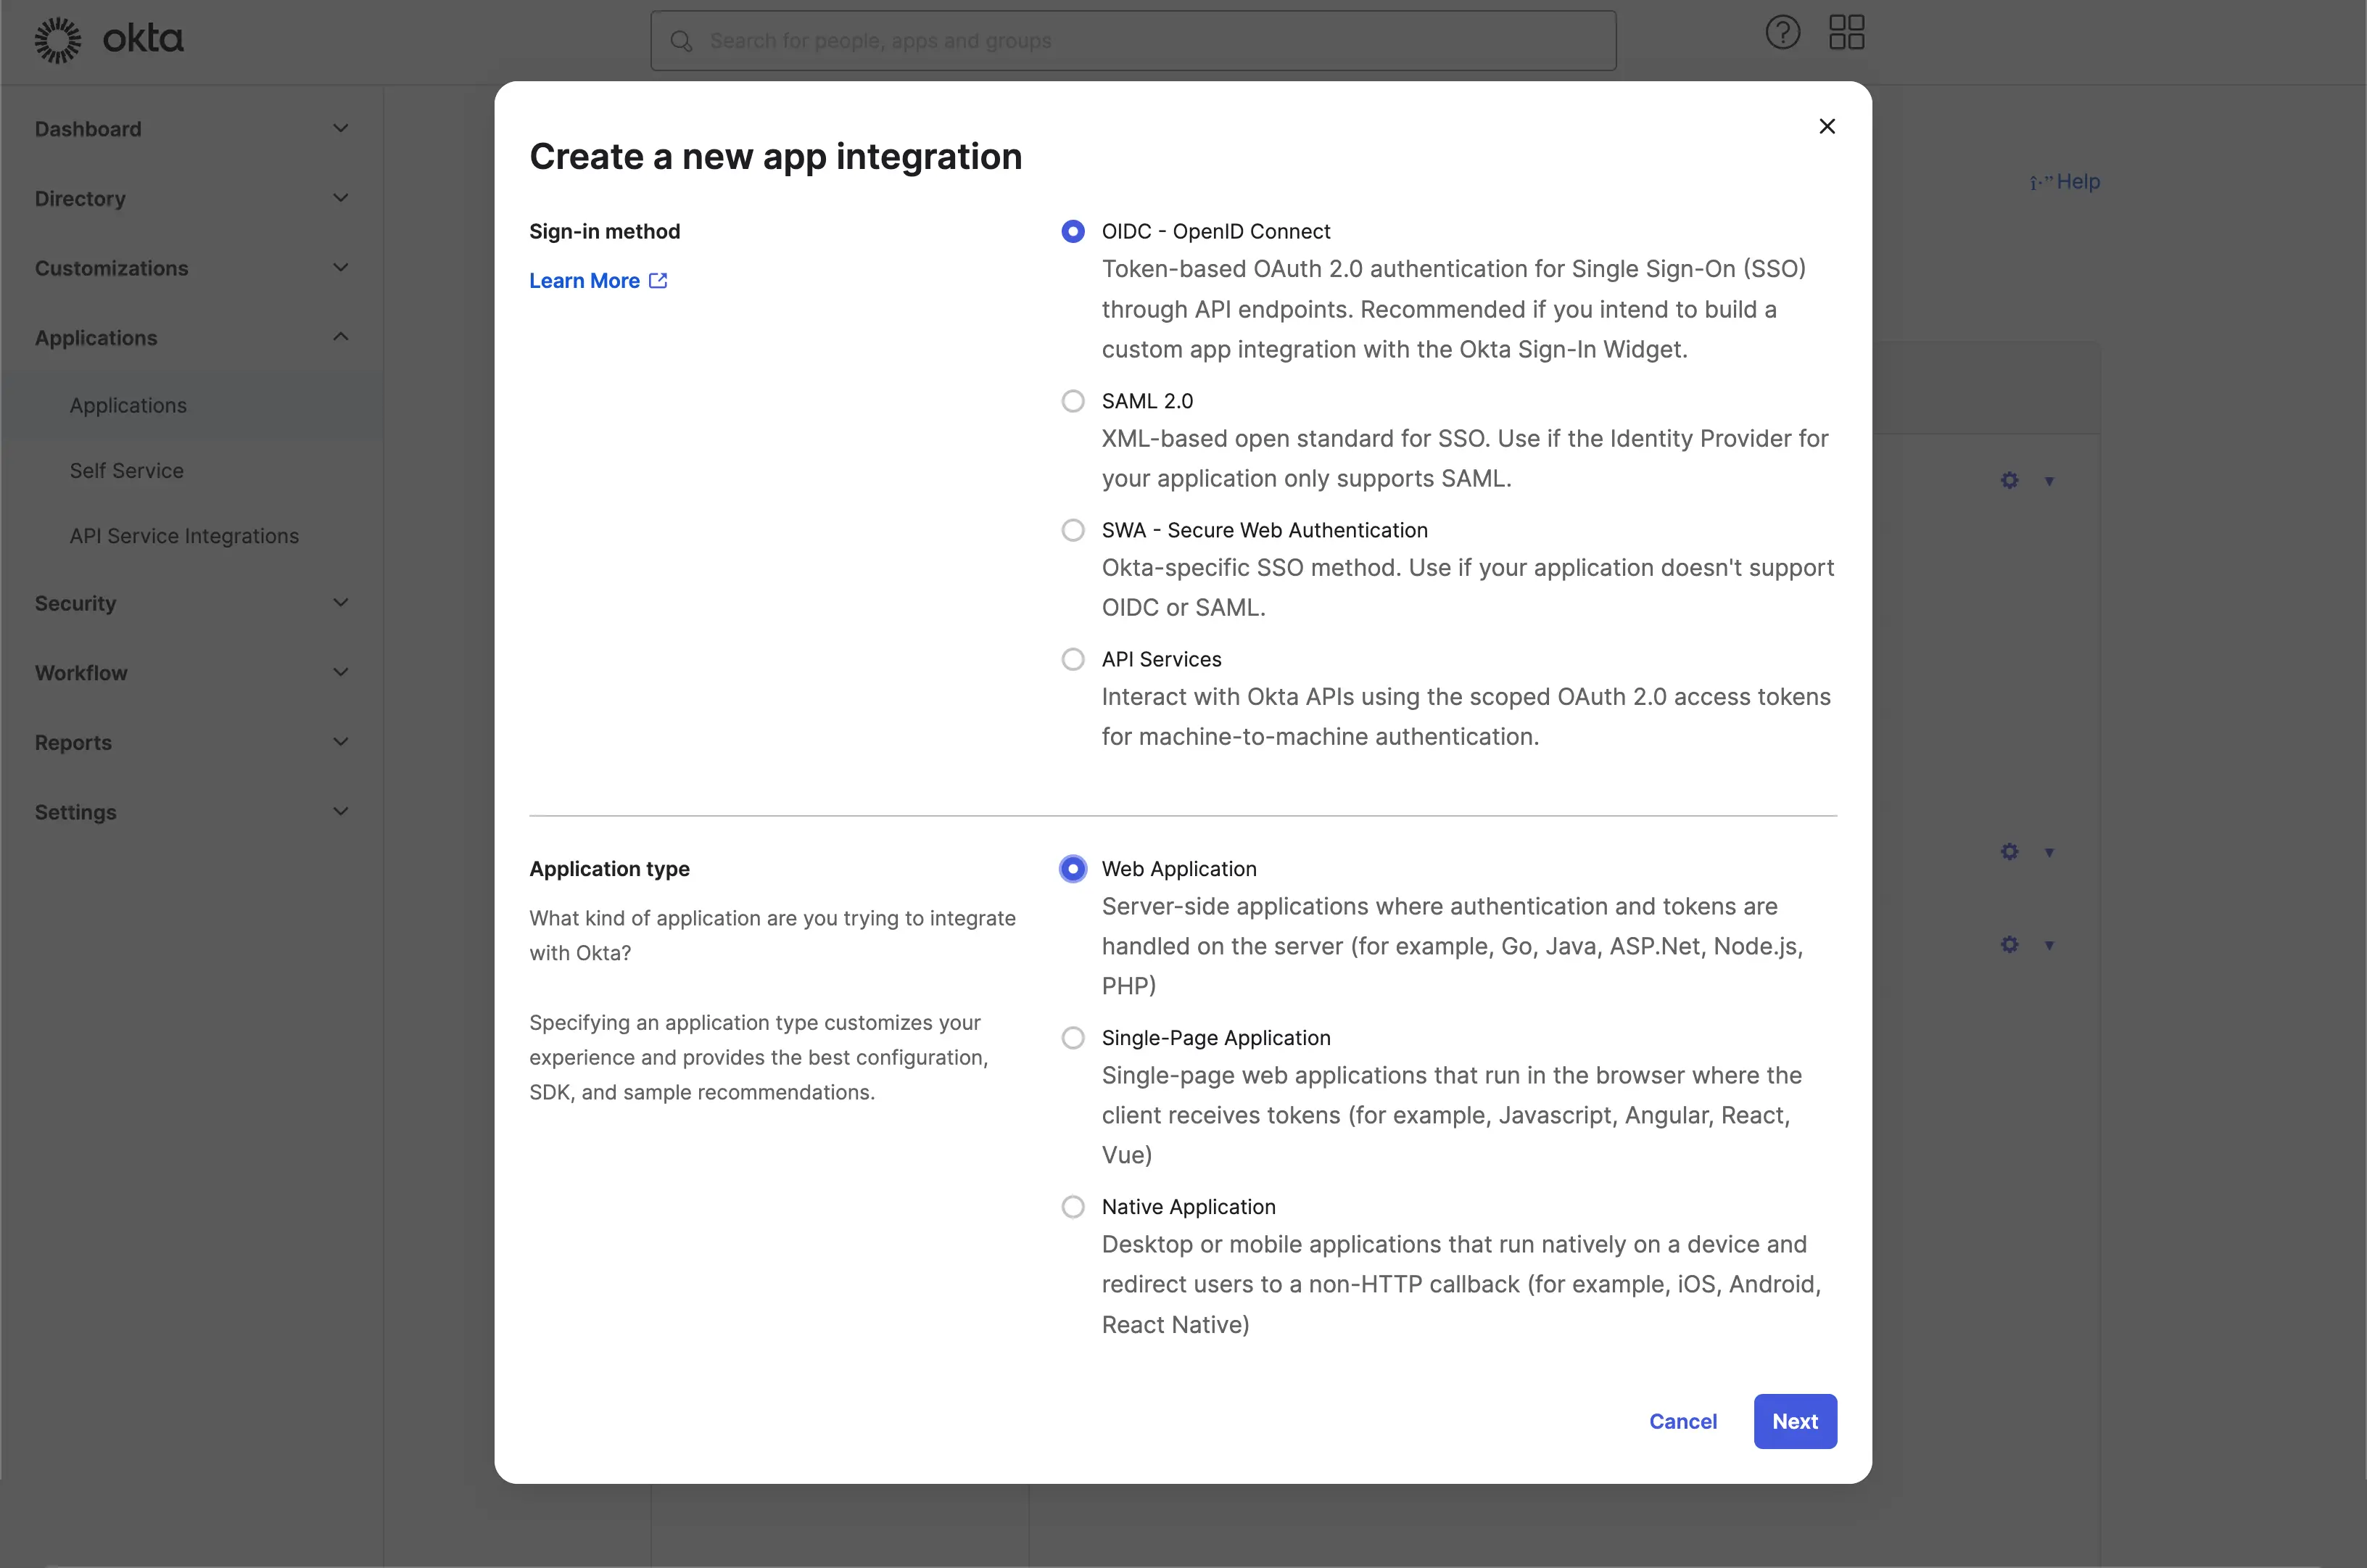
Next ボタンをクリックして続行します。
ステップ 2: アプリケーション設定を構成する
App integration nameを提供します。これは、あなたの OIDC アプリケーションの識別子として使用されます。- Logto SSO コネクターのコールバック URL を使用して、新しい
Sign-in redirect URIsを追加します。
これは、Okta が認証 (Authentication) に成功した後にユーザーのブラウザをリダイレクトする URI です。ユーザーが IdP での認証 (Authentication) に成功すると、IdP はユーザーのブラウザをこの指定された URI に認可 (Authorization) コードと共にリダイレクトします。Logto は、この URI から受け取った認可 (Authorization) コードに基づいて認証 (Authentication) プロセスを完了します。
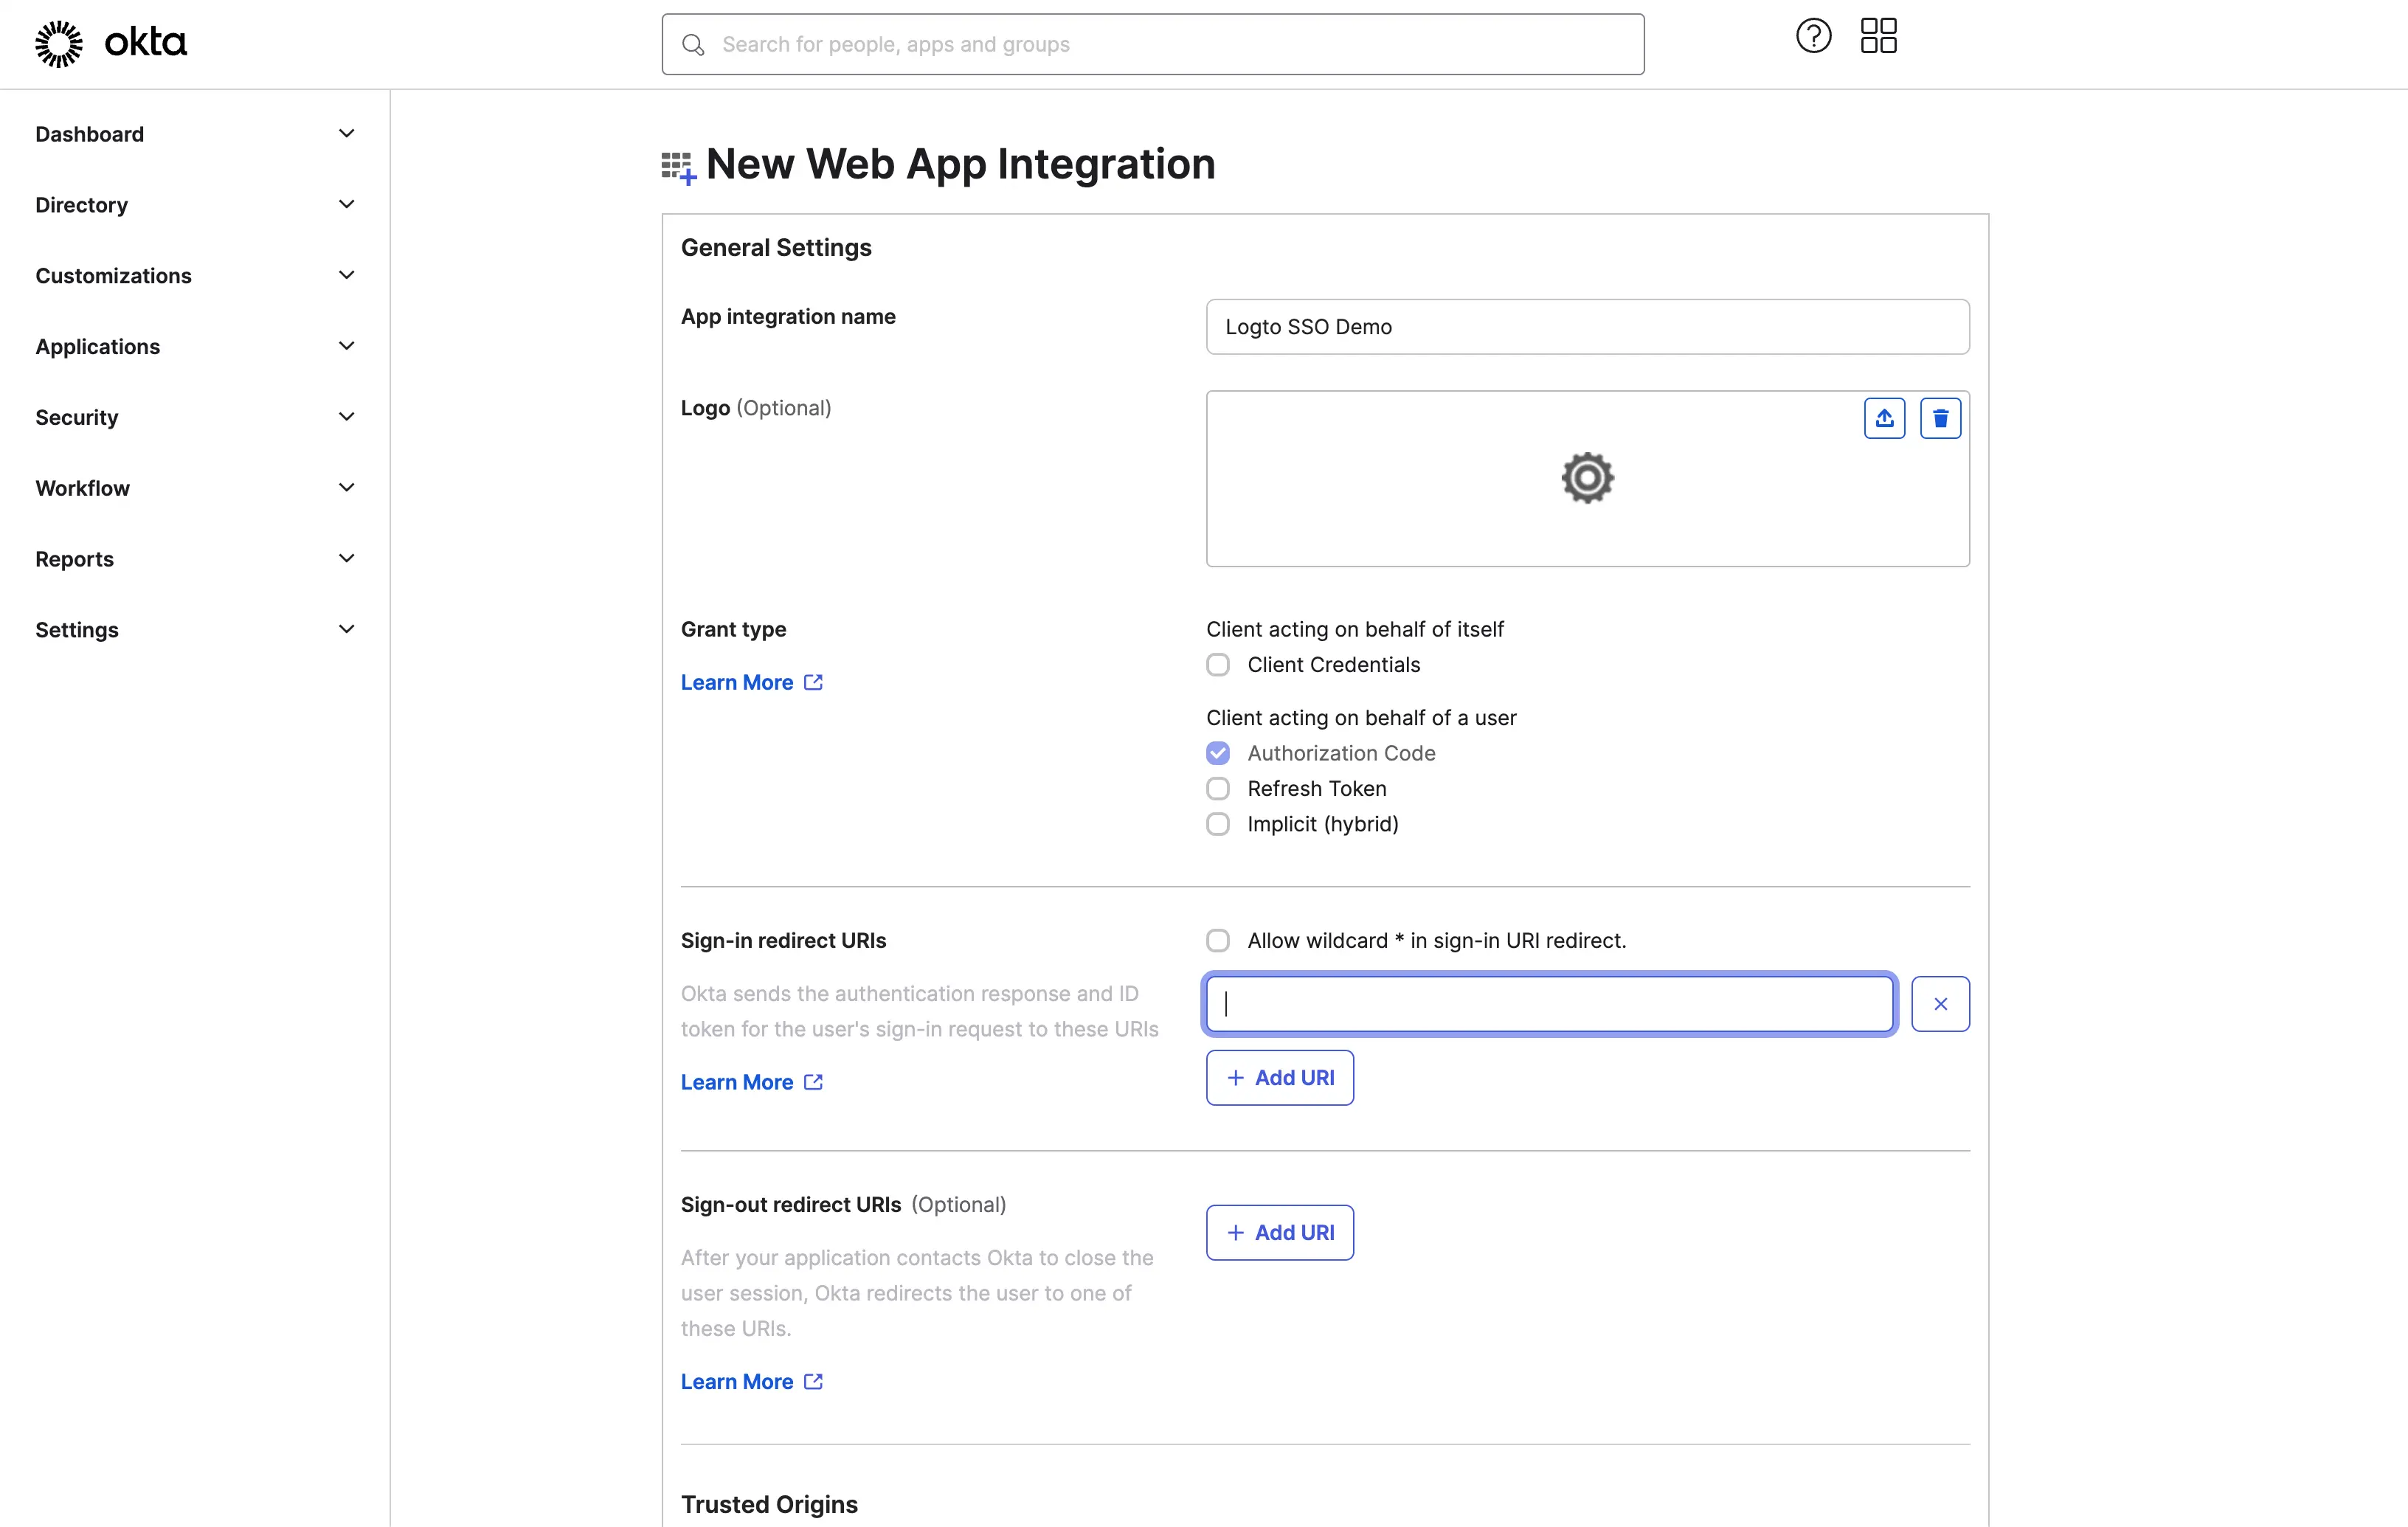
- アプリケーションにユーザーを割り当てます。
Assignments 設定に基づいて、アプリケーションをすべてのユーザーまたは特定のユーザー / グループに割り当てることができます。

Save ボタンをクリックしてアプリケーション設定を保存します。
ステップ 3: クライアント資格情報で Logto コネクターを設定する
OIDC アプリケーションの作成に成功すると、アプリケーションの詳細ページにリダイレクトされます。
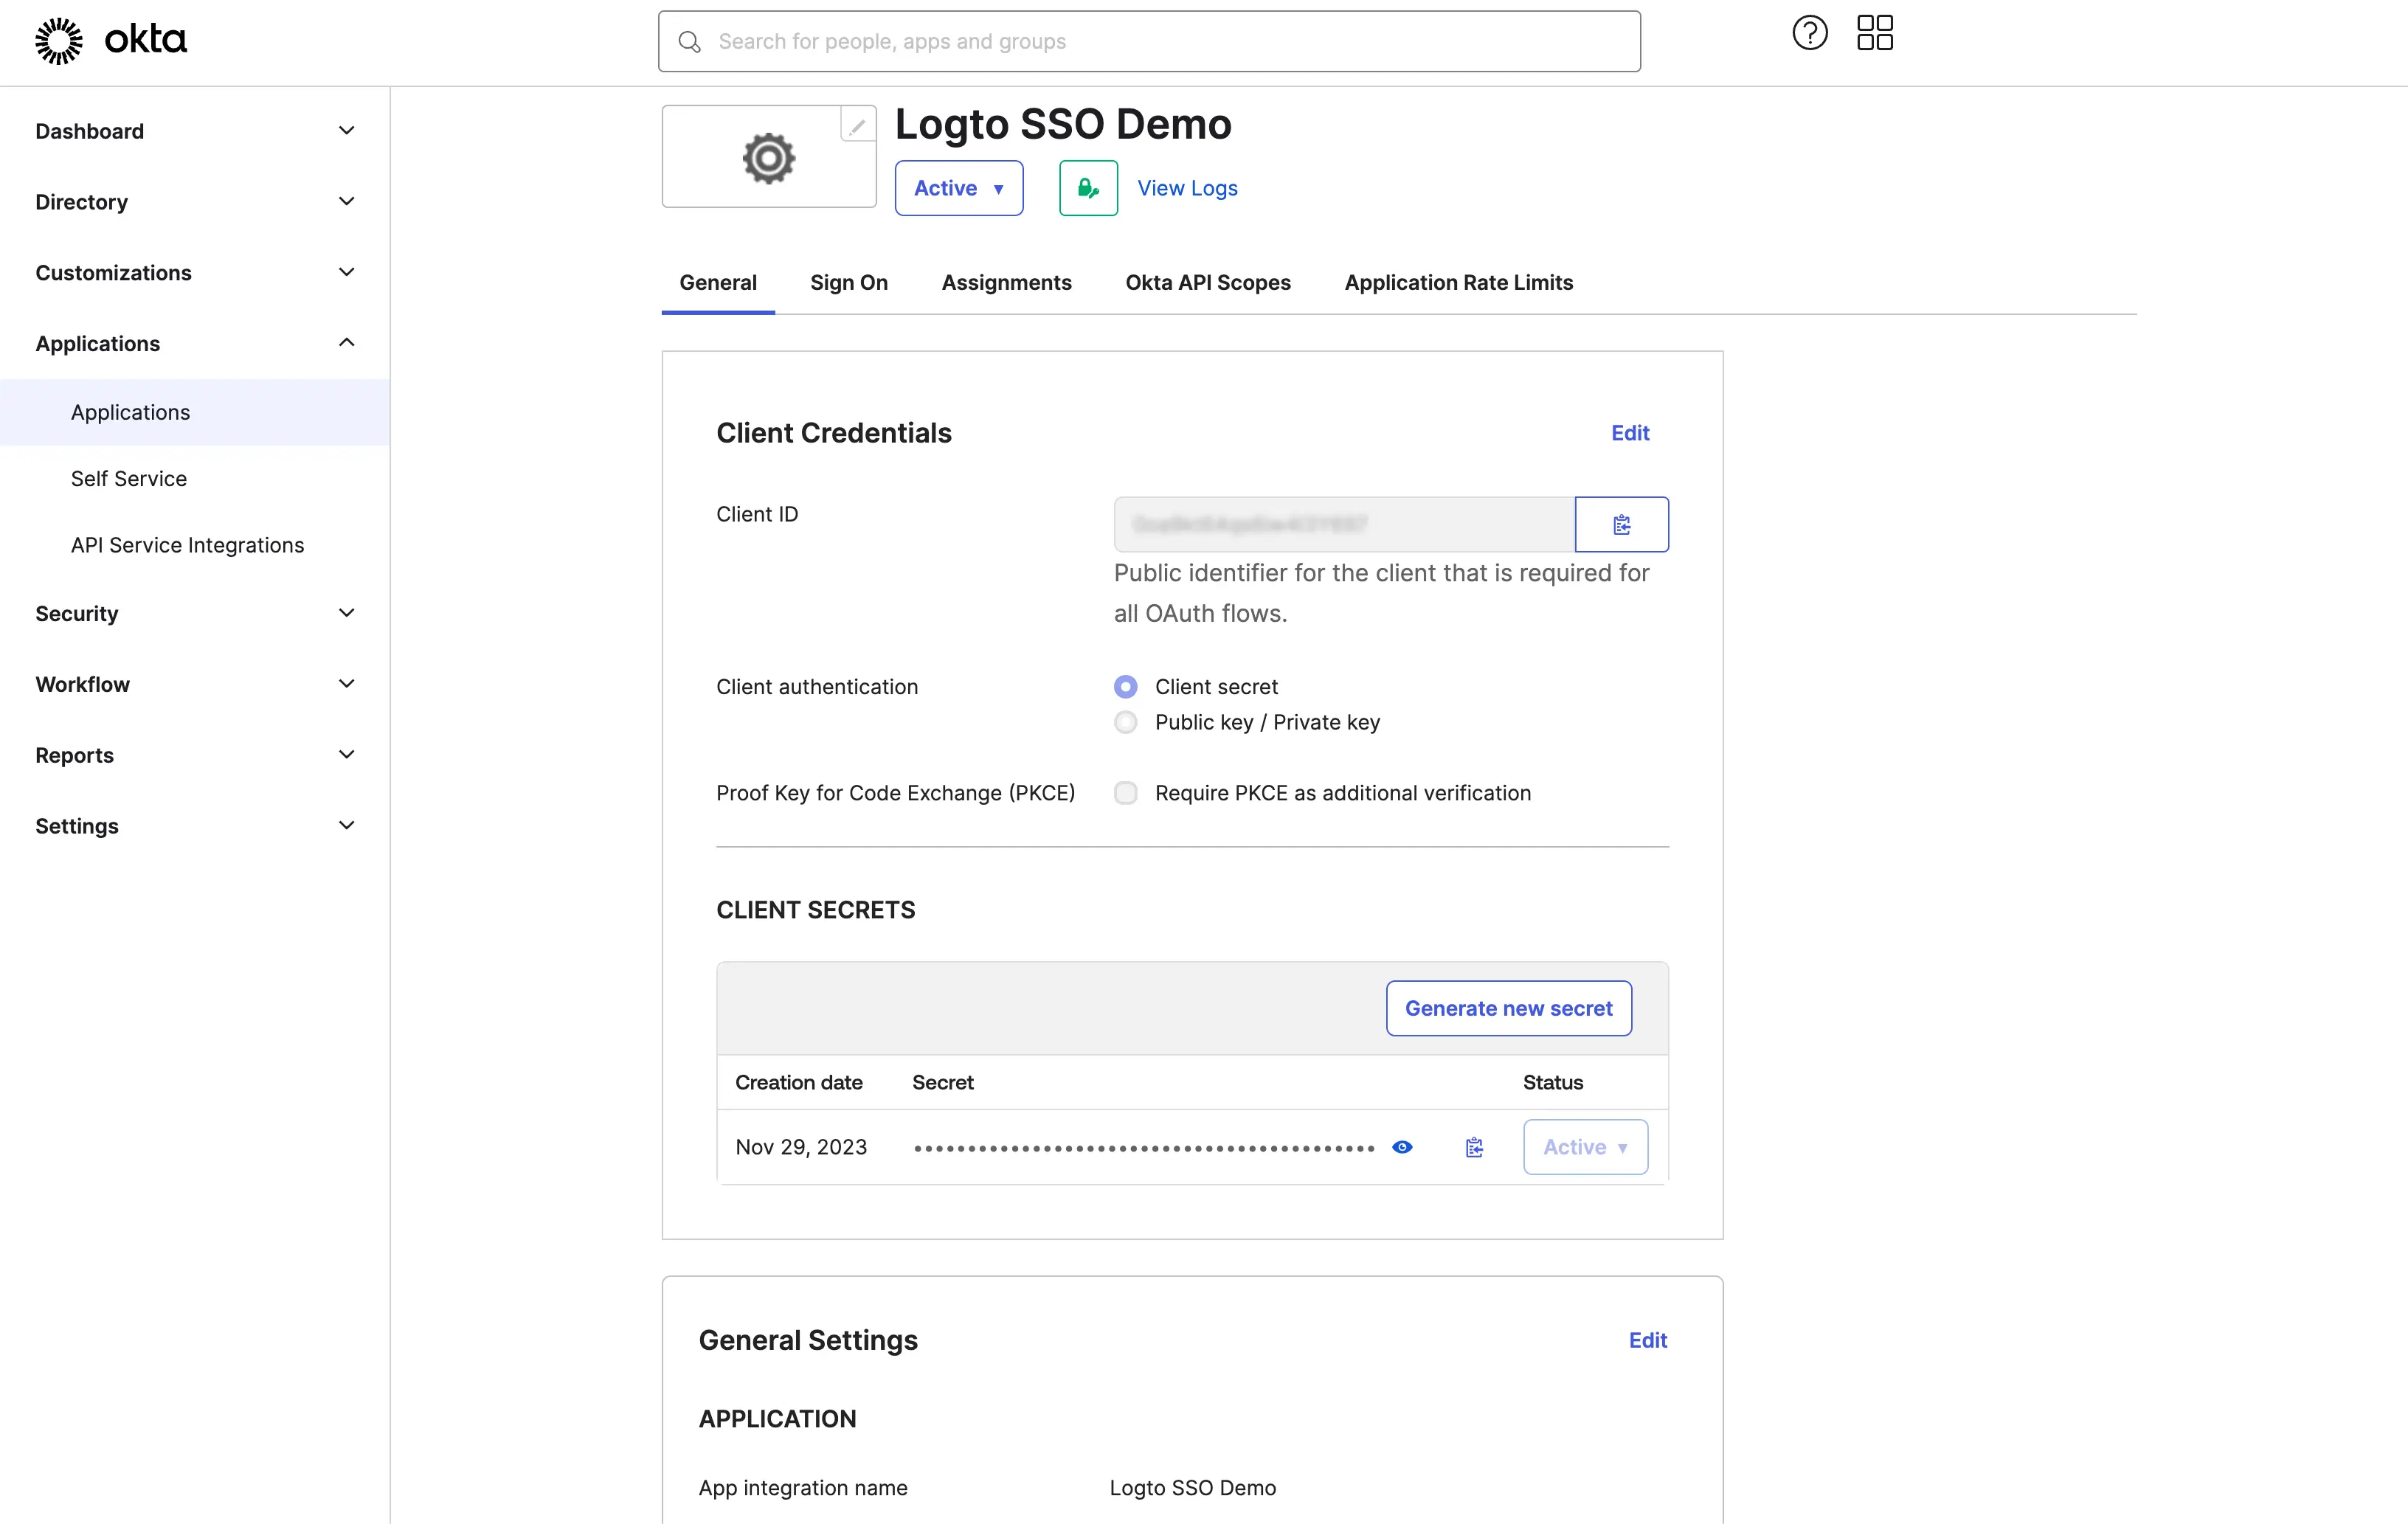
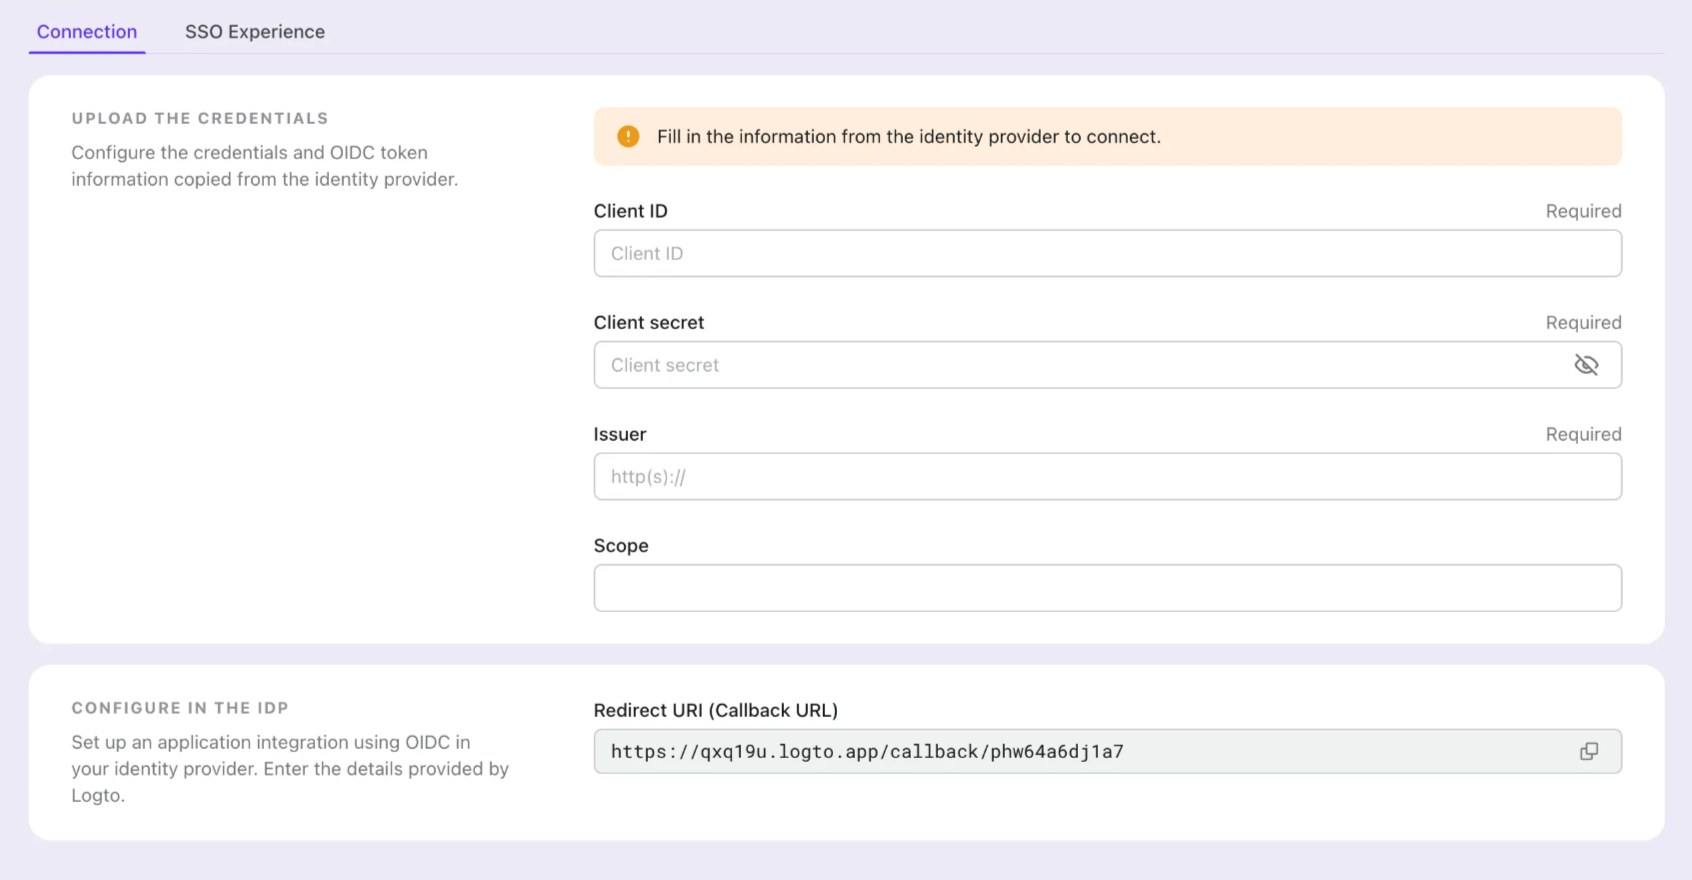
client ID と client secret をコピーし、Logto SSO コネクターの Connection タブの対応するフィールドに入力します。
Okta ドメインを 発行者 (Issuer) として使用します。例:https://dev-12345678.okta.com。すべてのフィールドに入力したら、Save ボタンをクリックしてコネクター設定を保存します。
提供した 発行者 (Issuer) リンクが有効であれば、発行者 (Issuer) フィールドの下に Okta IdP 設定の解析された完全なリストが表示されます。
ステップ 4: 追加のスコープ (オプション)
Scope フィールドを使用して、OAuth リクエストに追加のスコープを追加します。これにより、Okta OAuth サーバーからより多くの情報を要求できます。利用可能なスコープの詳細については、 Okta ドキュメント を参照してください。
カスタムスコープ設定に関係なく、Logto は常に openid、profile、および email スコープを IdP に送信します。これは、Logto がユーザーのアイデンティティ情報とメールアドレスを適切に取得できるようにするためです。
ステップ 5: メールドメインを設定し、SSO コネクターを有効にする
Logto のコネクターの SSO 体験 タブで、組織の メールドメイン を提供してください。これにより、SSO コネクターがそのユーザーの認証 (Authentication) 方法として有効になります。
指定されたドメインのメールアドレスを持つユーザーは、唯一の認証 (Authentication) 方法として SSO コネクターを使用するようにリダイレクトされます。
Okta との OIDC 統合の作成に関する詳細については、Create OIDC App Integrations をご確認ください。
Save your configuration
Logto コネクター設定エリアで必要な値をすべて記入したことを確認してください。「保存して完了」または「変更を保存」をクリックすると、Okta enterprise SSO コネクターが利用可能になります。
Enable Okta enterprise SSO connector in Sign-in Experience
エンタープライズコネクターを個別に設定する必要はありません。Logto は、ワンクリックでアプリケーションに SSO 統合を簡素化します。
- 移動先: Console > サインイン体験 > サインアップとサインイン。
- 「エンタープライズシングルサインオン (SSO)」トグルを有効にします。
- 変更を保存します。
有効にすると、サインインページに「シングルサインオン (SSO)」ボタンが表示されます。SSO が有効なメールドメインを持つエンタープライズユーザーは、エンタープライズアイデンティティプロバイダー (IdP) を使用してサービスにアクセスできます。
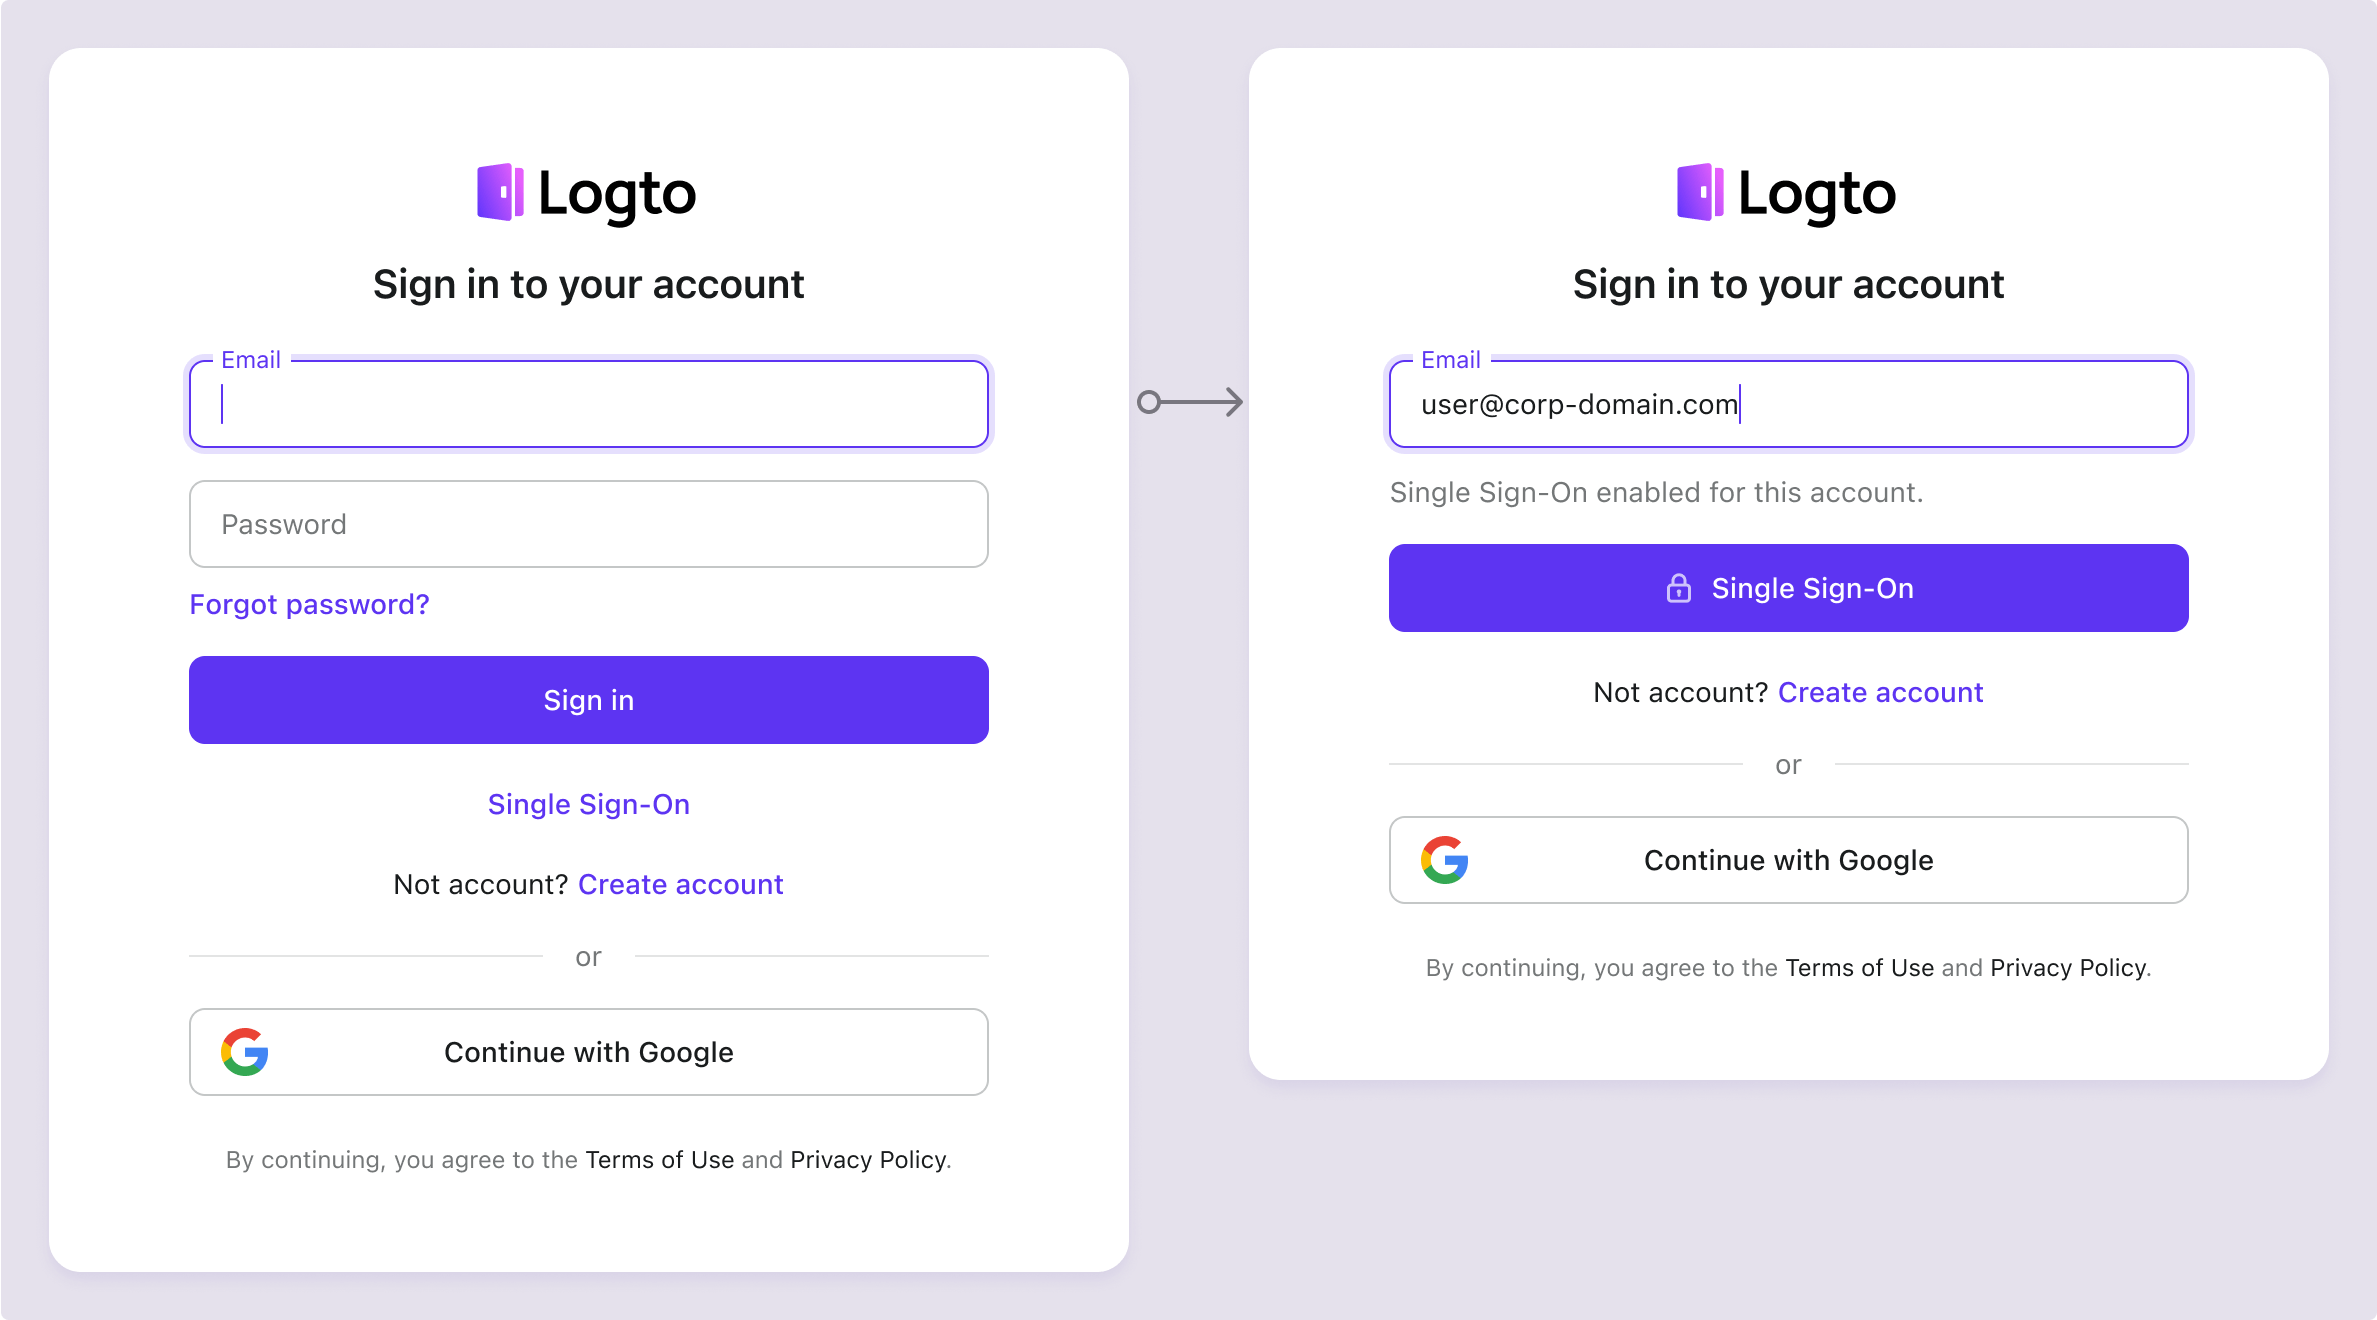
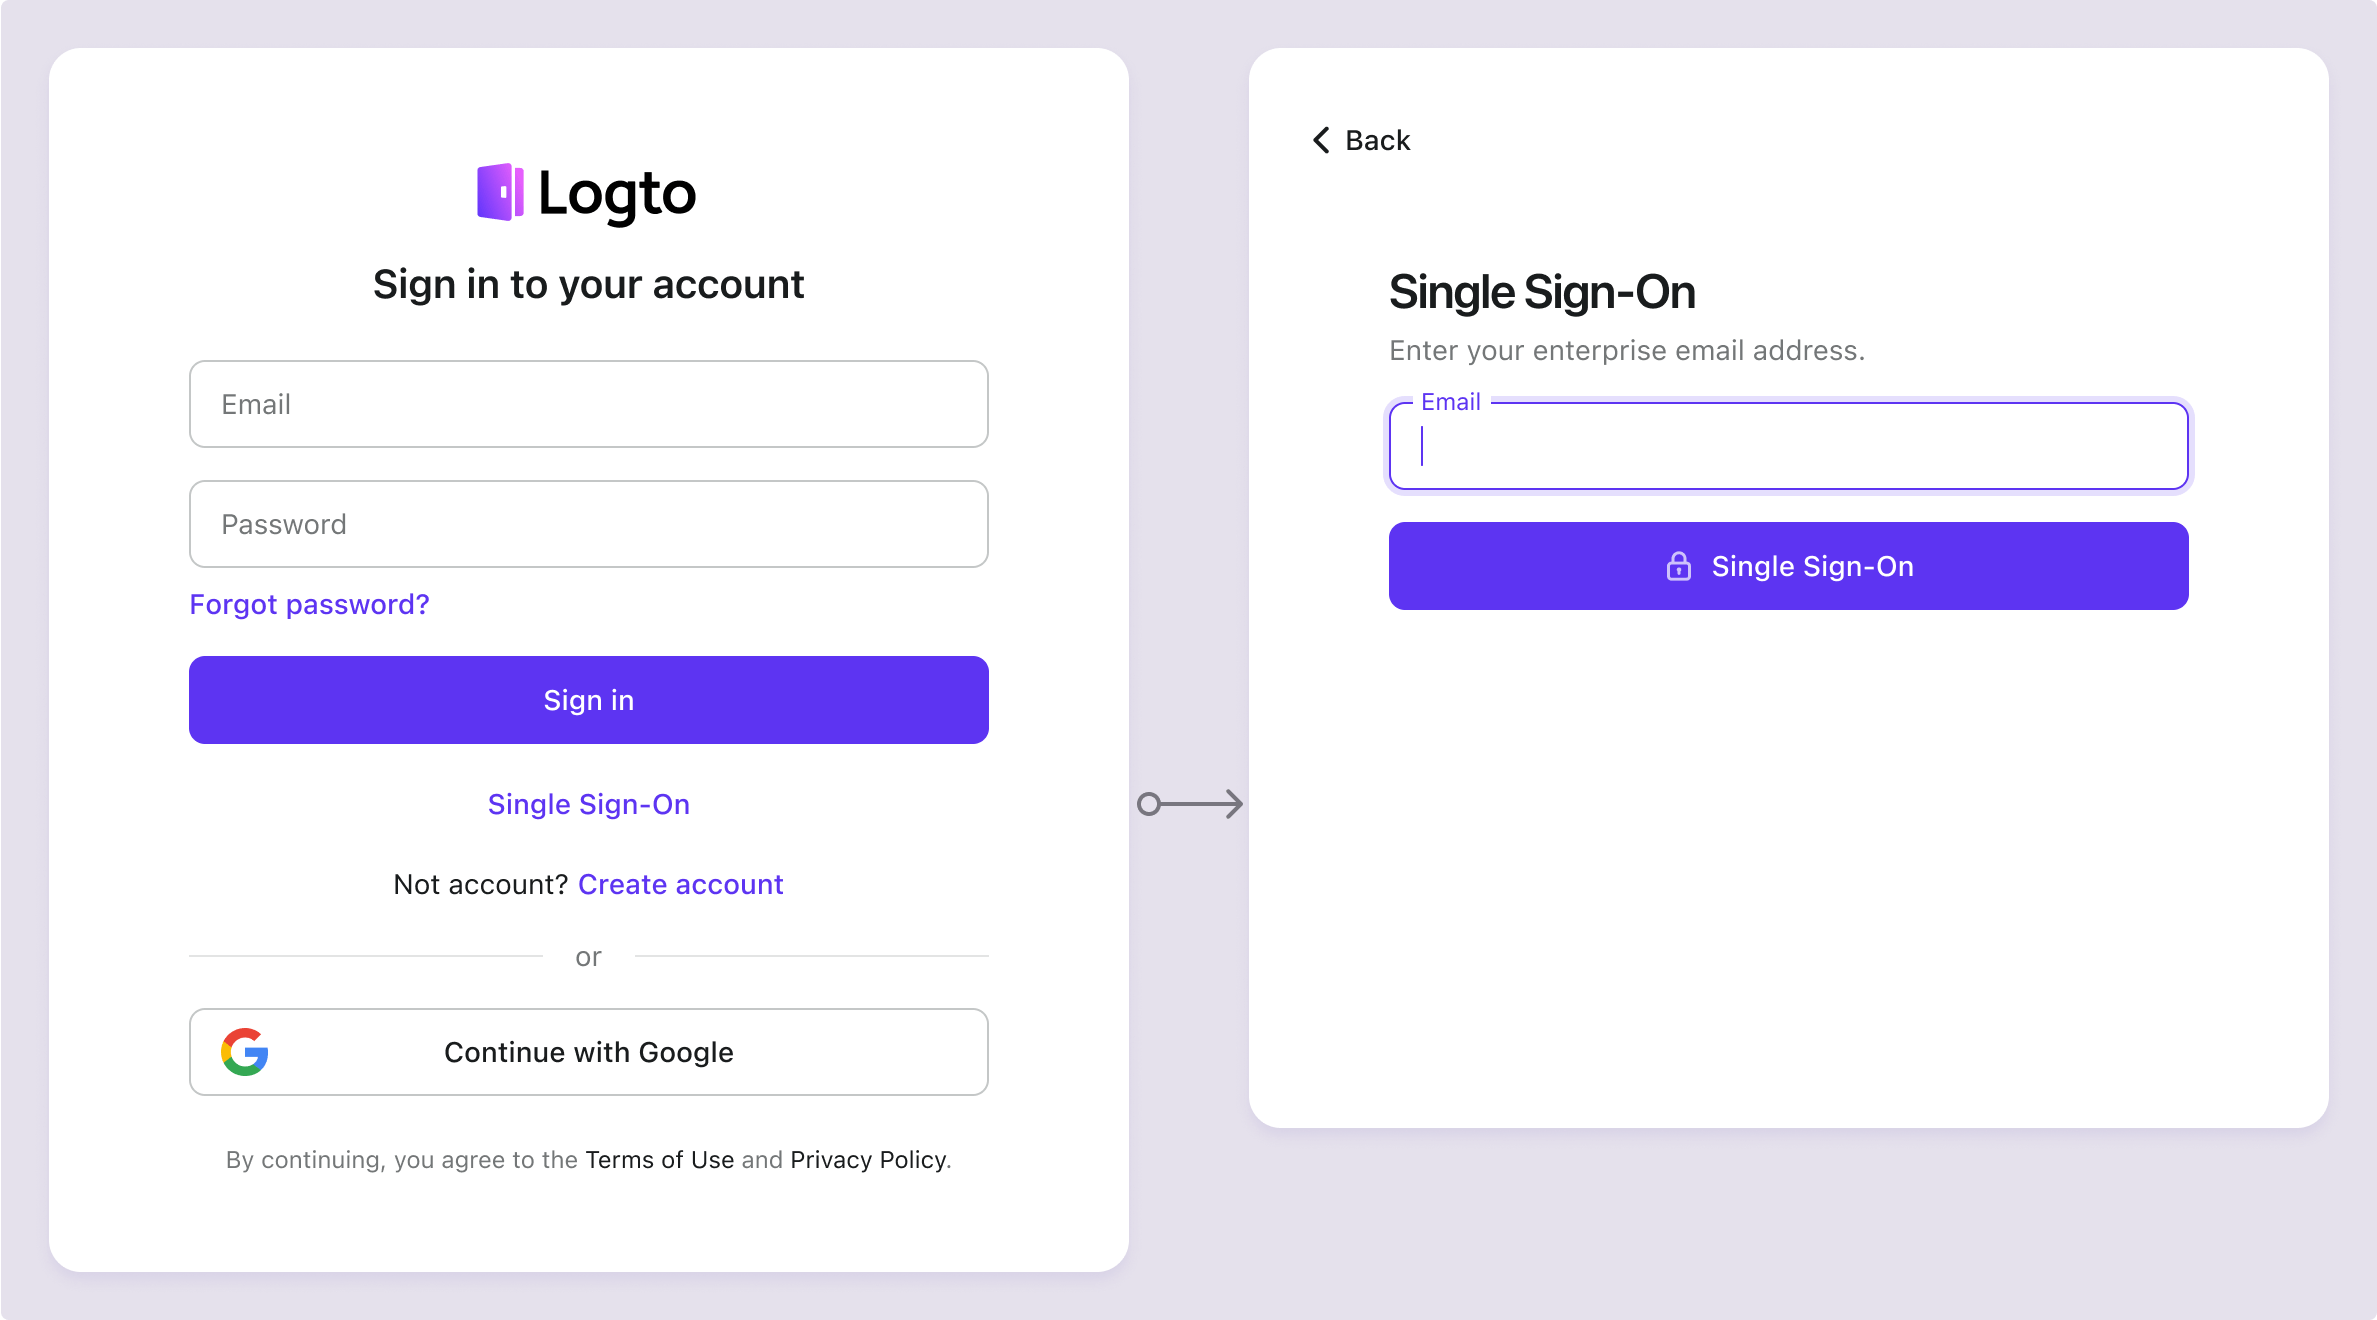
SP 主導の SSO や IdP 主導の SSO を含む SSO ユーザー体験について詳しくは、ユーザーフロー: エンタープライズシングルサインオン (SSO) を参照してください。
Testing and Validation
Flutter アプリに戻ります。これで Okta enterprise SSO を使用してサインインできるはずです。お楽しみください!
Further readings
エンドユーザーフロー:Logto は、MFA やエンタープライズシングルサインオン (SSO) を含む即時使用可能な認証 (Authentication) フローを提供し、アカウント設定、セキュリティ検証、マルチテナント体験の柔軟な実装のための強力な API を備えています。
認可 (Authorization):認可 (Authorization) は、ユーザーが認証 (Authentication) された後に行えるアクションやアクセスできるリソースを定義します。ネイティブおよびシングルページアプリケーションの API を保護し、ロールベースのアクセス制御 (RBAC) を実装する方法を探ります。
組織 (Organizations):特にマルチテナント SaaS や B2B アプリで効果的な組織機能は、テナントの作成、メンバー管理、組織レベルの RBAC、およびジャストインタイムプロビジョニングを可能にします。
顧客 IAM シリーズ:顧客(または消費者)アイデンティティとアクセス管理に関する連続ブログ投稿で、101 から高度なトピックまでを網羅しています。