Logto is an Auth0 alternative designed for modern apps and SaaS products. It offers both Cloud and Open-source services to help you quickly launch your identity and management (IAM) system. Enjoy authentication, authorization, and multi-tenant management all in one.
We recommend starting with a free development tenant on Logto Cloud. This allows you to explore all the features easily.
In this article, we will go through the steps to quickly build the OIDC sign-in experience (user authentication) with .NET Core (Blazor WebAssembly) and Logto.
Prerequisites
- A running Logto instance. Check out the introduction page to get started.
- Basic knowledge of .NET Core (Blazor WebAssembly).
- A usable OIDC account.
Create an application in Logto
Logto is based on OpenID Connect (OIDC) authentication and OAuth 2.0 authorization. It supports federated identity management across multiple applications, commonly called Single Sign-On (SSO).
To create your Single page app application, simply follow these steps:
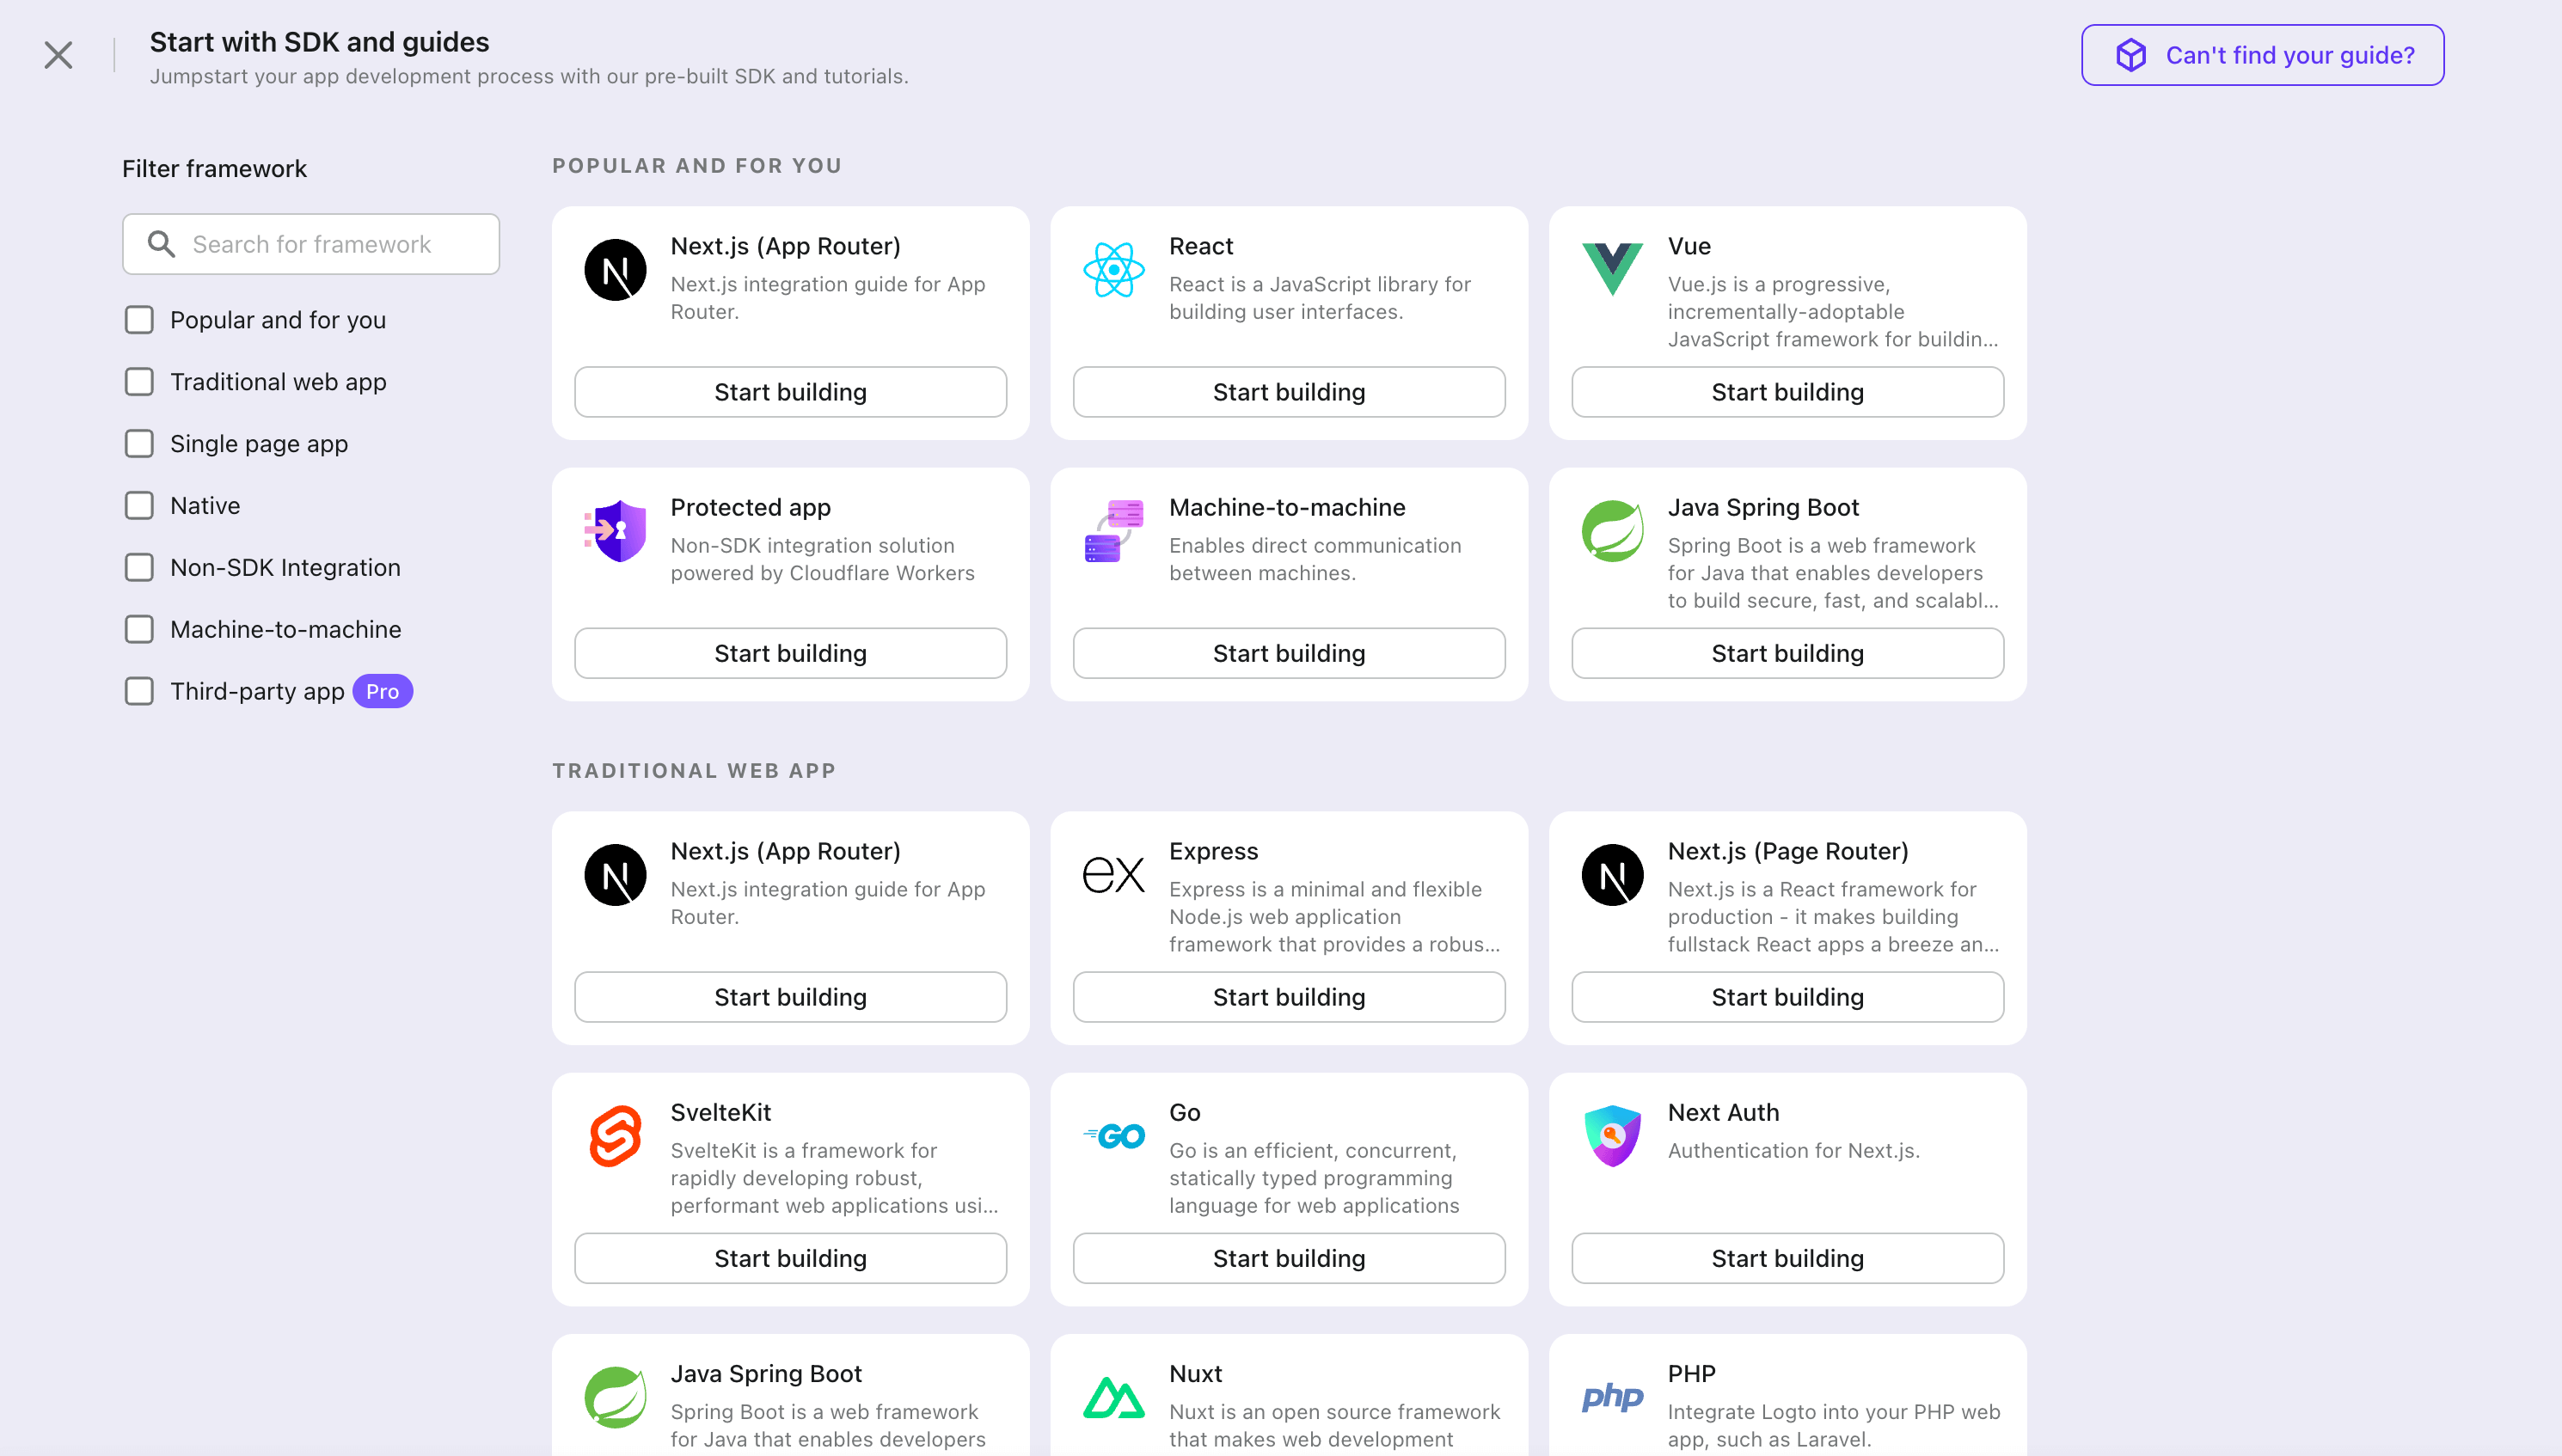
- Open the Logto Console. In the "Get started" section, click the "View all" link to open the application frameworks list. Alternatively, you can navigate to Logto Console > Applications, and click the "Create application" button.

- In the opening modal, click the "Single page app" section or filter all the available "Single page app" frameworks using the quick filter checkboxes on the left. Click the ".NET Core (Blazor WebAssembly)" framework card to start creating your application.

- Enter the application name, e.g., "Bookstore," and click "Create application".
🎉 Ta-da! You just created your first application in Logto. You'll see a congrats page which includes a detailed integration guide. Follow the guide to see what the experience will be in your application.
Integrate .NET Core (Blazor WebAssembly) with Logto
- The following demonstration is built on .NET Core 8.0 and Blorc.OpenIdConnect.
- The .NET Core sample projects are available in the GitHub repository.
Installation
Add the NuGet package to your project:
dotnet add package Blorc.OpenIdConnect
Add script references
Include Blorc.Core/injector.js the index.html file:
<head>
  <!-- ... -->
  <script src="_content/Blorc.Core/injector.js"></script>
  <!-- ... -->
</head>
Register services
Add the following code to the Program.cs file:
using Blorc.OpenIdConnect;
using Blorc.Services;

builder.Services.AddBlorcCore();
builder.Services.AddAuthorizationCore();
builder.Services.AddBlorcOpenIdConnect(
    options =>
    {
        builder.Configuration.Bind("IdentityServer", options);
    });

var webAssemblyHost = builder.Build();

await webAssemblyHost
    .ConfigureDocumentAsync(async documentService =>
    {
        await documentService.InjectBlorcCoreJsAsync();
        await documentService.InjectOpenIdConnectAsync();
    });

await webAssemblyHost.RunAsync();
There's no need to use the Microsoft.AspNetCore.Components.WebAssembly.Authentication package. The Blorc.OpenIdConnect package will take care of the authentication process.
Configure redirect URIs
Before we dive into the details, here's a quick overview of the end-user experience. The sign-in process can be simplified as follows:
- Your app invokes the sign-in method.
- The user is redirected to the Logto sign-in page. For native apps, the system browser is opened.
- The user signs in and is redirected back to your app (configured as the redirect URI).
Regarding redirect-based sign-in
- This authentication process follows the OpenID Connect (OIDC) protocol, and Logto enforces strict security measures to protect user sign-in.
- If you have multiple apps, you can use the same identity provider (Logto). Once the user signs in to one app, Logto will automatically complete the sign-in process when the user accesses another app.
To learn more about the rationale and benefits of redirect-based sign-in, see Logto sign-in experience explained.
In the following code snippets, we assume your app is running on http://localhost:3000/.
Configure redirect URIs
Switch to the application details page of Logto Console. Add a redirect URI http://localhost:3000/callback.

Just like signing in, users should be redirected to Logto for signing out of the shared session. Once finished, it would be great to redirect the user back to your website. For example, add http://localhost:3000/ as the post sign-out redirect URI section.
Then click "Save" to save the changes.
Configure application
Add the following code to the appsettings.json file:
{
// ...
IdentityServer: {
  Authority: 'https://<your-logto-endpoint>/oidc',
  ClientId: '<your-logto-app-id>',
  PostLogoutRedirectUri: 'http://localhost:3000/',
  RedirectUri: 'http://localhost:3000/callback',
  ResponseType: 'code',
  Scope: 'openid profile', // Add more scopes if needed
},
}
Remember to add the RedirectUri and PostLogoutRedirectUri to the list of allowed redirect URIs in the Logto application settings. They are both the URL of your WASM application.
Add AuthorizeView component
In the Razor pages that require authentication, add the AuthorizeView component. Let's assume it's the Home.razor page:
@using Microsoft.AspNetCore.Components.Authorization
@page "/"

<AuthorizeView>
    <Authorized>
        @* Signed in view *@
        <button @onclick="OnLogoutButtonClickAsync">
            Sign out
        </button>
    </Authorized>
    <NotAuthorized>
        @* Unauthenticated view *@
        <button @onclick="OnLoginButtonClickAsync">
            Sign in
        </button>
    </NotAuthorized>
</AuthorizeView>
Set up authentication
In the Home.razor.cs file (create it if it doesn't exist), add the following code:
using Microsoft.AspNetCore.Authorization;
using Microsoft.AspNetCore.Components;
using Microsoft.AspNetCore.Components.Web;
using Blorc.OpenIdConnect;
using Microsoft.AspNetCore.Components.Authorization;

[Authorize]
public partial class Home : ComponentBase
{
    [Inject]
    public required IUserManager UserManager { get; set; }

    public User<Profile>? User { get; set; }

    [CascadingParameter]
    protected Task<AuthenticationState>? AuthenticationStateTask { get; set; }

    protected override async Task OnInitializedAsync()
    {
        User = await UserManager.GetUserAsync<User<Profile>>(AuthenticationStateTask!);
    }

    private async Task OnLoginButtonClickAsync(MouseEventArgs obj)
    {
        await UserManager.SignInRedirectAsync();
    }

    private async Task OnLogoutButtonClickAsync(MouseEventArgs obj)
    {
        await UserManager.SignOutRedirectAsync();
    }
}
Once the user is authenticated, the User property will be populated with the user information.
Checkpoint: Test your application
Now, you can test your application:
- Run your application, you will see the sign-in button.
- Click the sign-in button, the SDK will init the sign-in process and redirect you to the Logto sign-in page.
- After you signed in, you will be redirected back to your application and see the sign-out button.
- Click the sign-out button to clear token storage and sign out.
Add OIDC connector
To enable quick sign-in and improve user conversion, connect with .NET Core (Blazor WebAssembly) as an identity provider. The Logto social connector helps you establish this connection in minutes by allowing several parameter inputs.
To add a social connector, simply follow these steps:
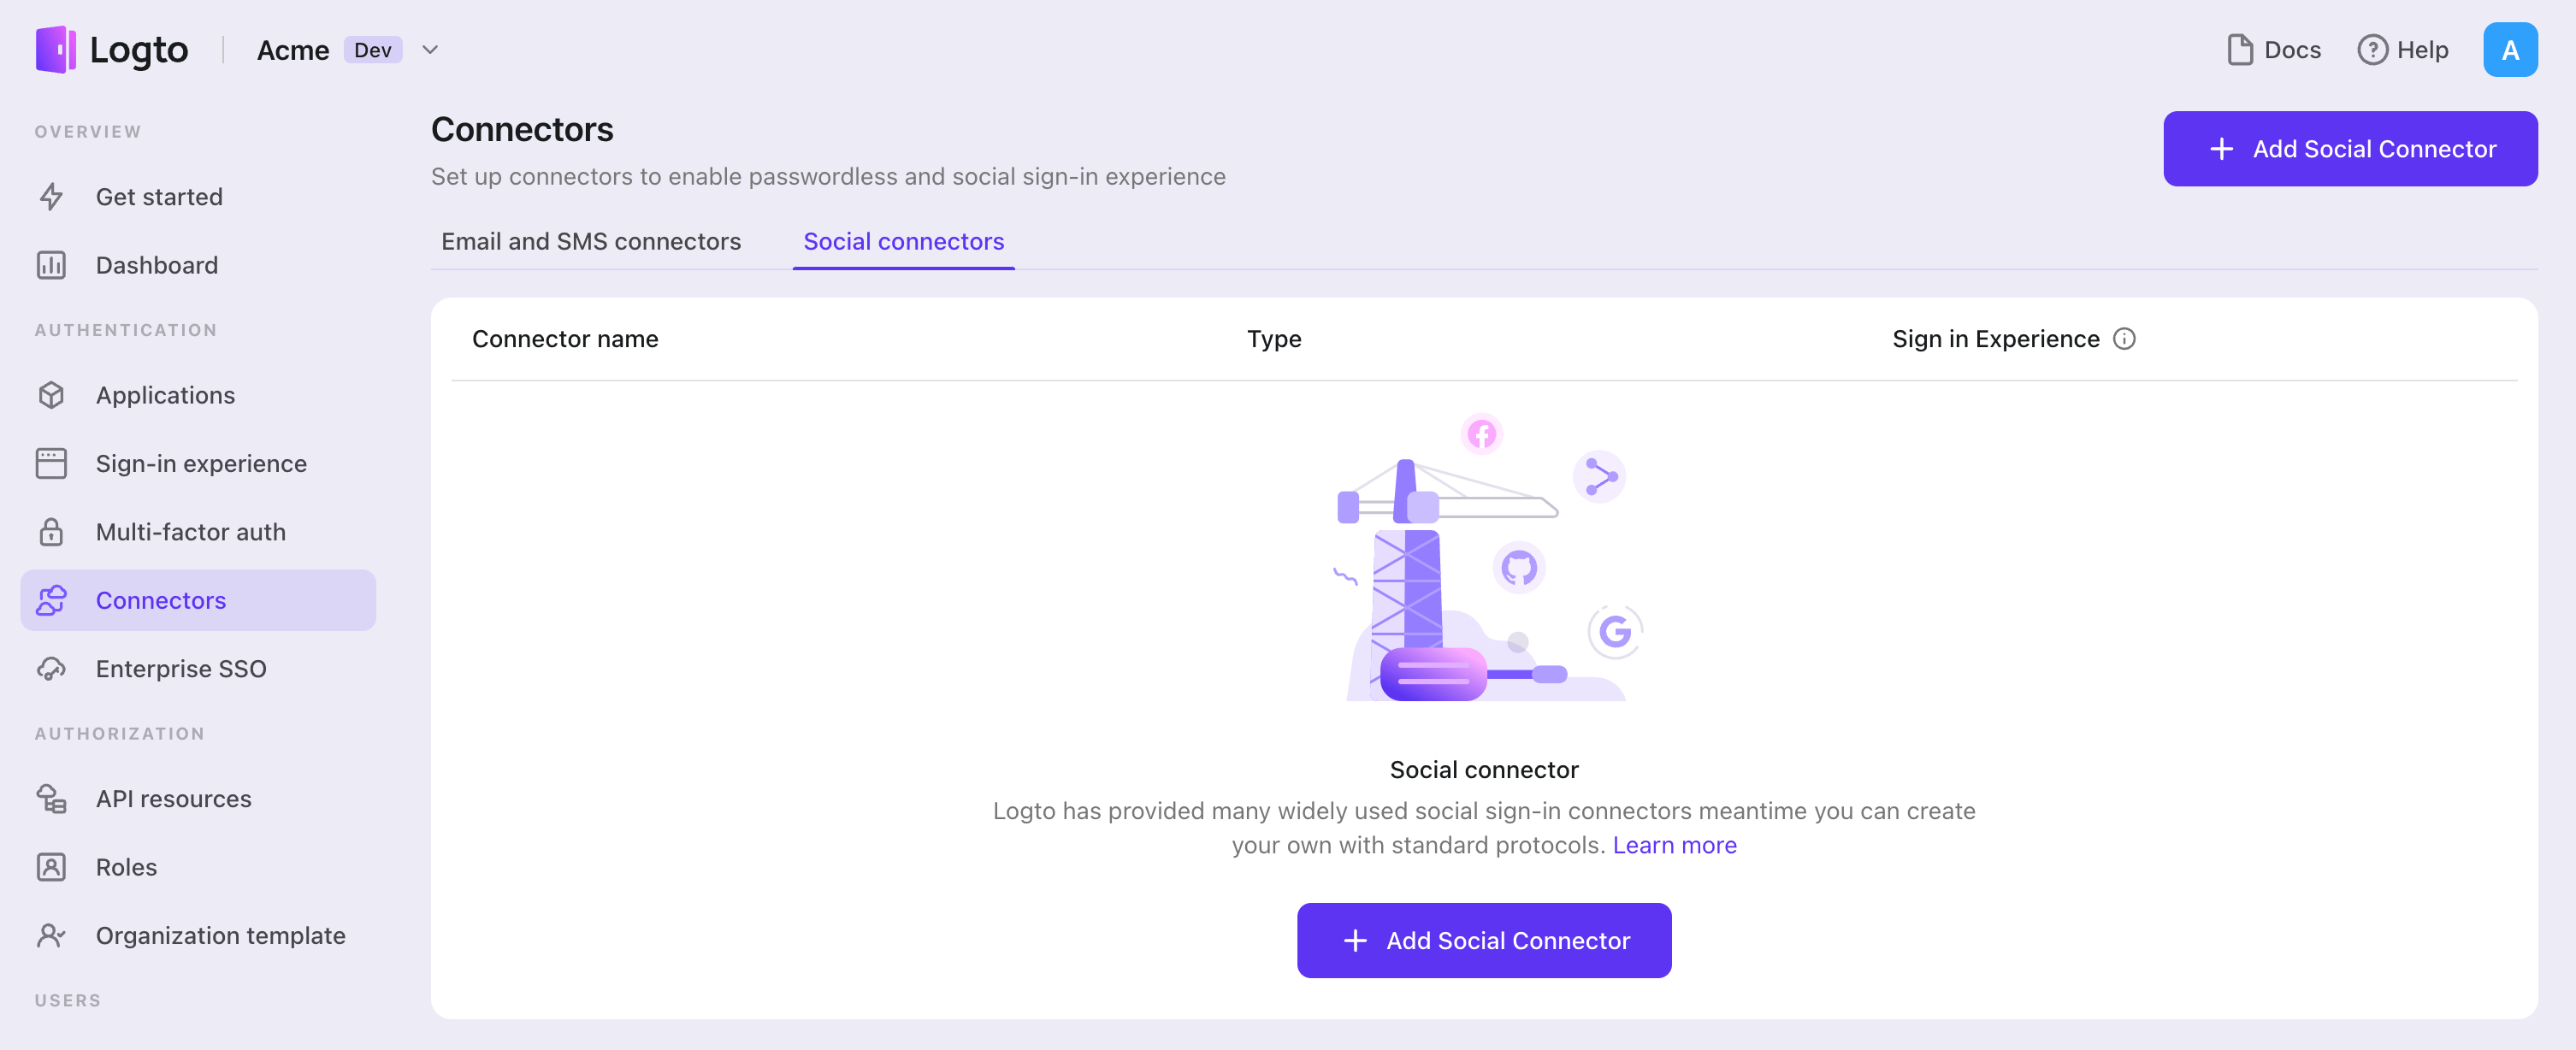
- Navigate to Console > Connectors > Social Connectors.
- Click "Add social connector" and select "OIDC".
- Follow the README guide and complete required fields and customize settings.

If you are following the in-place Connector guide, you can skip the next section.
Set up Standard OIDC app
Create your OIDC app
When you open this page, we believe you already know which social identity provider you want to connect to. The first thing to do is to confirm that the identity provider supports the OIDC protocol, which is a prerequisite for configuring a valid connector. Then, follow the identity provider's instructions to register and create the relevant app for OIDC authorization.
Configure your connector
We ONLY support "Authorization Code" grant type for security consideration and it can perfectly fit Logto's scenario.
clientId and clientSecret can be found at your OIDC apps details page.
clientId: The client ID is a unique identifier that identifies the client application during registration with the authorization server. This ID is used by the authorization server to verify the identity of the client application and to associate any authorized access tokens with that specific client application.
clientSecret: The client secret is a confidential key that is issued to the client application by the authorization server during registration. The client application uses this secret key to authenticate itself with the authorization server when requesting access tokens. The client secret is considered confidential information and should be kept secure at all times.
tokenEndpointAuthMethod: The token endpoint authentication method is used by the client application to authenticate itself with the authorization server when requesting access tokens. To discover supported methods, consult the token_endpoint_auth_methods_supported field available at the OAuth 2.0 service provider’s OpenID Connect discovery endpoint, or refer to the relevant documentation provided by the OAuth 2.0 service provider.
clientSecretJwtSigningAlgorithm (Optional): Only required when tokenEndpointAuthMethod is client_secret_jwt. The client secret JWT signing algorithm is used by the client application to sign the JWT that is sent to the authorization server during the token request.
scope: The scope parameter is used to specify the set of resources and permissions that the client application is requesting access to. The scope parameter is typically defined as a space-separated list of values that represent specific permissions. For example, a scope value of "read write" might indicate that the client application is requesting read and write access to a user's data.
You are expected to find authorizationEndpoint, tokenEndpoint, jwksUri and issuer as OpenID Provider's configuration information. They should be available in social vendor's documentation.
authenticationEndpoint: This endpoint is used to initiate the authentication process. The authentication process typically involves the user logging in and granting authorization for the client application to access their resources.
tokenEndpoint: This endpoint is used by the client application to obtain an id token that can be used to access the requested resources. The client application typically sends a request to the token endpoint with a grant type and authorization code to receive an id token.
jwksUri: This is the URL endpoint where the JSON Web Key Set (JWKS) of the social identity provider (IdP for short) can be obtained. The JWKS is a set of cryptographic keys that the IdP uses to sign and verify JSON Web Tokens (JWTs) that are issued during the authentication process. The jwksUri is used by the relying party (RP) to obtain the public keys used by the IdP to sign the JWTs, so the RP can verify the authenticity and integrity of the JWTs received from the IdP.
issuer: This is the unique identifier of the IdP that is used by the RP to verify the JWTs received from the IdP. It is included in the JWTs as the iss claim (Id token is always a JWT). The issuer value should match the URL of the IdP's authorization server, and it should be a URI that the RP trusts. When the RP receives a JWT, it checks the iss claim to ensure that it was issued by a trusted IdP, and that the JWT is intended for use with the RP.
Together, jwksUri and issuer provide a secure mechanism for the RP to verify the identity of the end-user during the authentication process. By using the public keys obtained from the jwksUri, the RP can verify the authenticity and integrity of the JWTs issued by the IdP. The issuer value ensures that the RP only accepts JWTs that were issued by a trusted IdP, and that the JWTs are intended for use with the RP.
Since an authentication request is always required, an authRequestOptionalConfig is provided to wrap all optional configs, you can find details on OIDC Authentication Request. You may also find that nonce is missing in this config. Since nonce should identical for each request, we put the generation of nonce in code implementation. So do not worry about it! Previously mentioned jwksUri and issuer are also included in idTokenVerificationConfig.
You may be curious as to why a standard OIDC protocol supports both the implicit and hybrid flows, yet the Logto connector only supports the authorization flow. It has been determined that the implicit and hybrid flows are less secure than the authorization flow. Due to Logto's focus on security, it only supports the authorization flow for the highest level of security for its users, despite its slightly less convenient nature.
responseType and grantType can ONLY be FIXED values with "Authorization Code" flow, so we make them optional and default values will be automatically filled.
For all flow types, we provided an OPTIONAL customConfig key to put your customize parameters.
Each social identity provider could have their own variant on OIDC standard protocol. If your desired social identity provider strictly stick to OIDC standard protocol, the you do not need to care about customConfig.
Config types
| Name | Type | Required |
|---|---|---|
| scope | string | True |
| clientId | string | True |
| clientSecret | string | True |
| authorizationEndpoint | string | True |
| tokenEndpoint | string | True |
| idTokenVerificationConfig | IdTokenVerificationConfig | True |
| authRequestOptionalConfig | AuthRequestOptionalConfig | False |
| customConfig | Record<string, string> | False |
| AuthRequestOptionalConfig properties | Type | Required |
|---|---|---|
| responseType | string | False |
| tokenEndpoint | string | False |
| responseMode | string | False |
| display | string | False |
| prompt | string | False |
| maxAge | string | False |
| uiLocales | string | False |
| idTokenHint | string | False |
| loginHint | string | False |
| acrValues | string | False |
| IdTokenVerificationConfig properties | Type | Required |
|---|---|---|
| jwksUri | string | True |
| issuer | string | string[] | False |
| audience | string | string[] | False |
| algorithms | string[] | False |
| clockTolerance | string | number | False |
| crit | Record<string, string | boolean> | False |
| currentDate | Date | False |
| maxTokenAge | string | number | False |
| subject | string | False |
| typ | string | False |
See here to find more details about IdTokenVerificationConfig.
Save your configuration
Double check you have filled out necessary values in the Logto connector configuration area. Click "Save and Done" (or "Save changes") and the OIDC connector should be available now.
Enable OIDC connector in Sign-in Experience
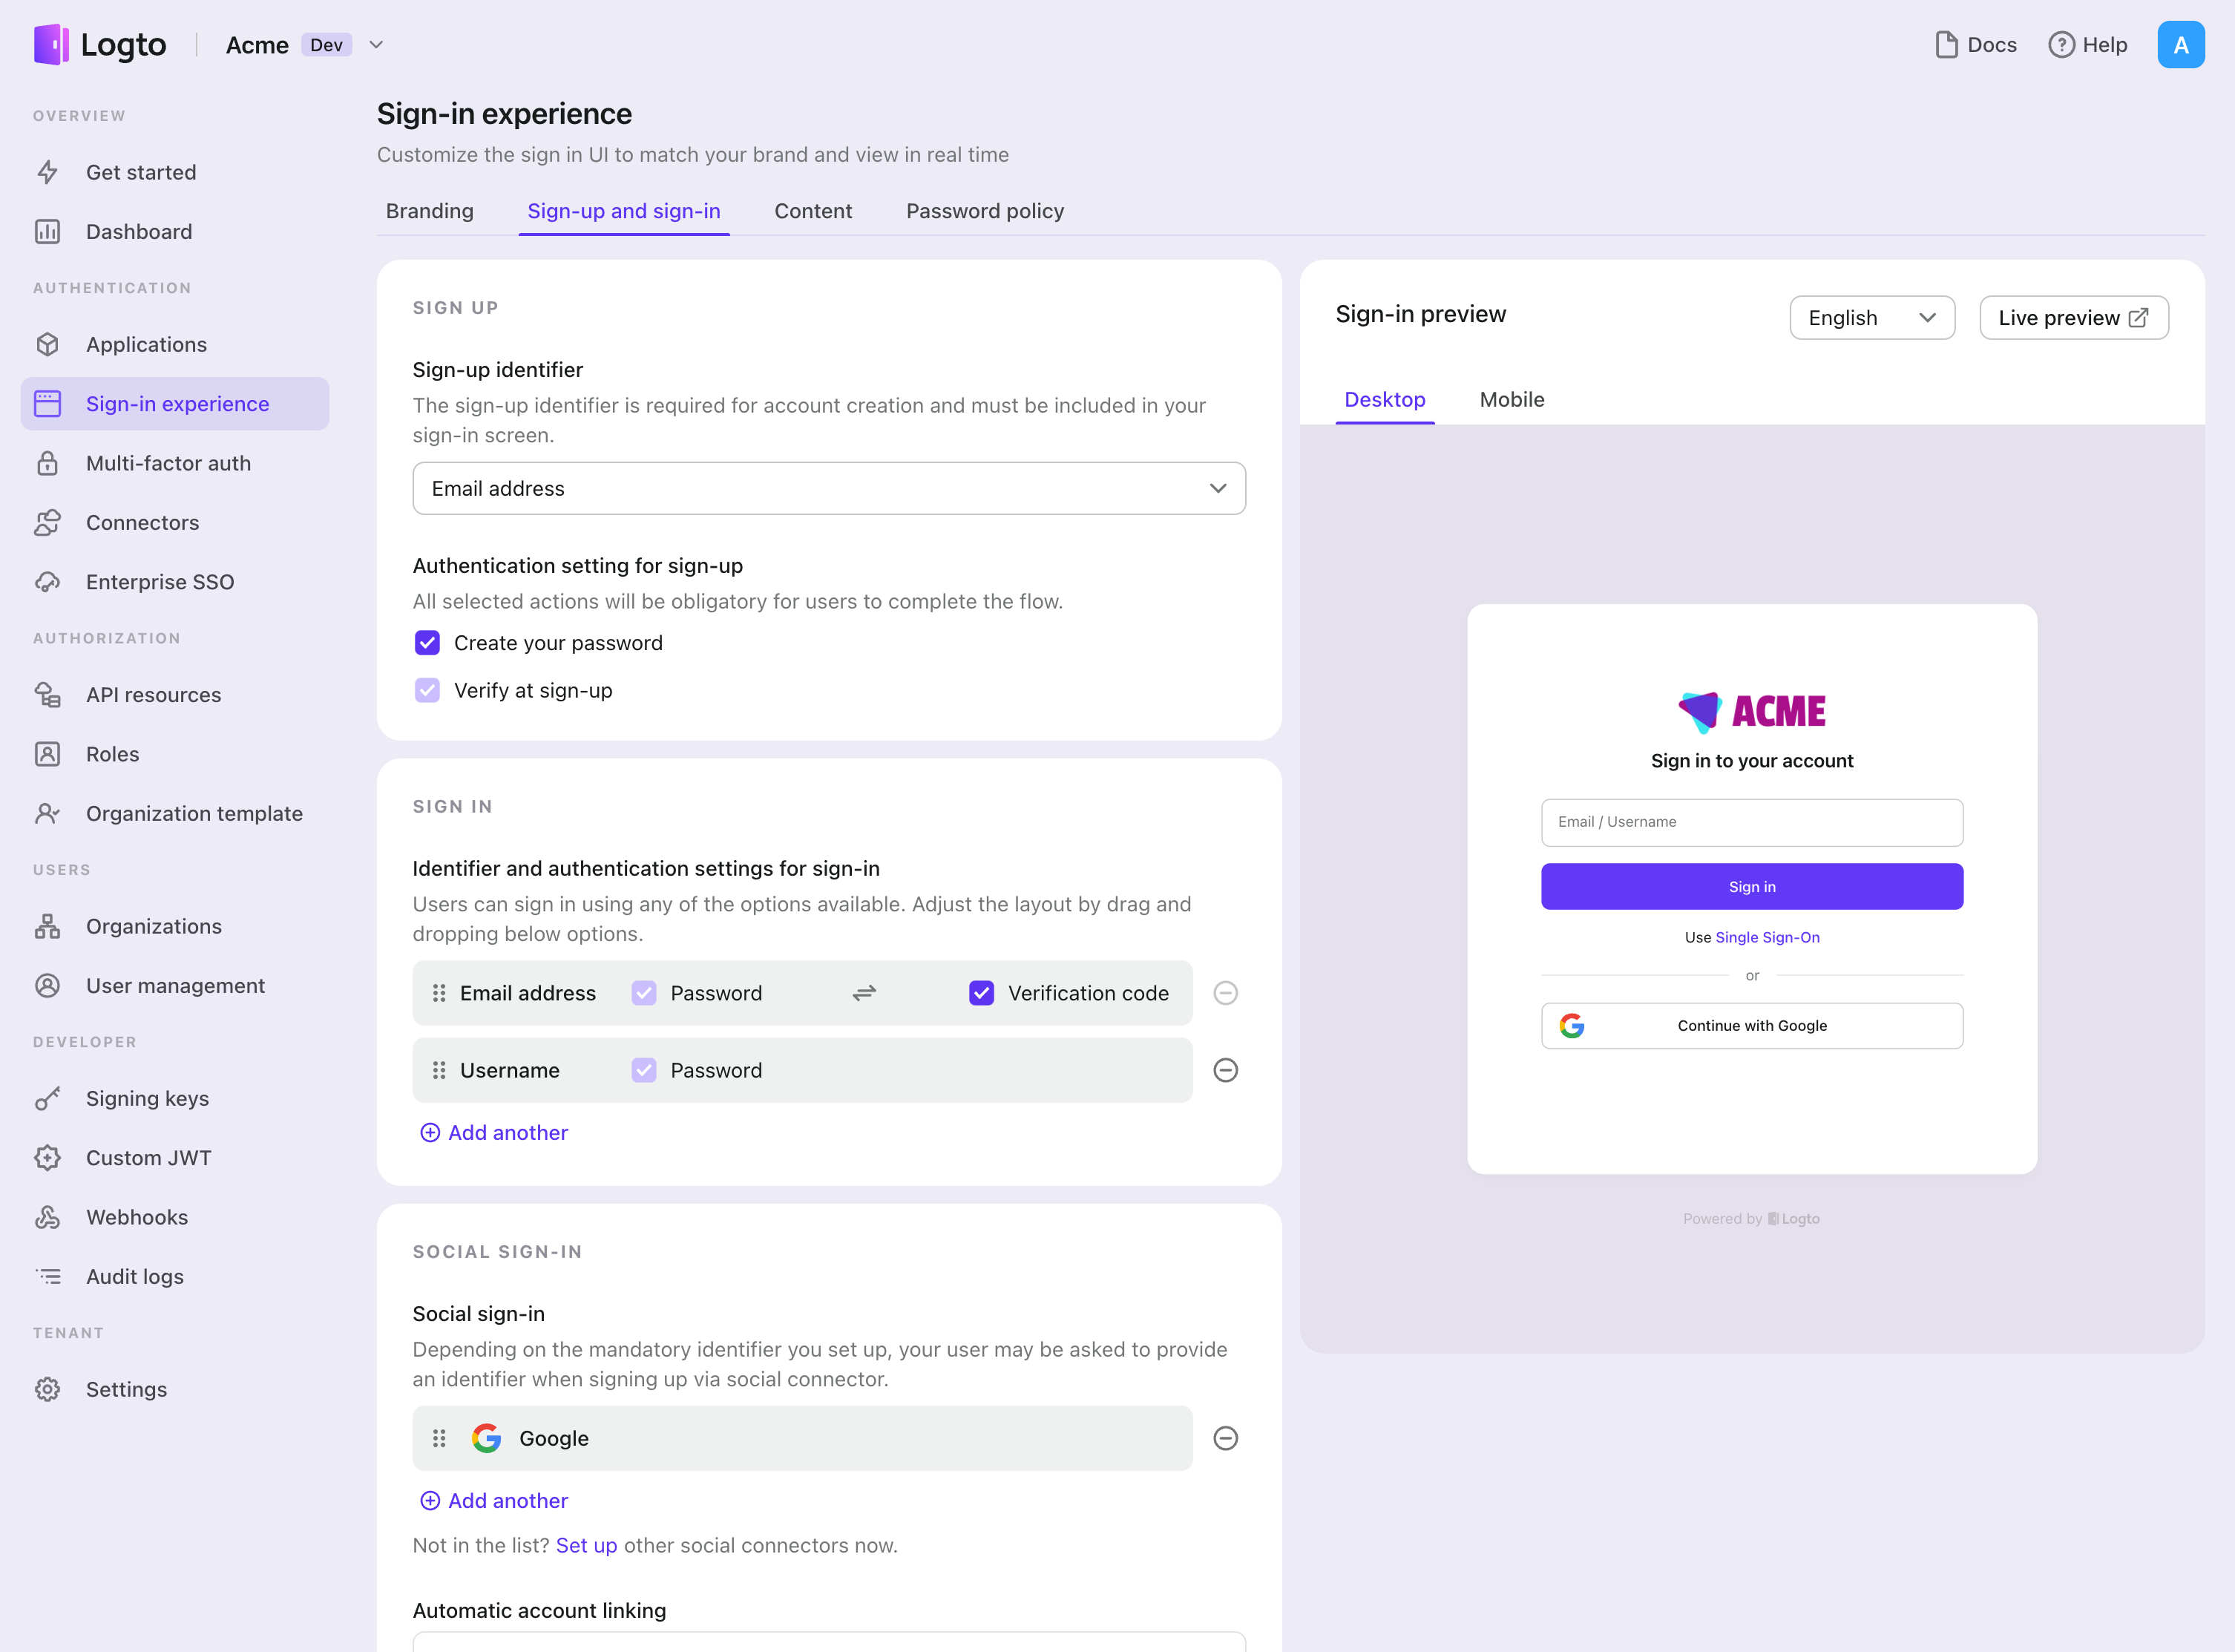
Once you create a social connector successfully, you can enable it as a "Continue with OIDC" button in Sign-in Experience.
- Navigate to Console > Sign-in experience > Sign-up and sign-in.
- (Optional) Choose "Not applicable" for sign-up identifier if you need social login only.
- Add configured OIDC connector to the "Social sign-in" section.

Testing and Validation
Return to your .NET Core (Blazor WebAssembly) app. You should now be able to sign in with OIDC. Enjoy!
Further readings
End-user flows: Logto provides a out-of-the-box authentication flows including MFA and enterprise SSO, along with powerful APIs for flexible implementation of account settings, security verification, and multi-tenant experience.
Authorization: Authorization defines the actions a user can do or resources they can access after being authenticated. Explore how to protect your API for native and single-page applications and implement Role-based Access Control (RBAC).
Organizations: Particularly effective in multi-tenant SaaS and B2B apps, the organization feature enable tenant creation, member management, organization-level RBAC, and just-in-time-provisioning.
Customer IAM series Our serial blog posts about Customer (or Consumer) Identity and Access Management, from 101 to advanced topics and beyond.