Logto は、モダンなアプリや SaaS 製品向けに設計された Auth0 の代替です。 Cloud と オープンソース の両方のサービスを提供し、アイデンティティと管理 (IAM) システムを迅速に立ち上げるのに役立ちます。認証 (Authentication)、認可 (Authorization)、マルチテナント管理を すべて一つに まとめて楽しんでください。
Logto Cloud で無料の開発テナントから始めることをお勧めします。これにより、すべての機能を簡単に探索できます。
この記事では、Android (Kotlin / Java) と Logto を使用して、Twilio サインイン体験(ユーザー認証 (Authentication))を迅速に構築する手順を説明します。
前提条件
- 稼働中の Logto インスタンス。紹介ページ をチェックして始めてください。
- Android (Kotlin / Java) の基本的な知識。
- 使用可能な Twilio アカウント。
Logto にアプリケーションを作成する
Logto は OpenID Connect (OIDC) 認証 (Authentication) と OAuth 2.0 認可 (Authorization) に基づいています。これは、複数のアプリケーション間でのフェデレーテッドアイデンティティ管理をサポートし、一般的にシングルサインオン (SSO) と呼ばれます。
あなたの ネイティブアプリ アプリケーションを作成するには、次の手順に従ってください:
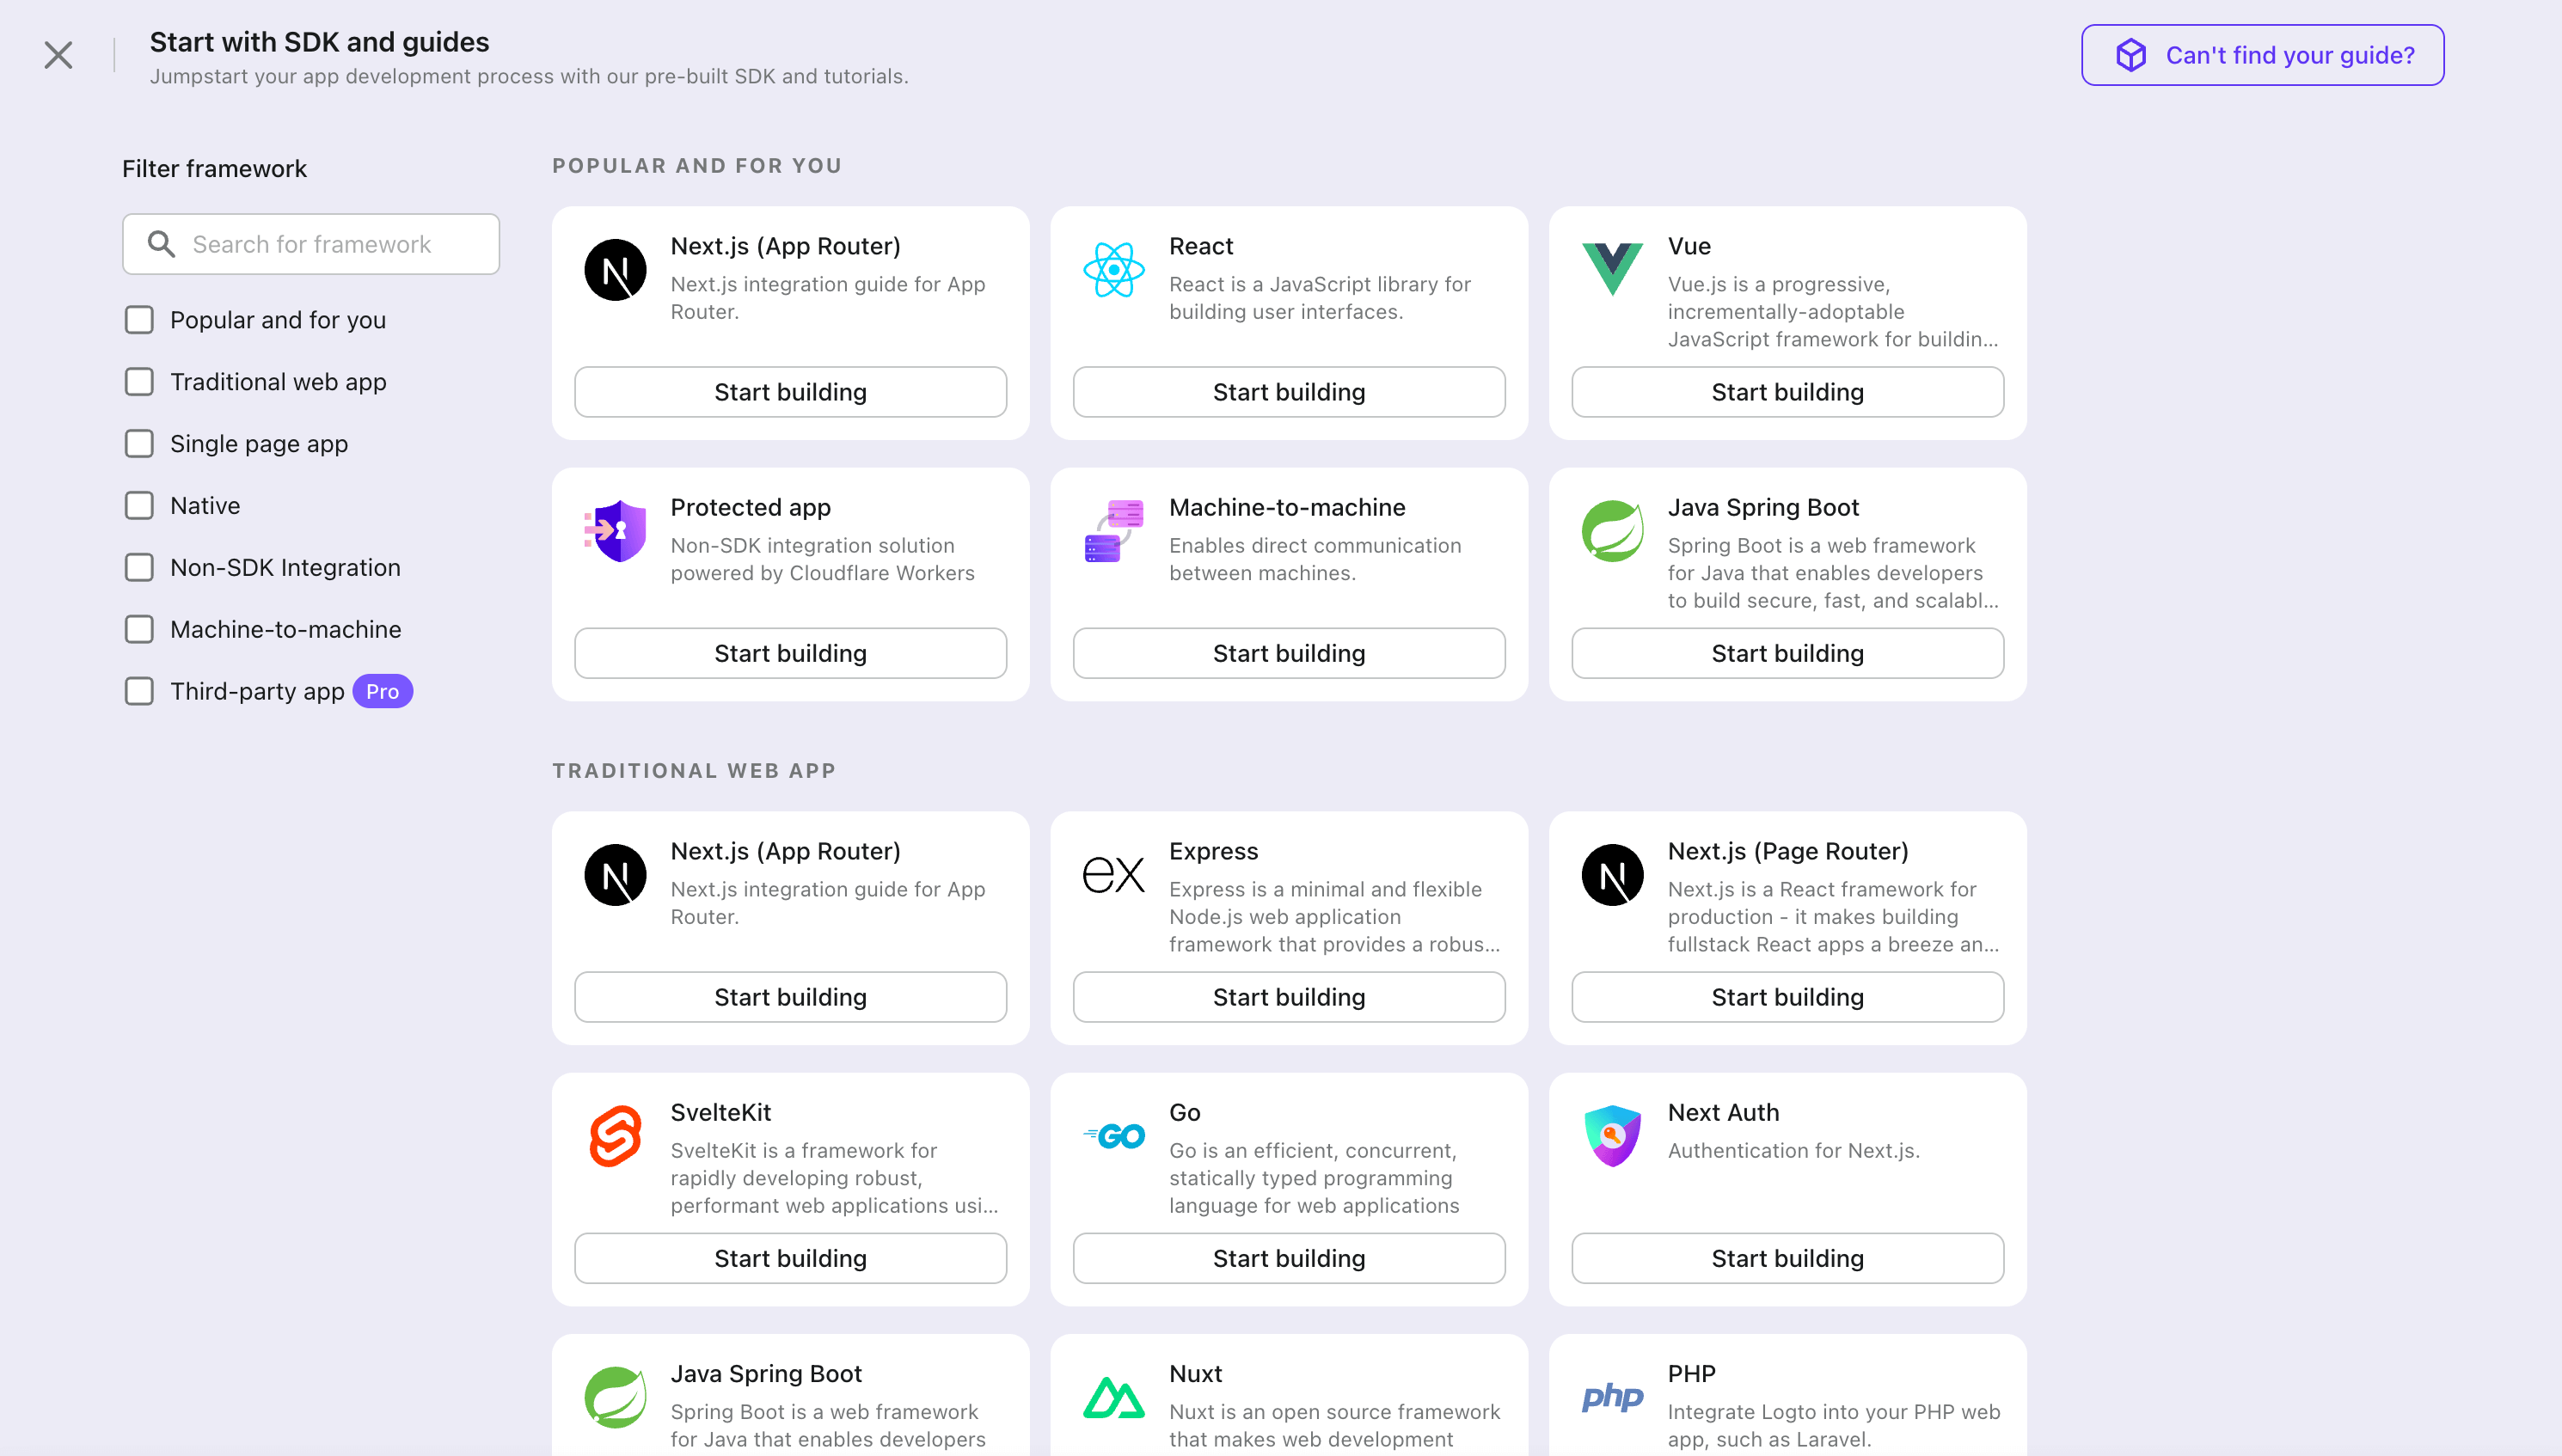
- Logto コンソール を開きます。「Get started」セクションで、「View all」リンクをクリックしてアプリケーションフレームワークのリストを開きます。あるいは、Logto Console > Applications に移動し、「Create application」ボタンをクリックします。

- 開いたモーダルで、左側のクイックフィルターチェックボックスを使用して、利用可能なすべての "ネイティブアプリ" フレームワークをフィルタリングするか、"ネイティブアプリ" セクションをクリックします。"Android" フレームワークカードをクリックして、アプリケーションの作成を開始します。

- アプリケーション名を入力します。例:「Bookstore」と入力し、「Create application」をクリックします。
🎉 タダーン!Logto で最初のアプリケーションを作成しました。詳細な統合ガイドを含むお祝いページが表示されます。ガイドに従って、アプリケーションでの体験を確認してください。
Logto SDK を統合する
- この例は View システム と View Model に基づいていますが、Jetpack Compose を使用する場合でも概念は同じです。
- この例は Kotlin で書かれていますが、Java でも概念は同じです。
- Kotlin と Java のサンプルプロジェクトは、私たちの SDK リポジトリ で利用可能です。
- チュートリアルビデオは、私たちの YouTube チャンネル で視聴できます。
インストール
Logto Android SDK のサポートされている最小 Android API レベルはレベル 24 です。
Logto Android SDK をインストールする前に、Gradle プロジェクトのビルドファイルで mavenCentral() がリポジトリ設定に追加されていることを確認してください:
dependencyResolutionManagement {
  repositories {
    mavenCentral()
  }
}
Logto Android SDK を依存関係に追加します:
- Kotlin
- Groovy
dependencies {
  implementation("io.logto.sdk:android:1.1.3")
}
dependencies {
  implementation 'io.logto.sdk:android:1.1.3'
}
SDK はインターネットアクセスが必要なため、次の権限を AndroidManifest.xml ファイルに追加する必要があります:
<?xml version="1.0" encoding="utf-8"?>
<manifest xmlns:android="http://schemas.android.com/apk/res/android"
  xmlns:tools="http://schemas.android.com/tools">

  <!-- インターネット権限を追加 -->
  <uses-permission android:name="android.permission.INTERNET" />

  <!-- その他の設定... -->
</manifest>
LogtoClient の初期化
LogtoViewModel.kt を作成し、このビューモデルで LogtoClient を初期化します:
//...他のインポート
import io.logto.sdk.android.LogtoClient
import io.logto.sdk.android.type.LogtoConfig

class LogtoViewModel(application: Application) : AndroidViewModel(application) {
    private val logtoConfig = LogtoConfig(
          endpoint = "<your-logto-endpoint>",
          appId = "<your-app-id>",
          scopes = null,
          resources = null,
          usingPersistStorage = true,
    )

    private val logtoClient = LogtoClient(logtoConfig, application)

    companion object {
        val Factory: ViewModelProvider.Factory = object : ViewModelProvider.Factory {
            @Suppress("UNCHECKED_CAST")
            override fun <T : ViewModel> create(
                modelClass: Class<T>,
                extras: CreationExtras
            ): T {
                // extras から Application オブジェクトを取得
                val application = checkNotNull(extras[APPLICATION_KEY])
                return LogtoViewModel(application) as T
            }
        }
    }
}
次に、MainActivity.kt のために LogtoViewModel を作成します:
//...他のインポート
class MainActivity : AppCompatActivity() {
    private val logtoViewModel: LogtoViewModel by viewModels { LogtoViewModel.Factory }
    //...他のコード
}
リダイレクト URI の設定
Logto コンソールのアプリケーション詳細ページに切り替えましょう。リダイレクト URI io.logto.android://io.logto.sample/callback を追加し、「変更を保存」をクリックします。

サインインとサインアウトの実装
logtoClient.signIn を呼び出す前に、Admin Console でリダイレクト URI
が正しく設定されていることを確認してください。 :::
logtoClient.signIn を使用してユーザーをサインインし、logtoClient.signOut を使用してユーザーをサインアウトできます。
例えば、Android アプリでは次のようにします:
//...他のインポートと共に
class LogtoViewModel(application: Application) : AndroidViewModel(application) {
    // ...他のコード

    // 認証 (Authentication) 状態を監視するライブデータを追加
    private val _authenticated = MutableLiveData(logtoClient.isAuthenticated)
    val authenticated: LiveData<Boolean>
        get() = _authenticated

    fun signIn(context: Activity) {
        logtoClient.signIn(context, "io.logto.android://io.logto.sample/callback") { logtoException ->
            logtoException?.let { println(it) }
            // ライブデータを更新
            _authenticated.postValue(logtoClient.isAuthenticated)
        }
    }

    fun signOut() {
        logtoClient.signOut { logtoException ->
            logtoException?.let { println(it) }
            // ライブデータを更新
            _authenticated.postValue(logtoClient.isAuthenticated)
        }
    }
}
次に、アクティビティ内で signIn と signOut メソッドを呼び出します:
class MainActivity : AppCompatActivity() {
    override fun onCreate(savedInstanceState: Bundle?) {
        //...他のコード

        // レイアウトに id "sign_in_button" を持つボタンがあると仮定
        val signInButton = findViewById<Button>(R.id.sign_in_button)
        signInButton.setOnClickListener {
            logtoViewModel.signIn(this)
        }

        // レイアウトに id "sign_out_button" を持つボタンがあると仮定
        val signOutButton = findViewById<Button>(R.id.sign_out_button)
        signOutButton.setOnClickListener {
            if (logtoViewModel.authenticated) { // ユーザーが認証 (Authentication) されているか確認
                logtoViewModel.signOut()
            }
        }

        // 認証 (Authentication) 状態を監視して UI を更新
        logtoViewModel.authenticated.observe(this) { authenticated ->
            if (authenticated) {
                // ユーザーは認証 (Authentication) されています
                signInButton.visibility = View.GONE
                signOutButton.visibility = View.VISIBLE
            } else {
                // ユーザーは認証 (Authentication) されていません
                signInButton.visibility = View.VISIBLE
                signOutButton.visibility = View.GONE
            }
        }

    }
}
チェックポイント: アプリケーションをテストする
これで、アプリケーションをテストできます:
- アプリケーションを実行すると、サインインボタンが表示されます。
- サインインボタンをクリックすると、SDK がサインインプロセスを初期化し、Logto のサインインページにリダイレクトされます。
- サインインすると、アプリケーションに戻り、サインアウトボタンが表示されます。
- サインアウトボタンをクリックして、トークンストレージをクリアし、サインアウトします。
Twilio コネクターを追加する
SMS コネクターは、認証 (Authentication) のためにワンタイムパスワード (OTP) を送信するための方法です。これは、SMS ベースの登録、サインイン、二要素認証 (2FA)、アカウント回復を含むパスワードレス認証 (Authentication) をサポートするために 電話番号 の確認を可能にします。 Logto の SMS コネクターを使用すると、数分でこれを設定できます。
SMS コネクターを追加するには、次の手順に従ってください:
- Console > Connector > Email and SMS connectors に移動します。
- 新しい SMS コネクターを追加するには、「Set up」ボタンをクリックし、「Twilio」を選択します。
- 選択したプロバイダーの README ドキュメントを確認します。
- 「Parameter Configuration」セクションで設定フィールドを完了します。
- JSON エディターを使用して SMS テンプレートをカスタマイズします。
- 電話番号 に確認コードを送信して設定をテストします。

インプレースコネクターガイドに従っている場合は、次のセクションをスキップできます。
Twilio SMS コネクター を設定する
Twilio アカウントを登録する
Twilio で新しいアカウントを作成します。(すでにアカウントをお持ちの場合は次のステップに進んでください。)
送信者の電話番号を設定する
Twilio コンソールページ にアクセスし、Twilio アカウントでサインインします。
「Phone Numbers」->「Manage」->「Buy a number」から電話番号を購入します。
特定の国や地域で SMS サービスがサポートされていない場合があります。他の地域から番号を選択して回避してください。
有効な番号を取得したら、「Messaging」->「Services」に移動します。ボタンをクリックして新しいメッセージサービスを作成します。
フレンドリーなサービス名を付け、サービスの目的として Notify my users を選択します。次のステップでは、Sender Type として Phone Number を選択し、取得した電話番号を送信者としてこのサービスに追加します。
各電話番号は 1 つのメッセージングサービスにのみリンクできます。
アカウントの資格情報を取得する
コネクターを機能させるために API の資格情報が必要です。Twilio コンソールページ から始めましょう。
右上の「Account」メニューをクリックし、「API keys & tokens」ページに移動して Account SID と Auth token を取得します。
サイドバーから「Messaging」->「Services」設定ページに戻り、サービスの Sid を見つけます。
コネクター JSON を作成する
accountSID、authToken、fromMessagingServiceSID フィールドに、対応するメッセージングサービスの Account SID、Auth token、Sid を入力します。
異なるケースに対して複数の SMS コネクターテンプレートを追加できます。単一のテンプレートを追加する例を以下に示します:
contentフィールドには任意の文字列型の内容を入力します。ランダムな認証コードのために{{code}}プレースホルダーを忘れずに残してください。usageTypeフィールドには、異なる使用ケースに応じてRegister、SignIn、ForgotPassword、Genericのいずれかを入力します。完全なユーザーフローを有効にするためには、Register、SignIn、ForgotPassword、Genericの usageType を持つテンプレートが必要です。
Twilio SMS コネクターをテストする
電話番号を入力し、「Send」をクリックして、設定が「Save and Done」前に機能するかどうかを確認できます。
これで完了です。サインイン体験でコネクターを有効にする のを忘れないでください。
設定タイプ
| 名前 | タイプ |
|---|---|
| accountSID | string |
| authToken | string |
| fromMessagingServiceSID | string |
| templates | Templates[] |
| テンプレートプロパティ | タイプ | 列挙値 |
|---|---|---|
| content | string | N/A |
| usageType | enum string | 'Register' | 'SignIn' | 'ForgotPassword' | 'Generic' |
設定を保存する
Logto コネクター設定エリアで必要な値をすべて記入したことを確認してください。「保存して完了」または「変更を保存」をクリックすると、Twilio コネクターが利用可能になります。
サインイン体験で Twilio コネクターを有効にする
コネクターを正常に作成したら、電話番号ベースのパスワードレスログインと登録を有効にできます。
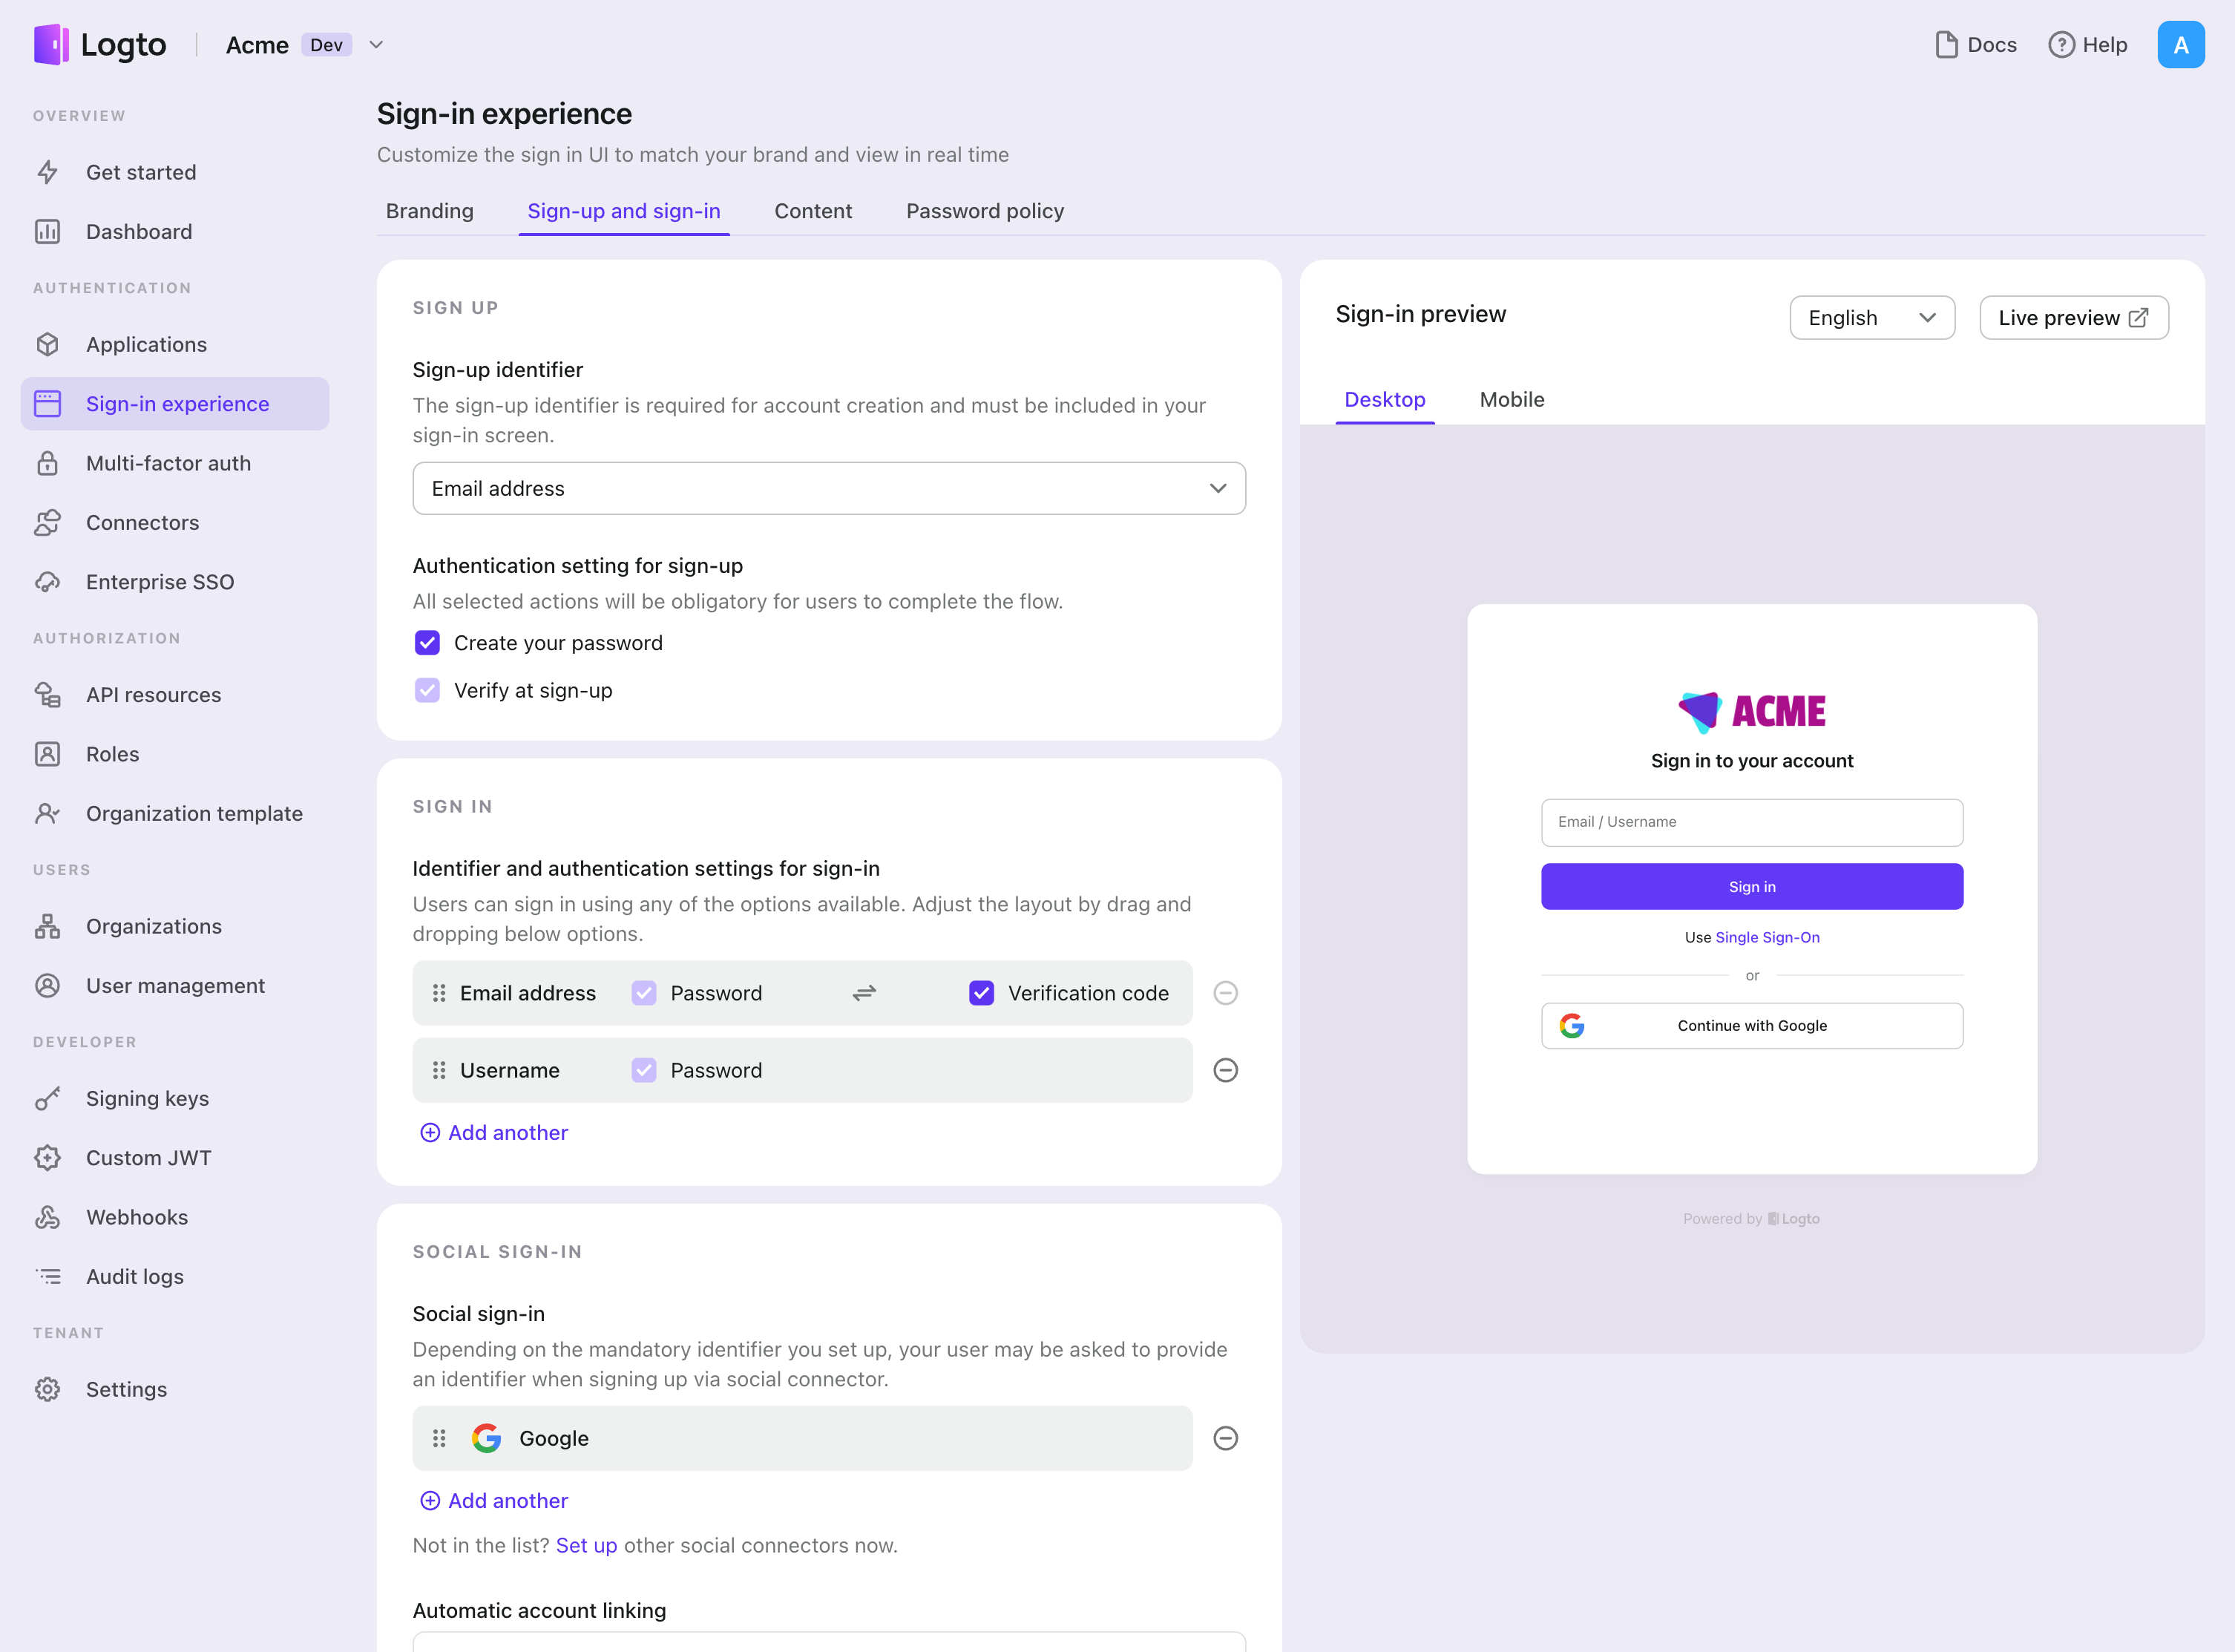
- コンソール > サインイン体験 > サインアップとサインイン に移動します。
- サインアップ方法を設定します(オプション):
- サインアップ識別子として "電話番号" または "Email or phone number" を選択します。
- "Verify at sign-up" は強制的に有効化されます。登録時に "Create a password" を有効にすることもできます。
- サインイン方法を設定します:
- サインイン識別子の一つとして 電話番号 を選択します。複数の利用可能な識別子(メール、電話番号、ユーザー名)を提供できます。
- 認証 (Authentication) 要素として "Verification code" および / または "Password" を選択します。
- "Save changes" をクリックし、"Live preview" でテストします。

OTP を使用した登録とログインに加えて、パスワードの回復や ベースのセキュリティ検証を有効にし、電話番号 をプロファイルにリンクすることもできます。詳細については、エンドユーザーフロー を参照してください。
テストと検証
Android (Kotlin / Java) アプリに戻ります。これで Twilio を使用してサインインできるはずです。お楽しみください!
さらなる読み物
エンドユーザーフロー:Logto は、MFA やエンタープライズシングルサインオン (SSO) を含む即時使用可能な認証 (Authentication) フローを提供し、アカウント設定、セキュリティ検証、マルチテナント体験の柔軟な実装のための強力な API を備えています。
認可 (Authorization):認可 (Authorization) は、ユーザーが認証 (Authentication) された後に行えるアクションやアクセスできるリソースを定義します。ネイティブおよびシングルページアプリケーションの API を保護し、ロールベースのアクセス制御 (RBAC) を実装する方法を探ります。
組織 (Organizations):特にマルチテナント SaaS や B2B アプリで効果的な組織機能は、テナントの作成、メンバー管理、組織レベルの RBAC、およびジャストインタイムプロビジョニングを可能にします。
顧客 IAM シリーズ:顧客(または消費者)アイデンティティとアクセス管理に関する連続ブログ投稿で、101 から高度なトピックまでを網羅しています。