Every app needs authentication and authorization. Logto is an Auth0 alternative designed for modern apps and SaaS products.
In this article, we will go through the steps to quickly build the Naver sign-in experience (user authentication) with React and Logto.
Prerequisites
- A running Logto instance. Check out the get started page if you don't have one.
- Basic knowledge of React.
- A usable Naver account.
Create an application in Logto
In you browser, open a new tab and enter the link of Logto Admin Console.

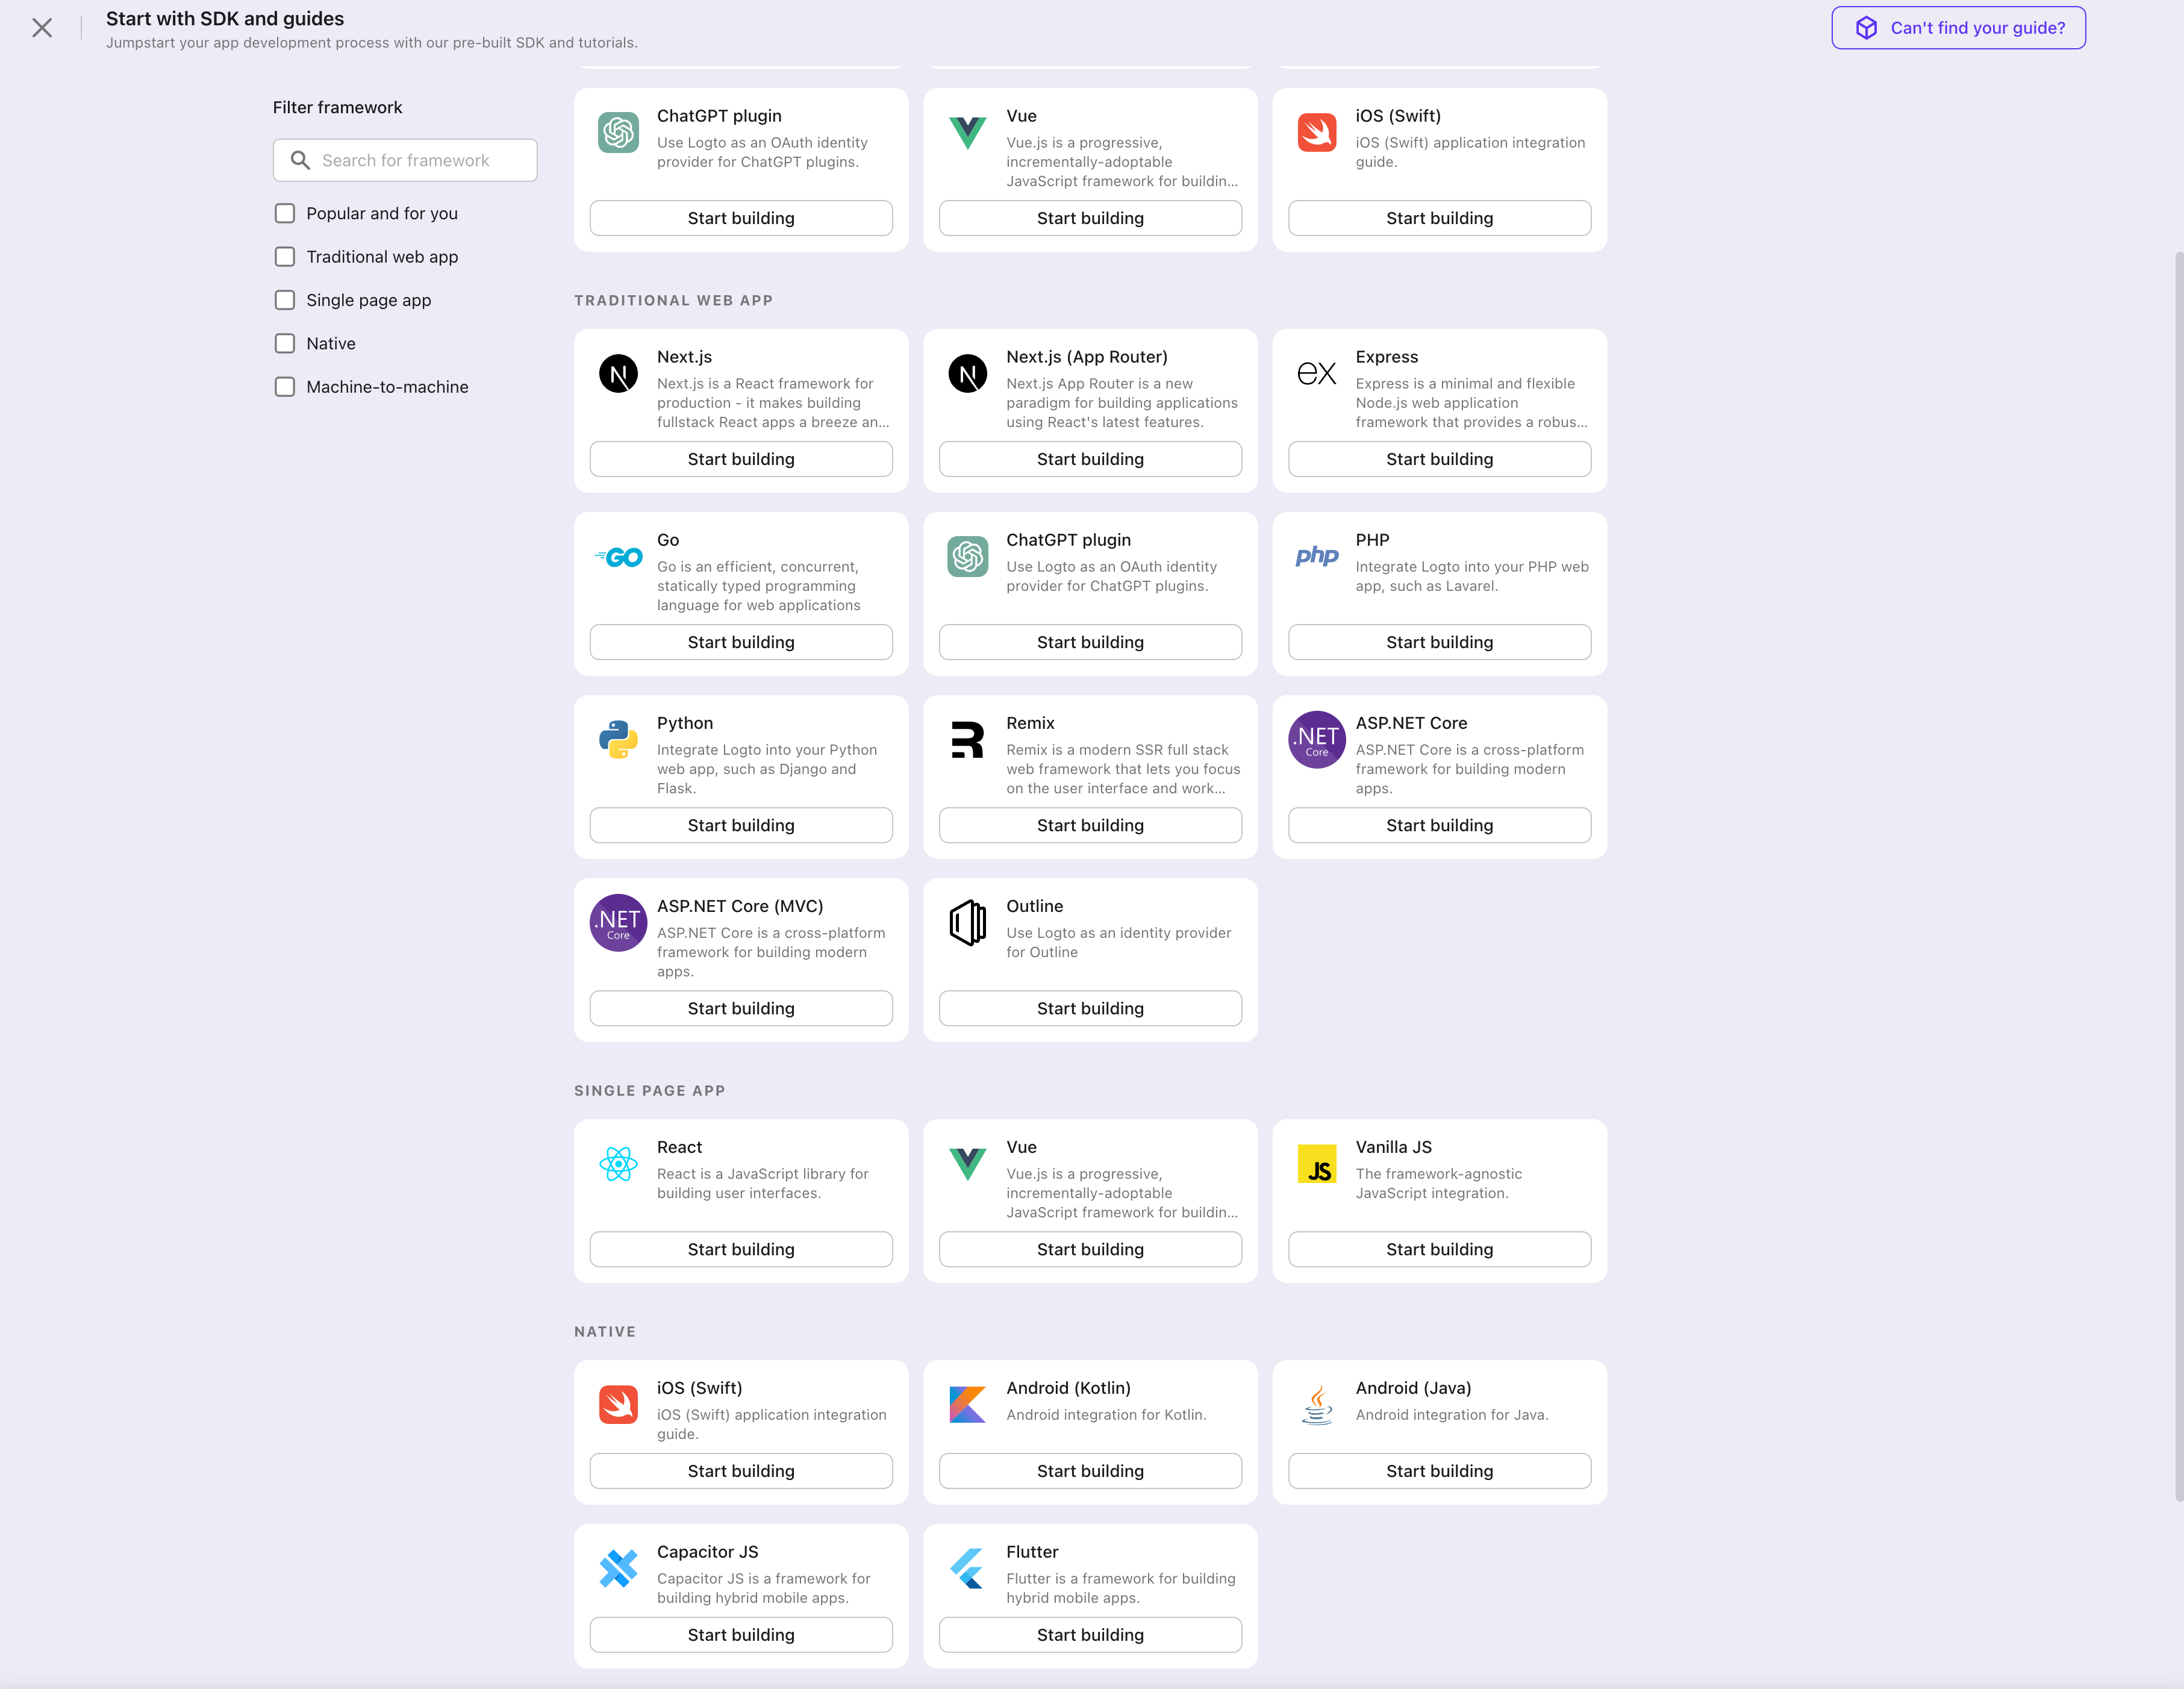
Once the page is loaded, in the "Get Started" section click the View all link to open the application framework list page.
Choose your application type

In the opening modal, scroll to the "Single page app" section or filter all the available " Single page app" frameworks using the quick filter checkboxes on the left.
Click the "React" framework card to start creating your application.
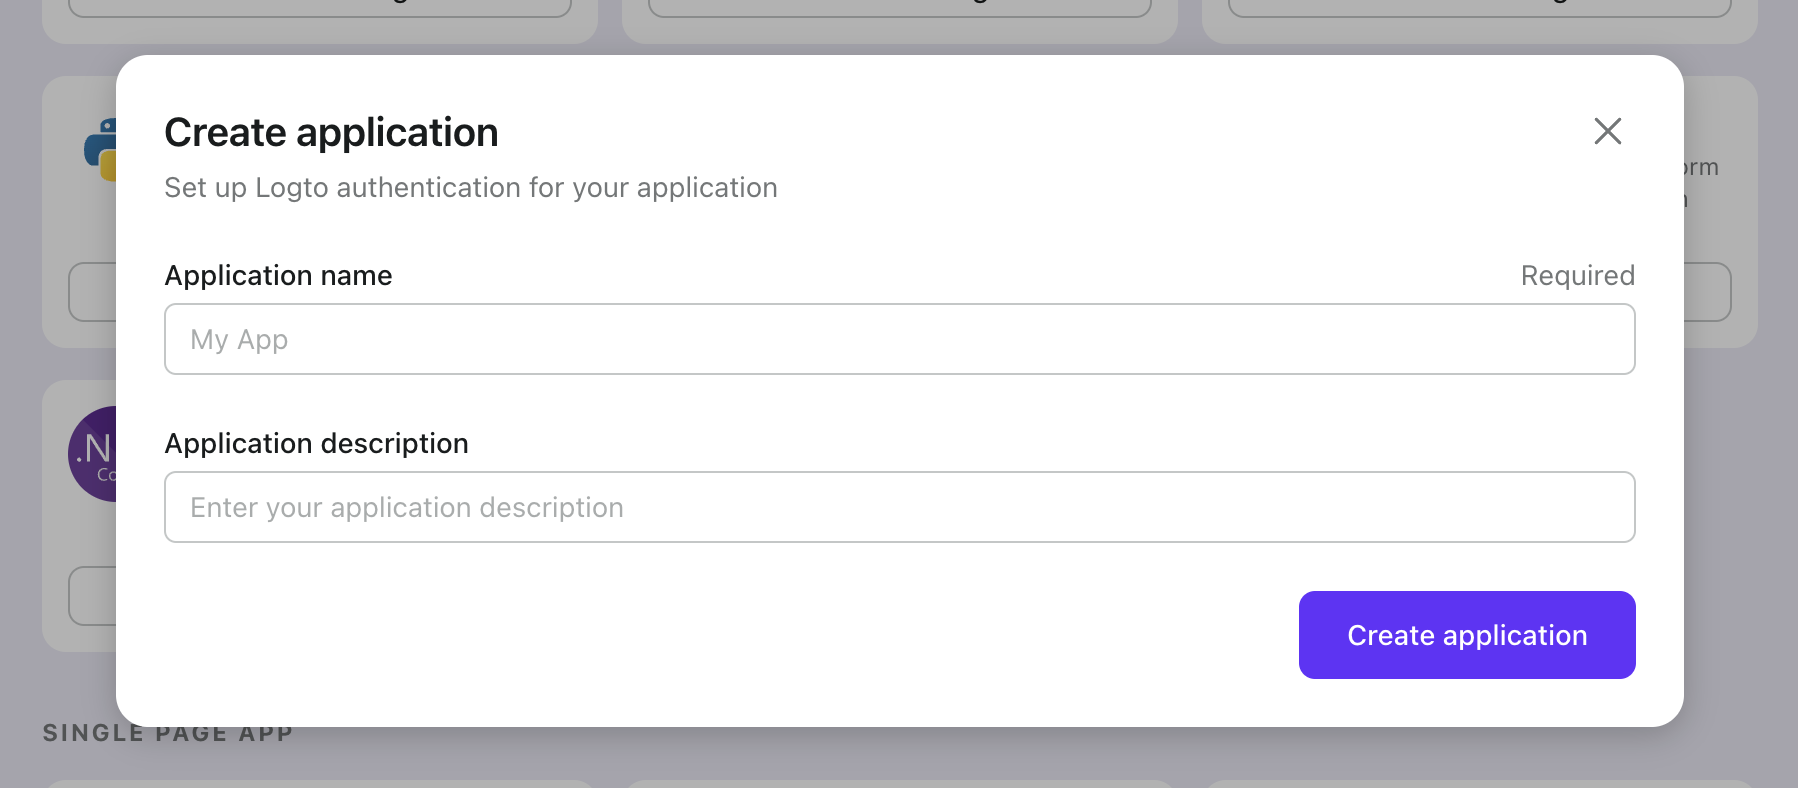
Enter application name

Enter the application name, e.g., "Bookstore," and click "Create Application."
🎉 Ta-da! You just created your first application in Logto. You'll see a congrats page which includes a detailed integration guide. Follow the guide to see what the experience will be in your application.
Integrate Logto SDK
- The sample project is available on our SDK repository.
- The tutorial video is available on our YouTube channel.
Installation
- npm
- Yarn
- pnpm
npm i @logto/react
yarn add @logto/react
pnpm add @logto/react
Init LogtoClient
In the following code snippets, we assume your app is running on http://localhost:3000.
Import and use LogtoProvider to provide a Logto context:
import { LogtoProvider, LogtoConfig } from '@logto/react';

const config: LogtoConfig = {
  endpoint: '<your-logto-endpoint>', // E.g. http://localhost:3001
  appId: '<your-application-id>',
};

const App = () => (
  <LogtoProvider config={config}>
    <YourAppContent />
  </LogtoProvider>
);
Implement sign-in
The sign-in flow can be simplified as:
Configure sign-in redirect URI
Let's switch to the Application details page of Logto Console. Add a Redirect URI
http://localhost:3000/callback and click "Save Changes".
Redirect URI is an OAuth 2.0 concept which implies the location should redirect after authentication.
Implement a sign-in button
We provide two hooks useHandleSignInCallback() and useLogto() which can help you easily manage the authentication flow.
Before calling .signIn(), make sure you have correctly configured Redirect URI
in Admin Console.
Go back to your IDE/editor, use the following code to implement the sign-in button:
import { useLogto } from '@logto/react';

const SignIn = () => {
  const { signIn, isAuthenticated } = useLogto();

  if (isAuthenticated) {
    return <div>Signed in</div>;
  }

  return <button onClick={() => signIn('http://localhost:3000/callback')}>Sign In</button>;
};
Handle redirect
We're almost there! In the last step, we use http://localhost:3000/callback as the Redirect URI, and now we need to handle it properly.
First let's create a callback component:
import { useHandleSignInCallback } from '@logto/react';

const Callback = () => {
  const { isLoading } = useHandleSignInCallback(() => {
    // Navigate to root path when finished
  });

  // When it's working in progress
  if (isLoading) {
    return <div>Redirecting...</div>;
  }

  return null;
};
Finally insert the code below to create a /callback route which does NOT require authentication:
// Assuming react-router
<Route path="/callback" element={<Callback />} />
Implement sign-out
Calling .signOut() will clear all the Logto data in memory and localStorage if they exist.
After signing out, it'll be great to redirect your user back to your website. Let's add http://localhost:3000 as one of the Post Sign-out URIs in Admin Console (shows under Redirect URIs), and use the URL as the parameter when calling .signOut().
Implement a sign-out button
const SignOut = () => {
  const { signOut } = useLogto();

  return <button onClick={() => signOut('http://localhost:3000')}>Sign out</button>;
};
Handle authentication status
In Logto SDK, generally we can use logtoClient.isAuthenticated to check the authentication status, if the user is signed in, the value will be true, otherwise, the value will be false.
In Logto React SDK, the isAuthenticated status can be checked by using the useLogto hook. In the example code below, we can use it to programmatically show and hide the sign-in and sign-out buttons. And also use getIdTokenClaims to get the id of the currently logged-in user.
const Home = () => {
  const { isAuthenticated, getIdTokenClaims, signIn, signOut } = useLogto();
  const [userId, setUserId] = useState('');

  useEffect(() => {
    (async () => {
      if (isAuthenticated) {
        const claims = await getIdTokenClaims();
        setUserId(claims.sub);
      }
    })();
  }, [isAuthenticated]);

  return (
    <div>
      {userId && <p>Logged in as {userId}</p>}
      {isAuthenticated ? (
        <button onClick={signOut}>Sign Out</button>
      ) : (
        <button onClick={() => signIn('http://localhost:3000/callback')}>Sign In</button>
      )}
    </div>
  );
};
Open your React app to test if the integration works. When you click the "Sign In" button, the page should be redirected to a Logto sign-in page, and you should be able to create a new account by entering username and password and complete the sign-in process.
Add Naver connector
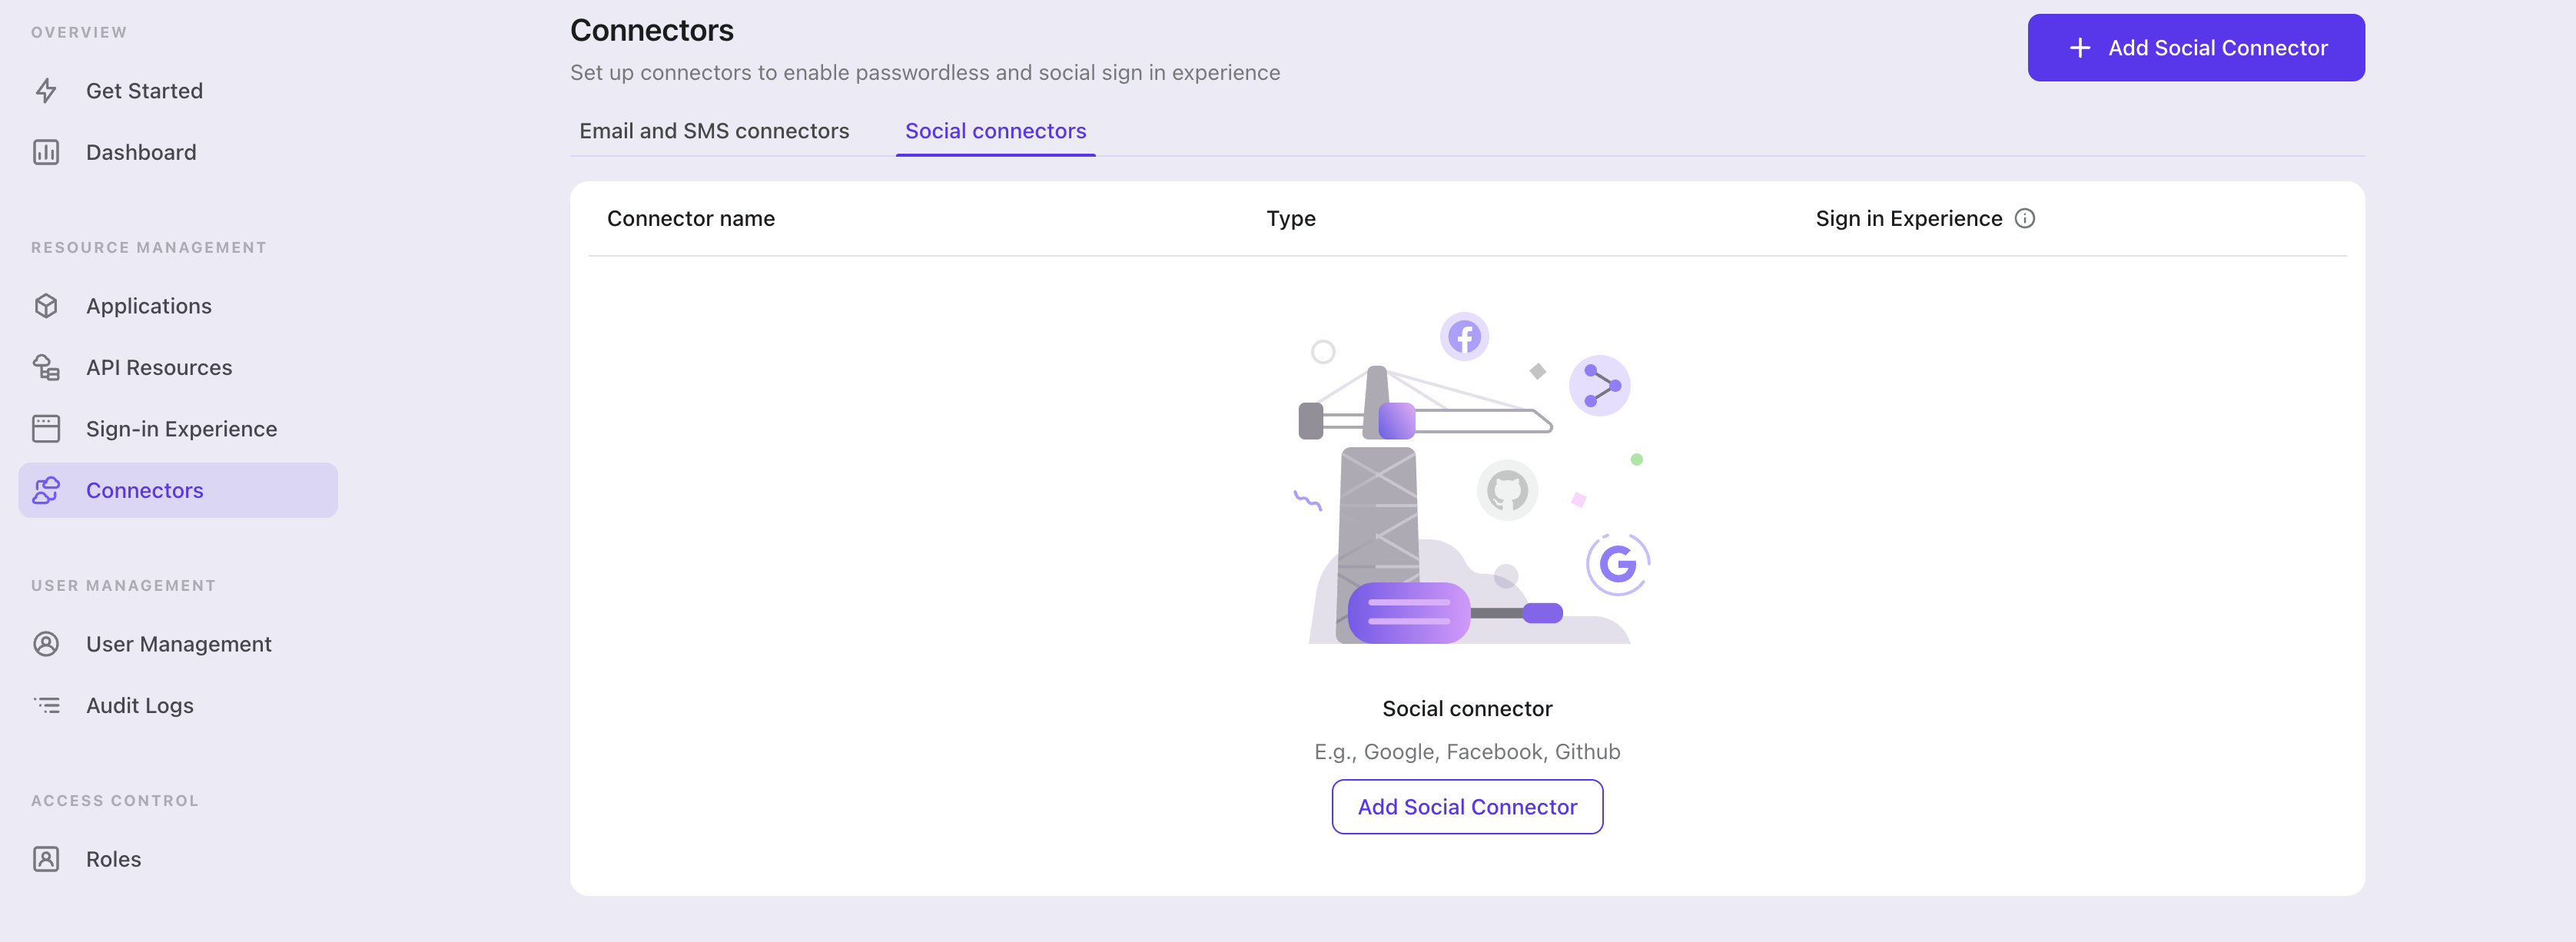
To add a social connector, go to the "Connector" tab in the Admin Console, then click on "Social Connectors". From there, click "Add Social Connector".

In the openning modal, select "Naver" and click "Next".
On the next page, you will see a two-column layout with the README content on the left and configuration on the right.
Feel free to follow the README file in place or read the following section to complete the configuration process. If you follow the in-place guide, you can skip the next section.
Set up Naver login
Developer Site Only Korean Support Now
Currently Naver Developers site only supports Korean. Please consider use a translator.
For the Production
- For the production, you have to get review from Naver team.
Otherwise, only registered users can sign in.
- You can add a tester from
맴버관리(Member Manage)menu.
- You can add a tester from
- To get a review, please check
애플리케이션 개발 상태(Application Devlopment Status)fromAPI 설정(API Setting)from your application project setting.
Set up a project in the Naver Developers
- Visit the Naver Developers and sign in with your Naver account.
- Click the Application -> 어플리케이션 등록 from the menu to create new project.
- Follow the instruction below to create application.
Application Name (어플리케이션 이름)
- Type your application name on
어플리케이션 이름(This name is shown while a user sign in.)
API Usage (사용 API)
- Choose
네이버 로그인(Naver Login)for사용 API(API Usage) - Check
이메일 주소(Email Address), 별명(Nickname), 프로필 사진(Profile Image)as필수(Neccessary)from권한(Role)(You can check추가(Add)as optional these options, but you cannot get the information from the user.)
Sign in Open API Service Environment (로그인 오픈 API 서비스 환경)
- For
로그인 오픈 API 서비스 환경(Sign in Open API Service Environment), add two environmentPC웹(PC Web)and모바일웹(Mobile Web).
PC Web (PC 웹)
- For
서비스 URL(Service URL), typehttp(s)://YOUR_URL(ex. https://logto.io) - For
네이버 로그인(Naver Login) Callback URL, typehttp(s)://YOUR_URL/callback/connector_id(e.g. https://logto.io/callback/connector_id)
Mobile Web (Mobile 웹)
- For
서비스 URL(Service URL), typehttp(s)://YOUR_URL(ex. https://logto.io) - For
네이버 로그인(Naver Login) Callback URL, typehttp(s)://YOUR_URL/callback/connector_id(e.g. https://logto.io/callback/connector_id)
⚠️ Caution
The
connector_idcan be found on the top bar of the Logto Admin Console connector details page.
Configure Logto
Config types
| Name | Type |
|---|---|
| clientId | string |
| clientSecret | string |
clientId
clientId is Client ID of your project.
(You can find it from 애플리케이션 정보(Application Info) of your project from Naver developers.)
clientSeceret
clientSecret is Client Secret of your project.
(You can find it from 애플리케이션 정보(Application Info) of your project from Naver developers.)
Save your configuration
Double check you have filled out necessary values in the Logto connector configuration area. Click "Save and Done" (or "Save Changes") and the Naver connector should be available now.
Enable Naver connector in Sign-in Experience
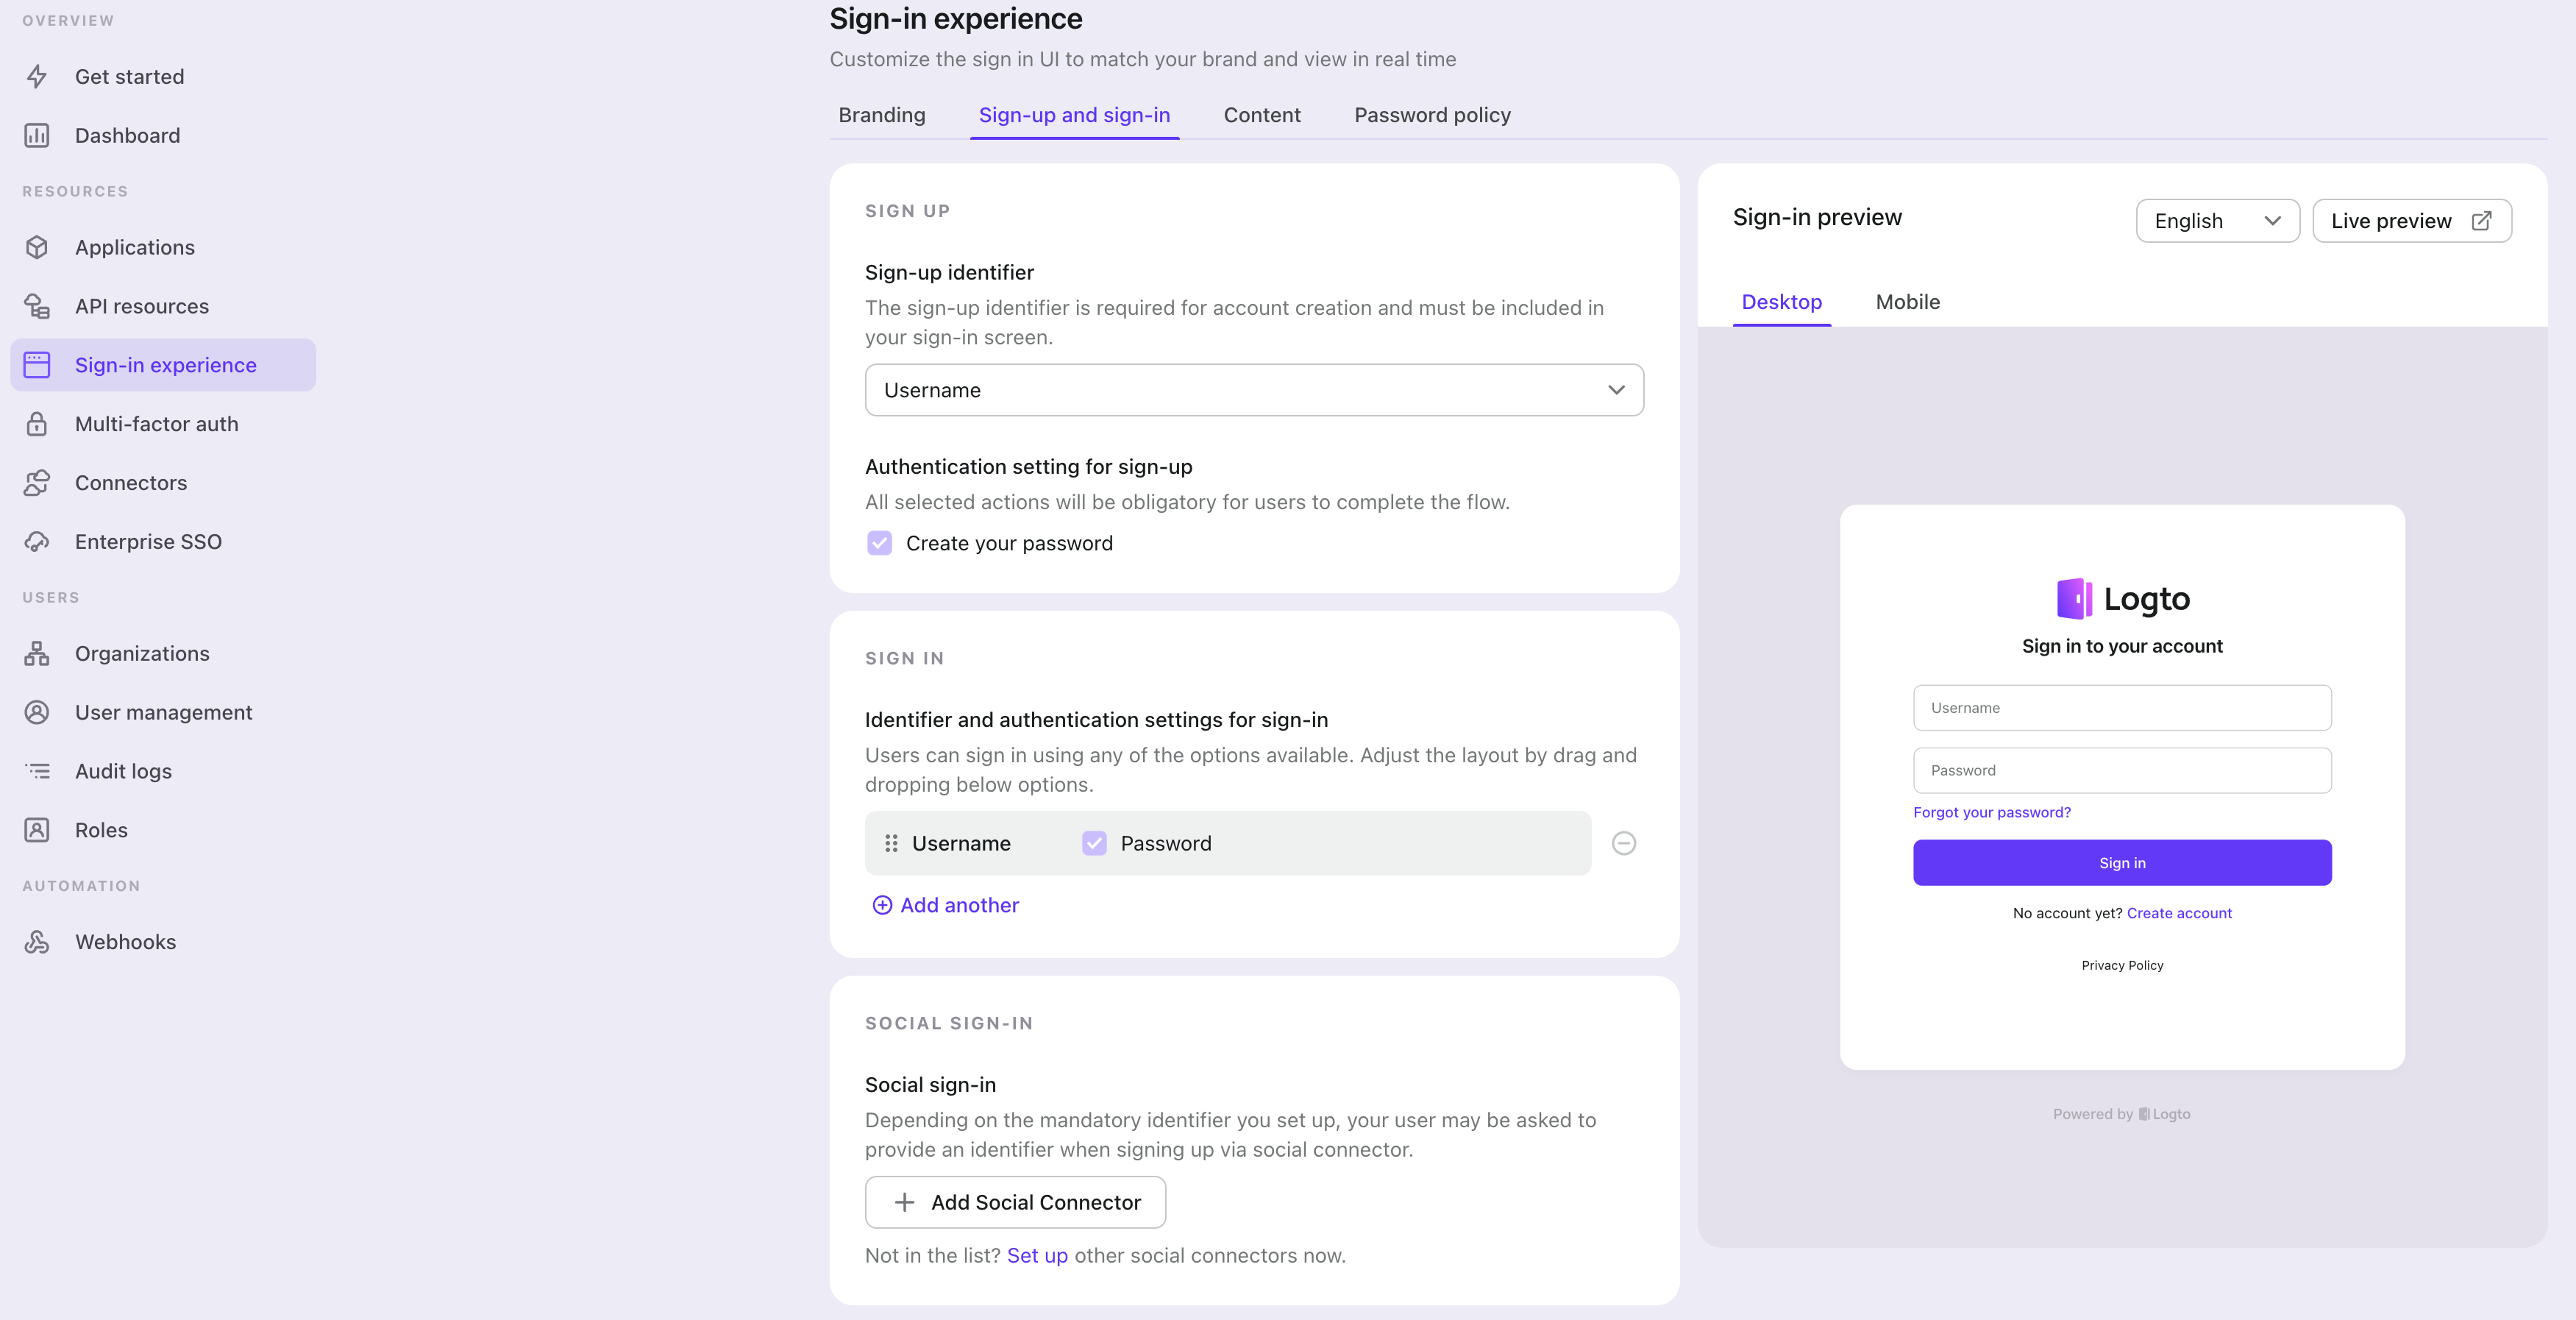
Switch to the "Sign-in Experience" tab, then click the "Sign-up and Sign-in" tab.
If it's the first time you enter the tab, you will see a quick introduction about Sign-in Experience and its basic configuration.

Select "None" for the "Sign-up identifier" to provide minimum sign-up effort for Naver sign-in, which may increase your conversion rate.
In the "Social sign-in" section, add "Add Social Connector" and choose "Naver". Then you should be able to see a button with text "Continue with Naver" in the preview section.

Finally, click "Save Changes" on the bottom right corner.
Testing and Validation
Return to your React app. You should now be able to sign in with Naver. Enjoy!
Further readings
⚔️ Protect your API For native and single page apps, you'll need to call one or more API endpoints to retrieve and update data.
Learn more about identifying who's who and keeping your API secure.
🧑🚀 Manage users We know you care about user management and activities, as we also do.
Learn more about how to know your users and see the figures like DAU and MAU graphically.
🌐 Localization From one regional business to a global corporate, the willingness to offer the best user experience won't change.
You can change current language phrases or add a new language without friction.
🧑🎓 Customer IAM series Our serial blog posts about Customer (or Consumer) Identity and Access Management, from 101 to advanced topics and beyond.
